> ## Documentation Index
> Fetch the complete documentation index at: https://docs.insighto.ai/llms.txt
> Use this file to discover all available pages before exploring further.
# GHL Chat Widget
This guide walks you through setting up and deploying the GHL Chat Widget inside Insighto to enable your AI assistant to operate through GHL channels.
## Setup GHL Chat Widget
1. Prerequisites: Chat Assistant & GHL Calendar Tool Setup
Before proceeding, make sure you have the following set up:
* ✅ A **Chat Assistant** created in Insighto
* ✅ The **GHL Calendar Tool** properly configured and connected
***
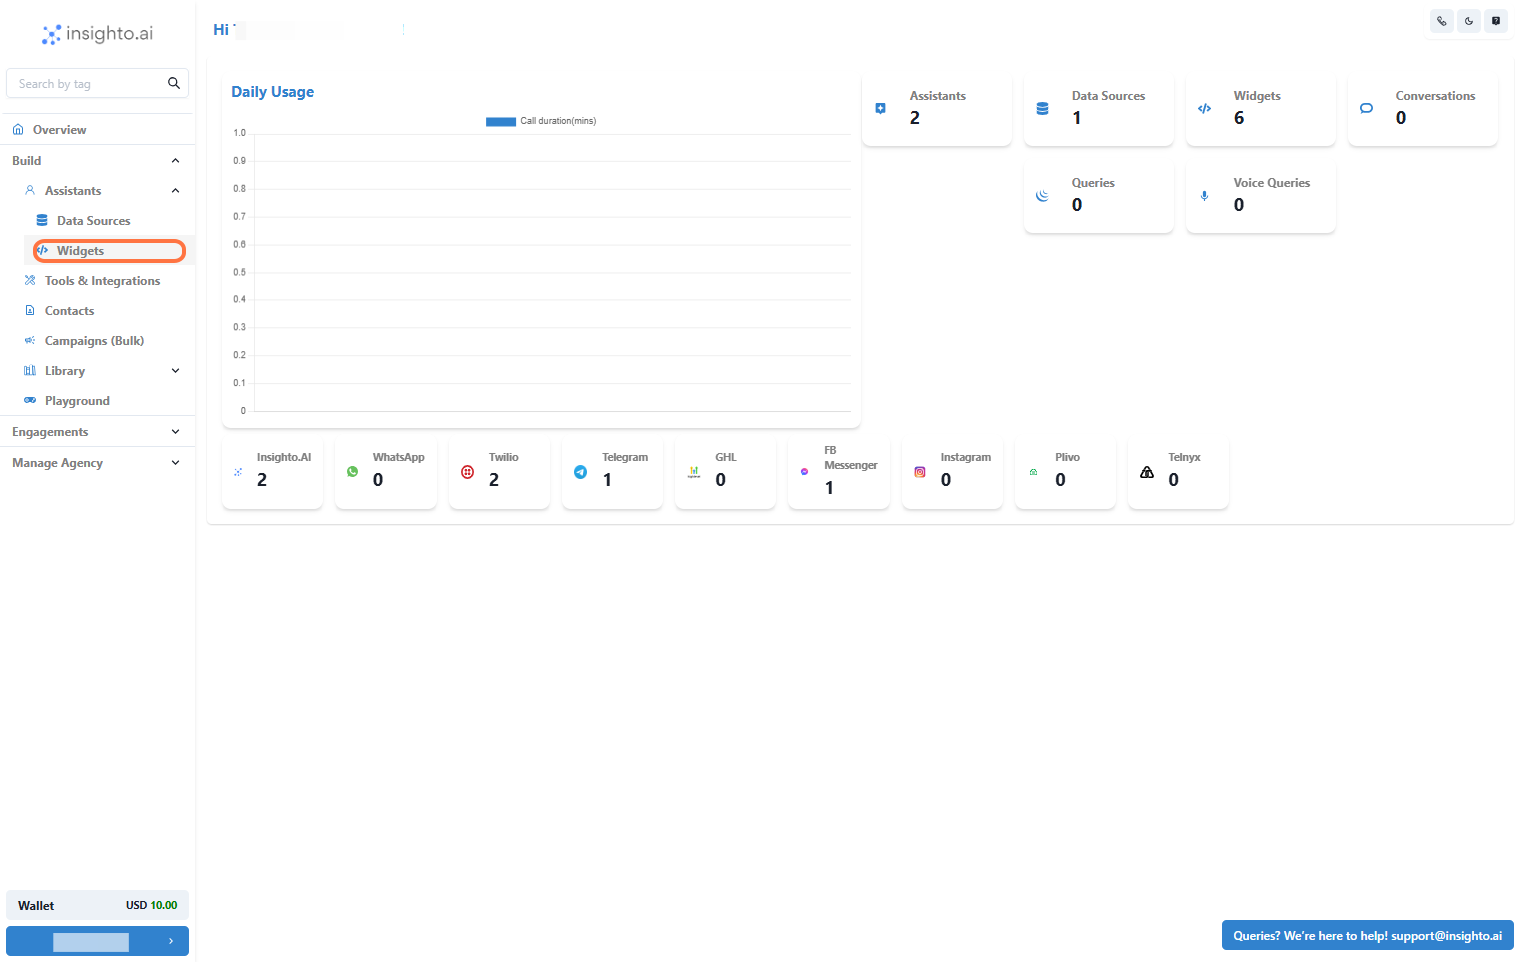
2. Click on Widgets from the Left Panel
Go to the **Assistants** section in the left panel and click **Widgets**. This takes you to the widget setup screen where you can deploy your AI assistant.
 ***
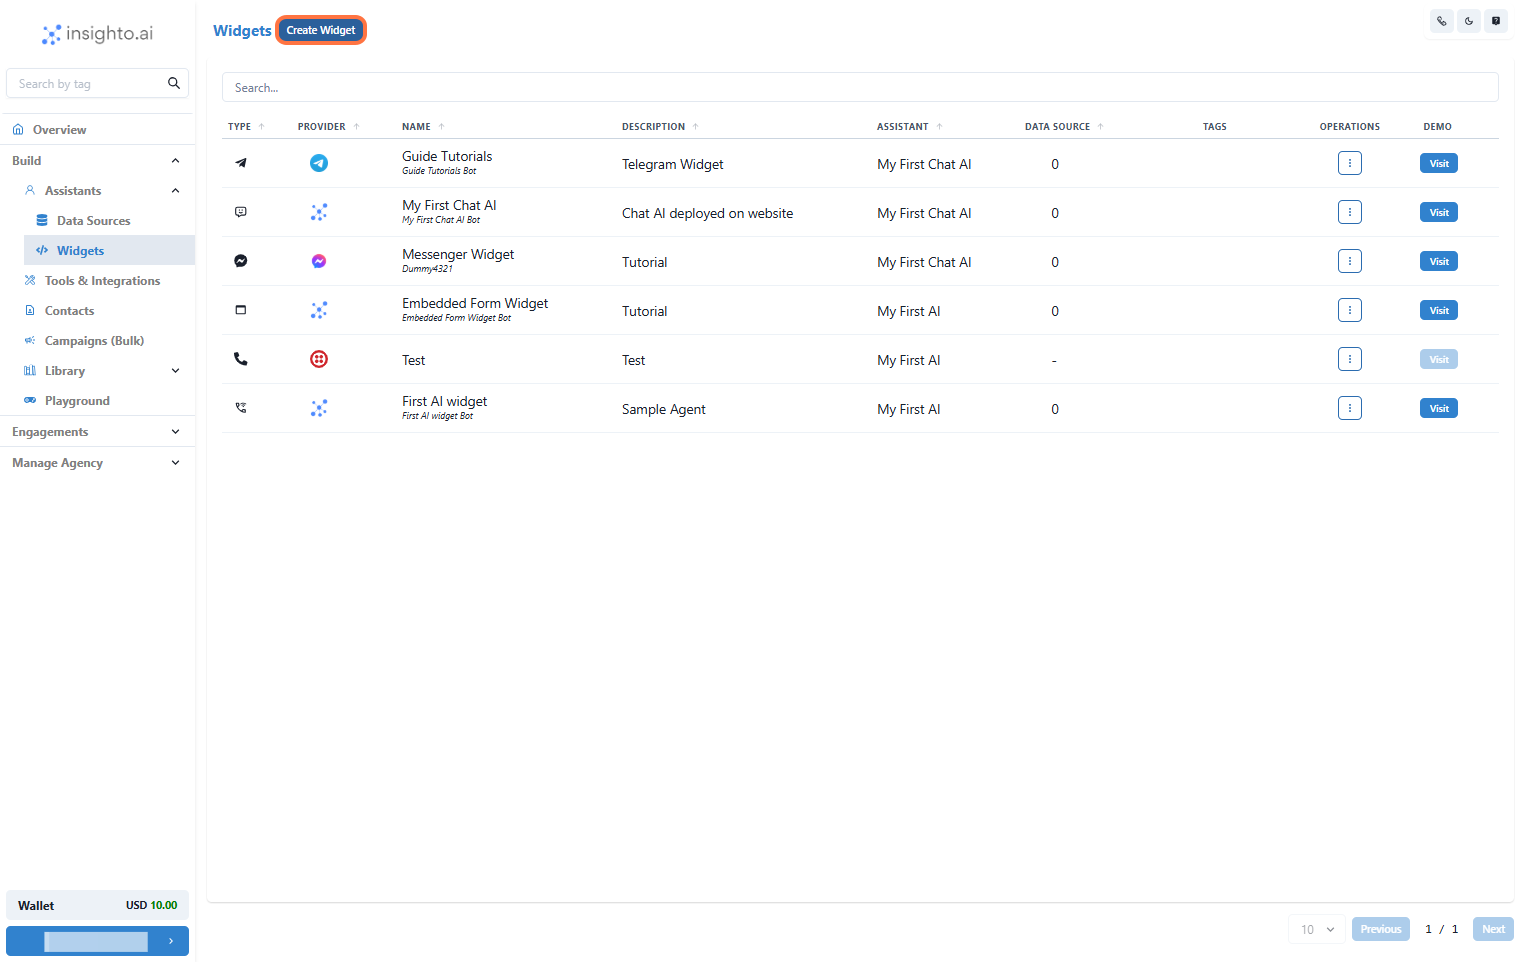
3. Create a New Widget
Click **Create New Widget** to begin the widget setup process.
***
3. Create a New Widget
Click **Create New Widget** to begin the widget setup process.
 ***
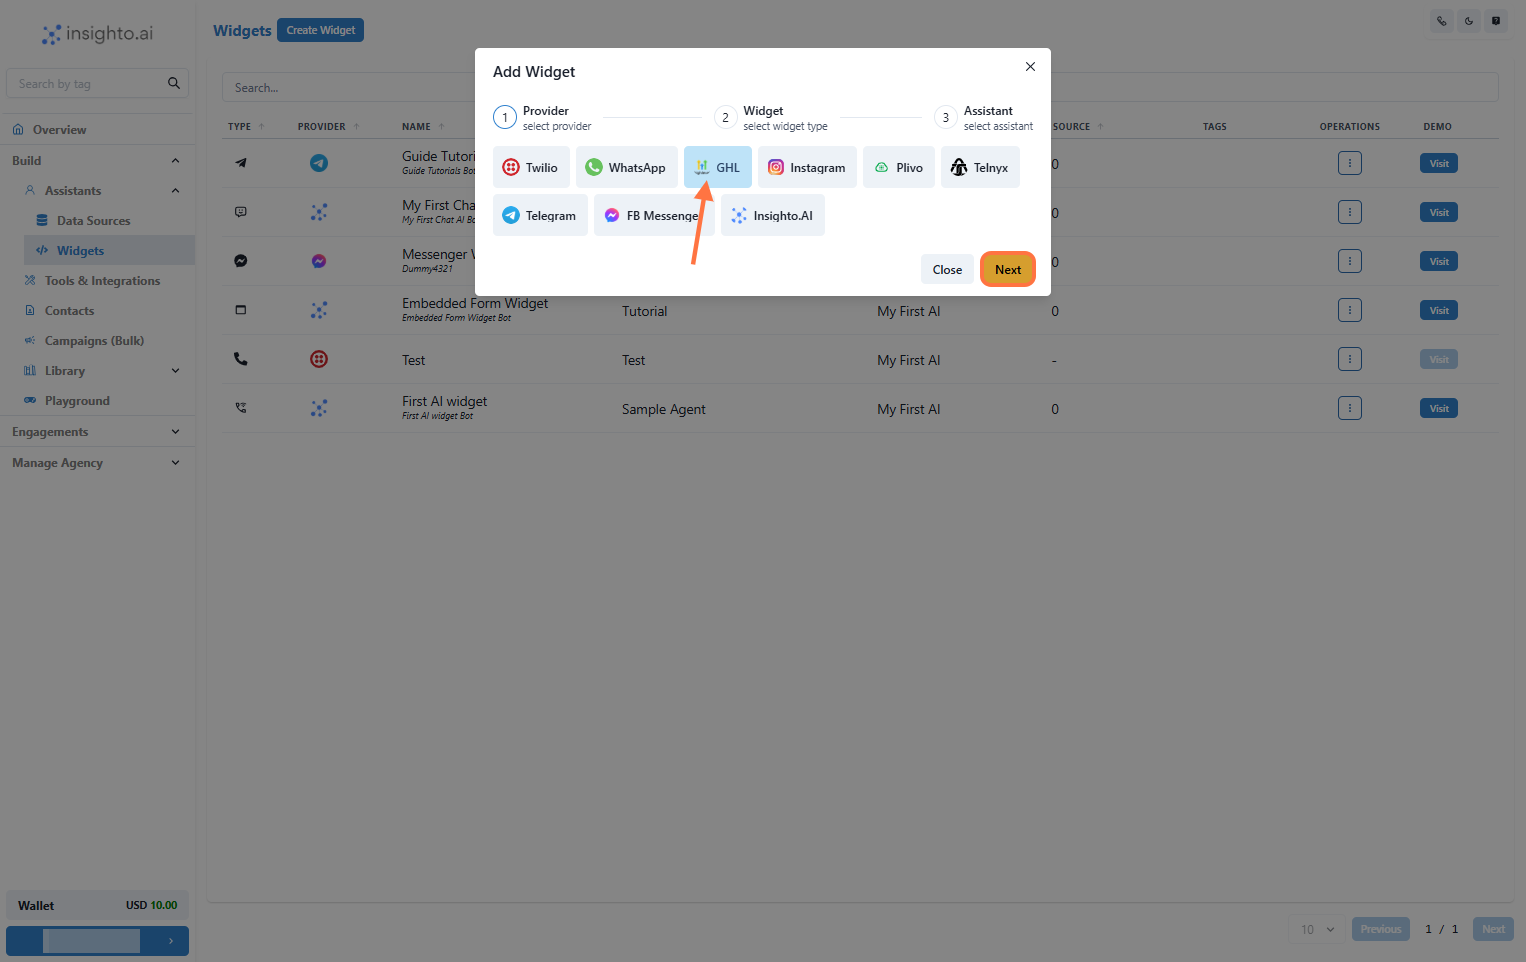
4. Select GHL as the Provider Type and Click Next
On the widget setup screen:
* Select **GHL** as the provider type
* Click **Next** to proceed
***
4. Select GHL as the Provider Type and Click Next
On the widget setup screen:
* Select **GHL** as the provider type
* Click **Next** to proceed
 ***
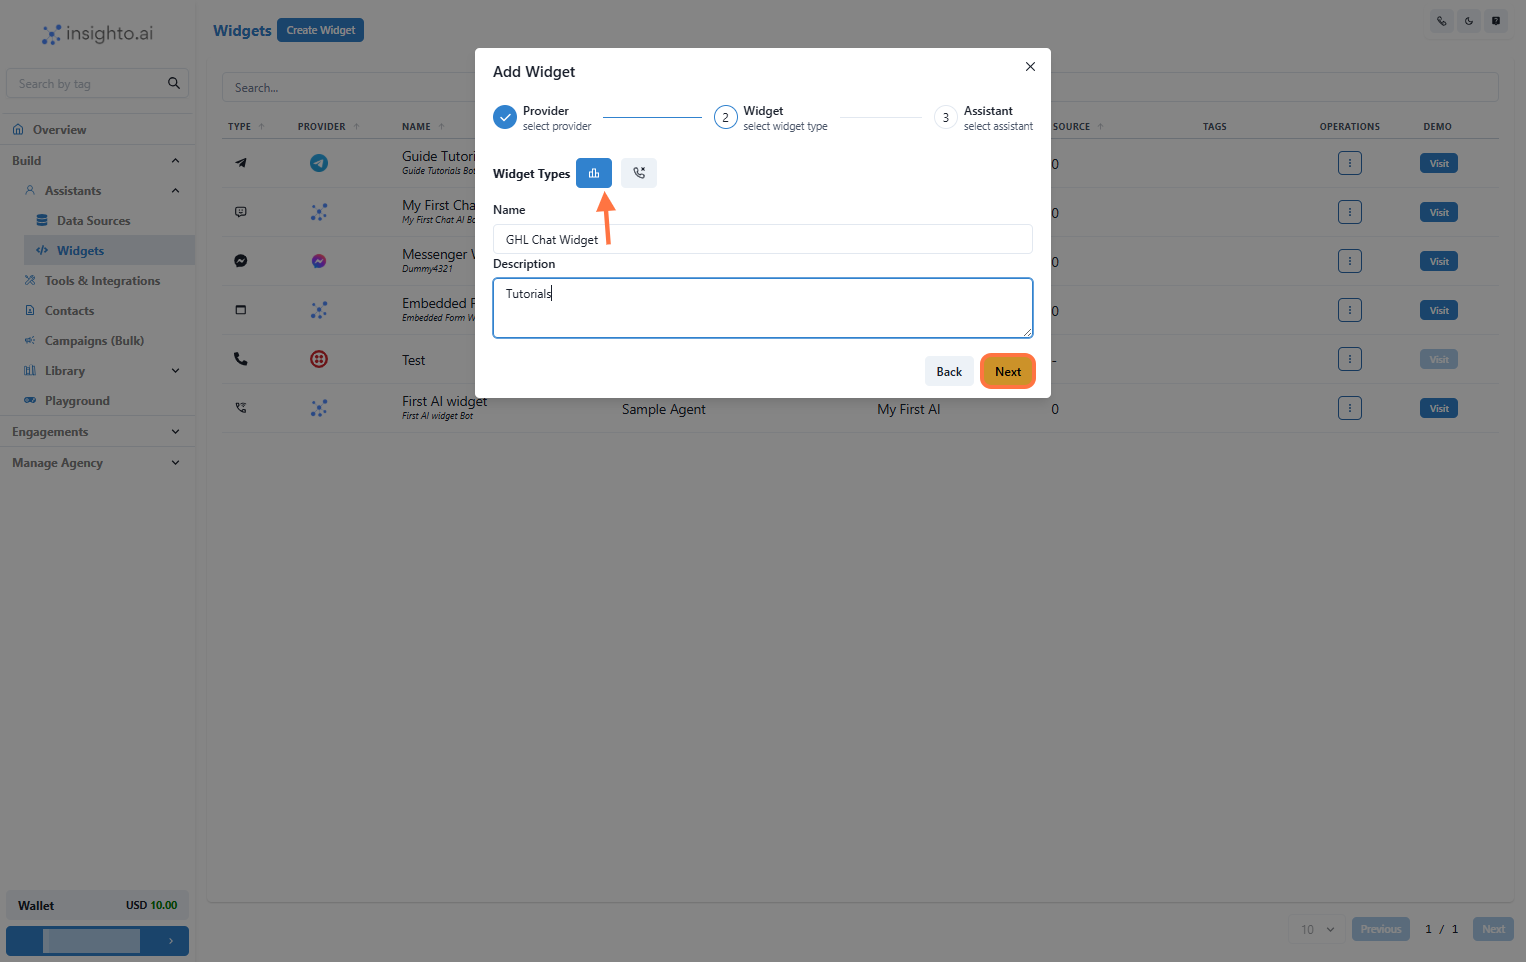
5. Select Widget Type, Name, and Describe Your Widget
Fill in the following:
* **Widget Type**: Choose **Chat**
* **Name**: Provide a meaningful name
* **Description**: Describe the widget’s purpose briefly
Click **Next** to continue.
***
5. Select Widget Type, Name, and Describe Your Widget
Fill in the following:
* **Widget Type**: Choose **Chat**
* **Name**: Provide a meaningful name
* **Description**: Describe the widget’s purpose briefly
Click **Next** to continue.
 ***
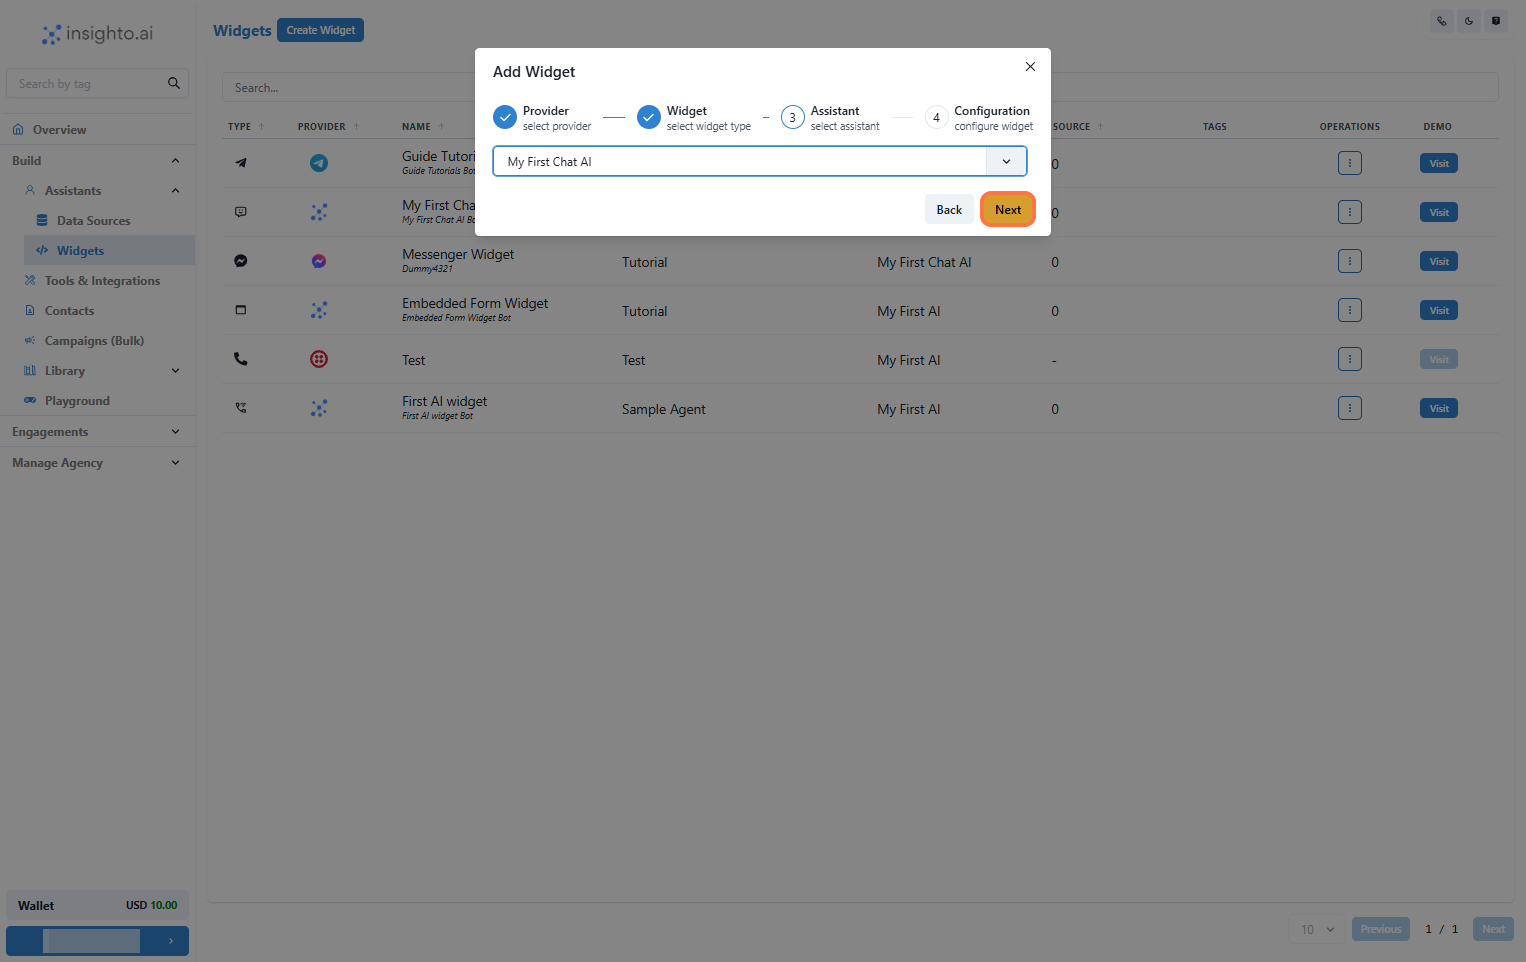
6. Select Your Chat Assistant from the Dropdown
Choose the chat assistant you created earlier from the dropdown list.
***
6. Select Your Chat Assistant from the Dropdown
Choose the chat assistant you created earlier from the dropdown list.
 ***
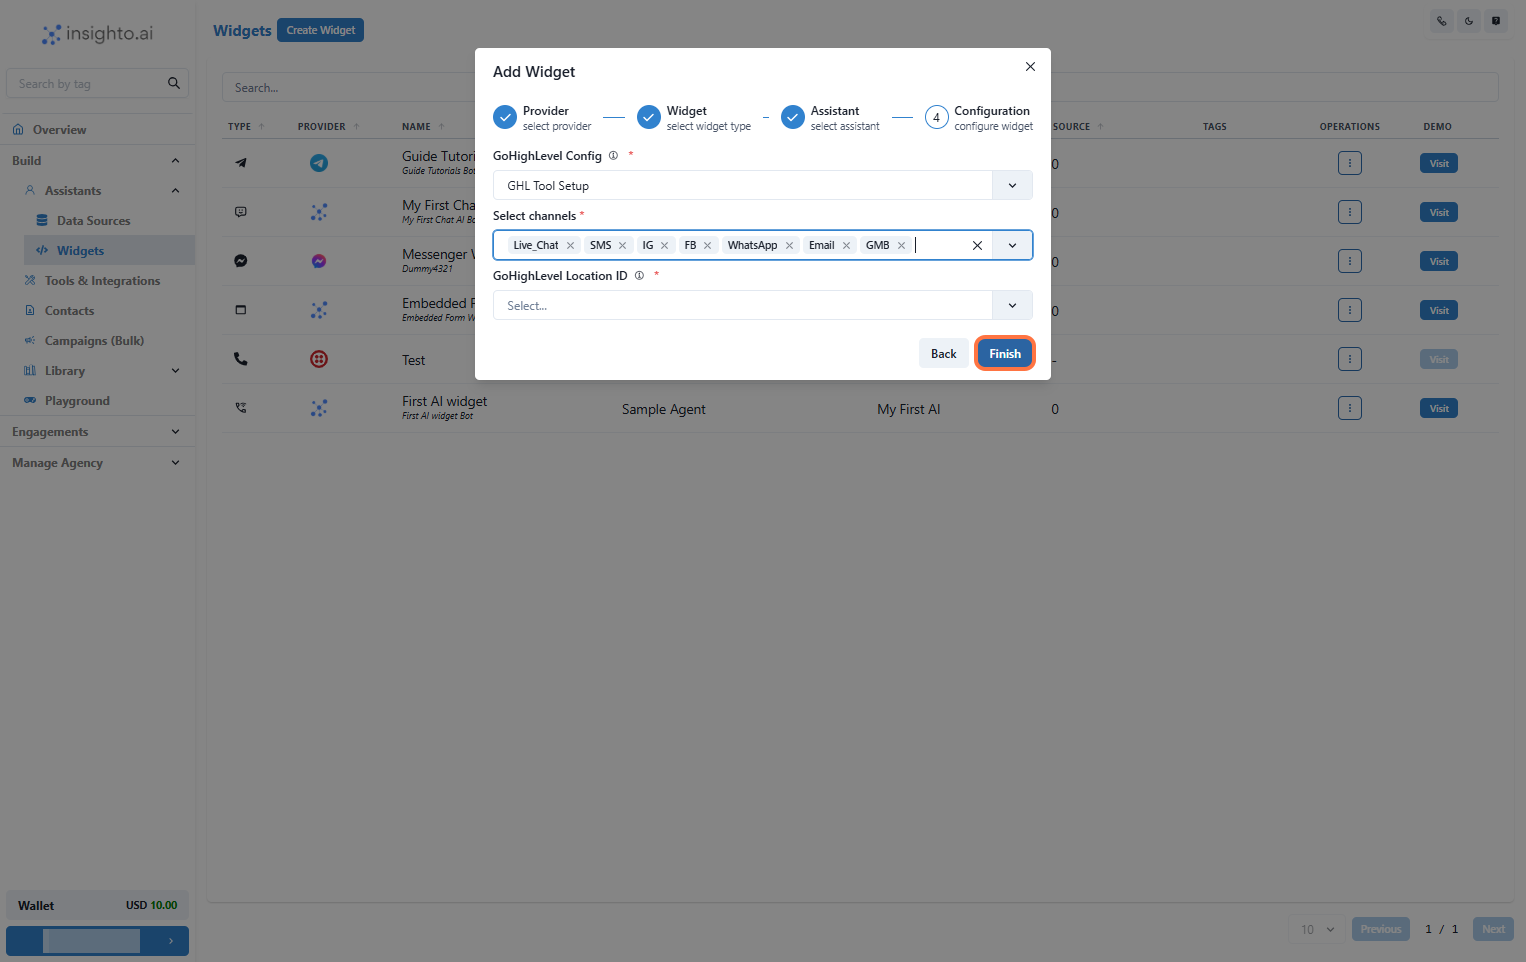
7. Configure GHL Chat Widget
8. Select your **GHL Configuration** from the dropdown
9. Choose the **channels** where the assistant will handle conversations
10. Select the **Location ID**
11. Click **Finish** to deploy the widget
***
7. Configure GHL Chat Widget
8. Select your **GHL Configuration** from the dropdown
9. Choose the **channels** where the assistant will handle conversations
10. Select the **Location ID**
11. Click **Finish** to deploy the widget
 ***
8. Test the Deployment
After deploying the chat widget, test it through your connected GHL channels:
* Send sample queries
* Confirm the assistant responds correctly
* Verify calendar interactions work (if enabled)
***
8. Test the Deployment
After deploying the chat widget, test it through your connected GHL channels:
* Send sample queries
* Confirm the assistant responds correctly
* Verify calendar interactions work (if enabled)