> ## Documentation Index
> Fetch the complete documentation index at: https://docs.insighto.ai/llms.txt
> Use this file to discover all available pages before exploring further.
# Google Calender Tool
This guide walks you through setting up the Google Calendar tool and connecting it with your AI assistant to manage scheduling seamlessly. With this integration, your assistant can check availability and help users book appointments directly within a conversation—making your calendar smarter and more accessible.
***
## Setup Google Calendar
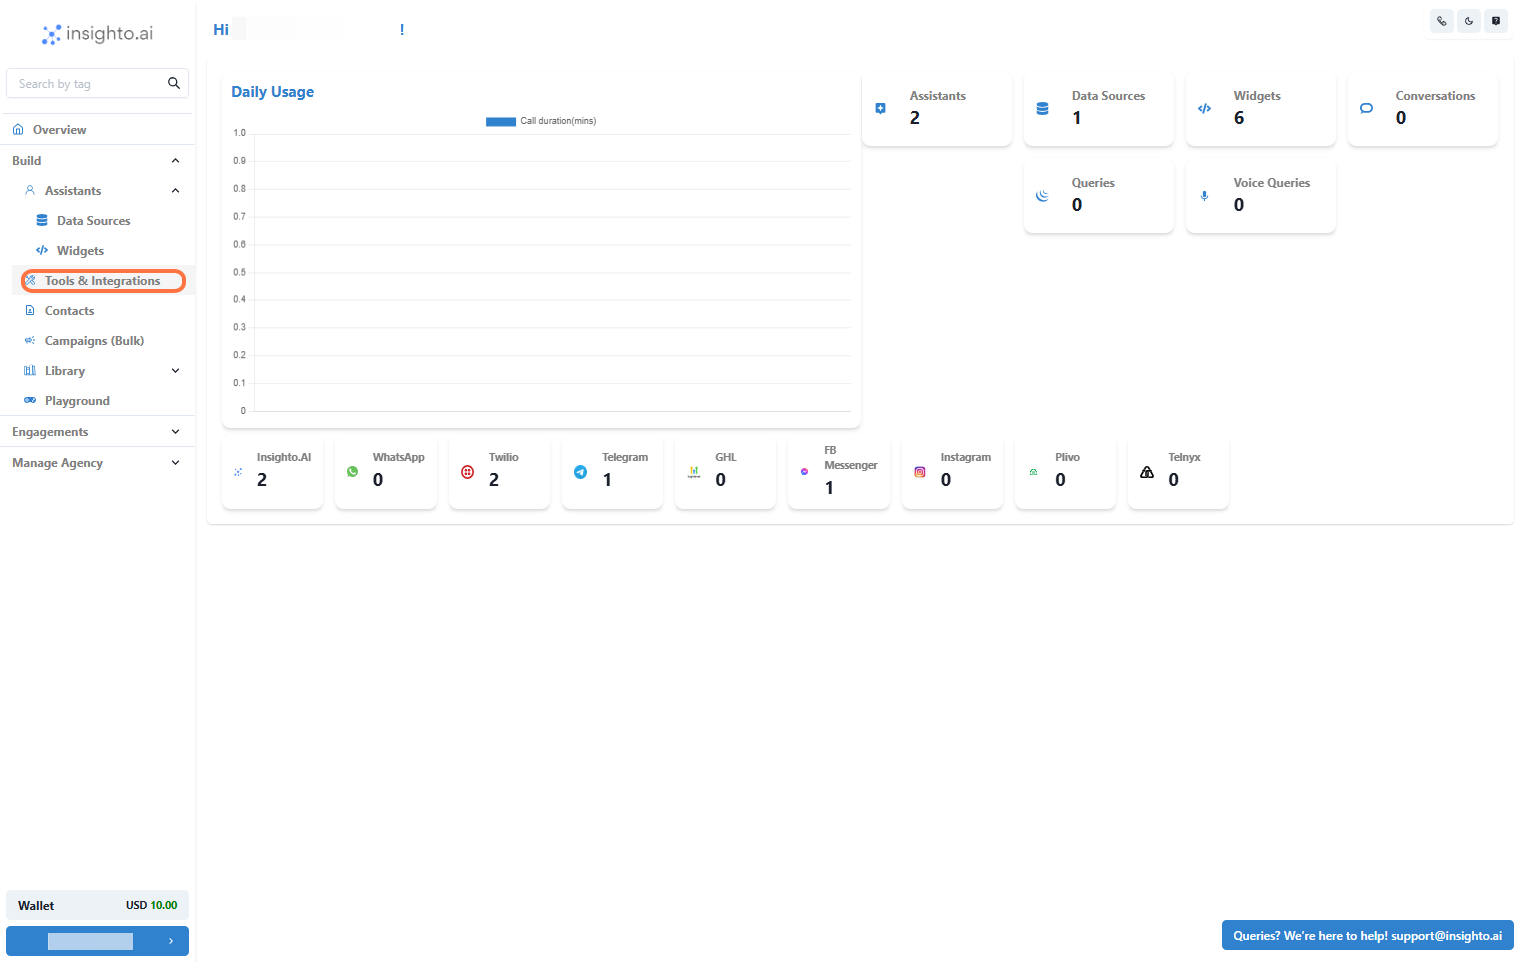
1. Go to Tools & Integration
From the left-hand sidebar of your Insighto dashboard, click on **Tools & Integration**.
 ***
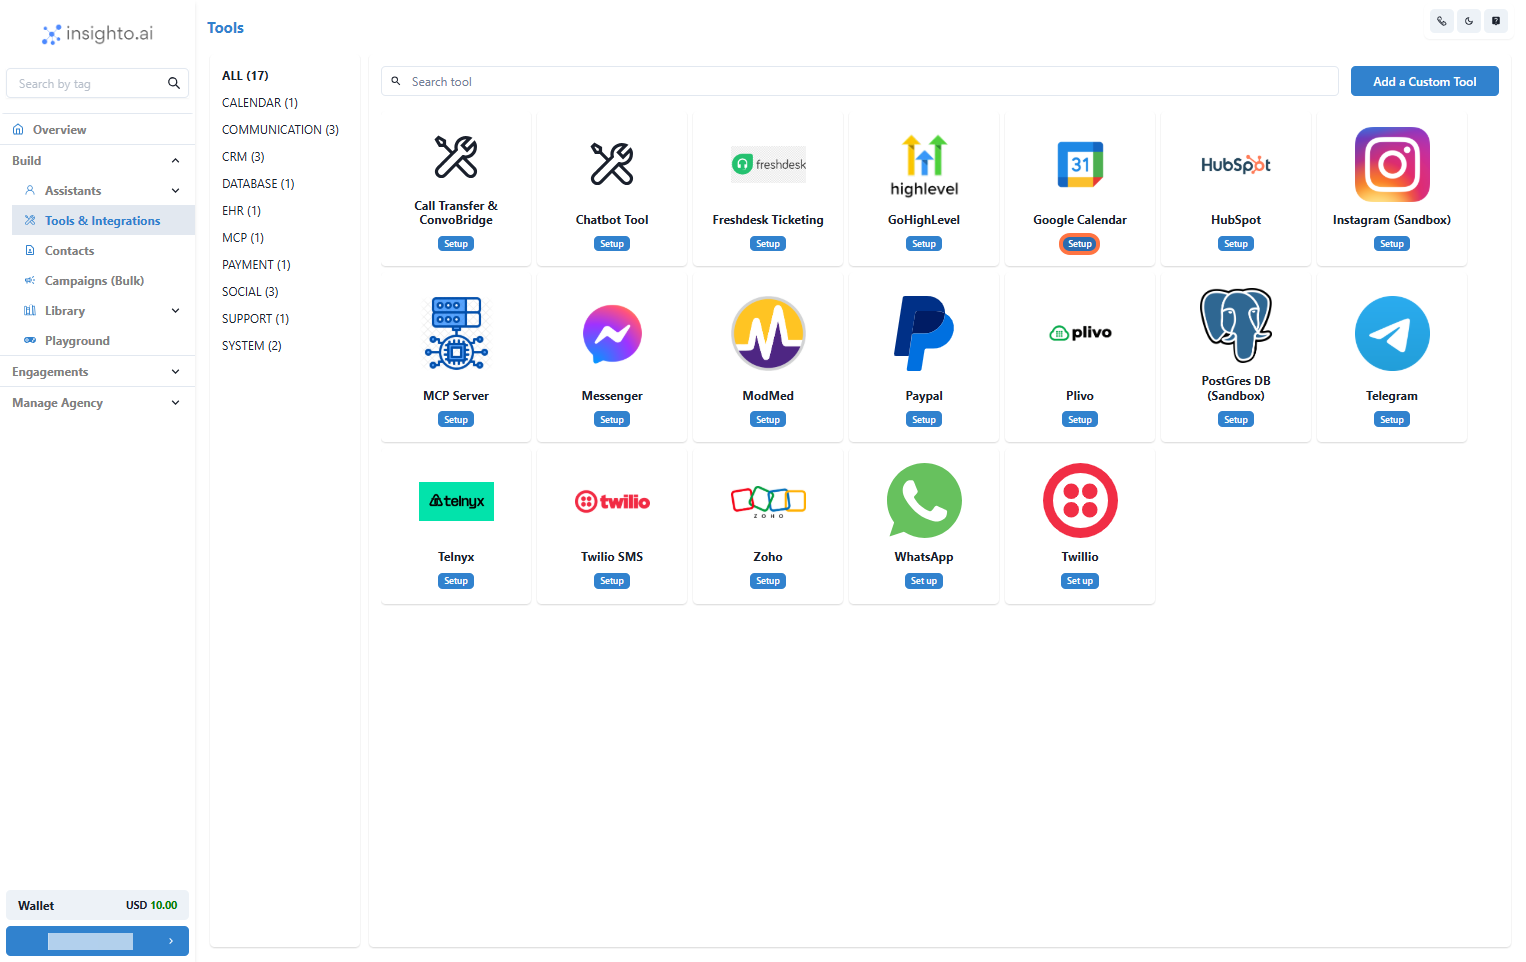
2. Click on Set Up
Locate the **Google Calendar Tool** and click **Set Up**.
***
2. Click on Set Up
Locate the **Google Calendar Tool** and click **Set Up**.
 ***
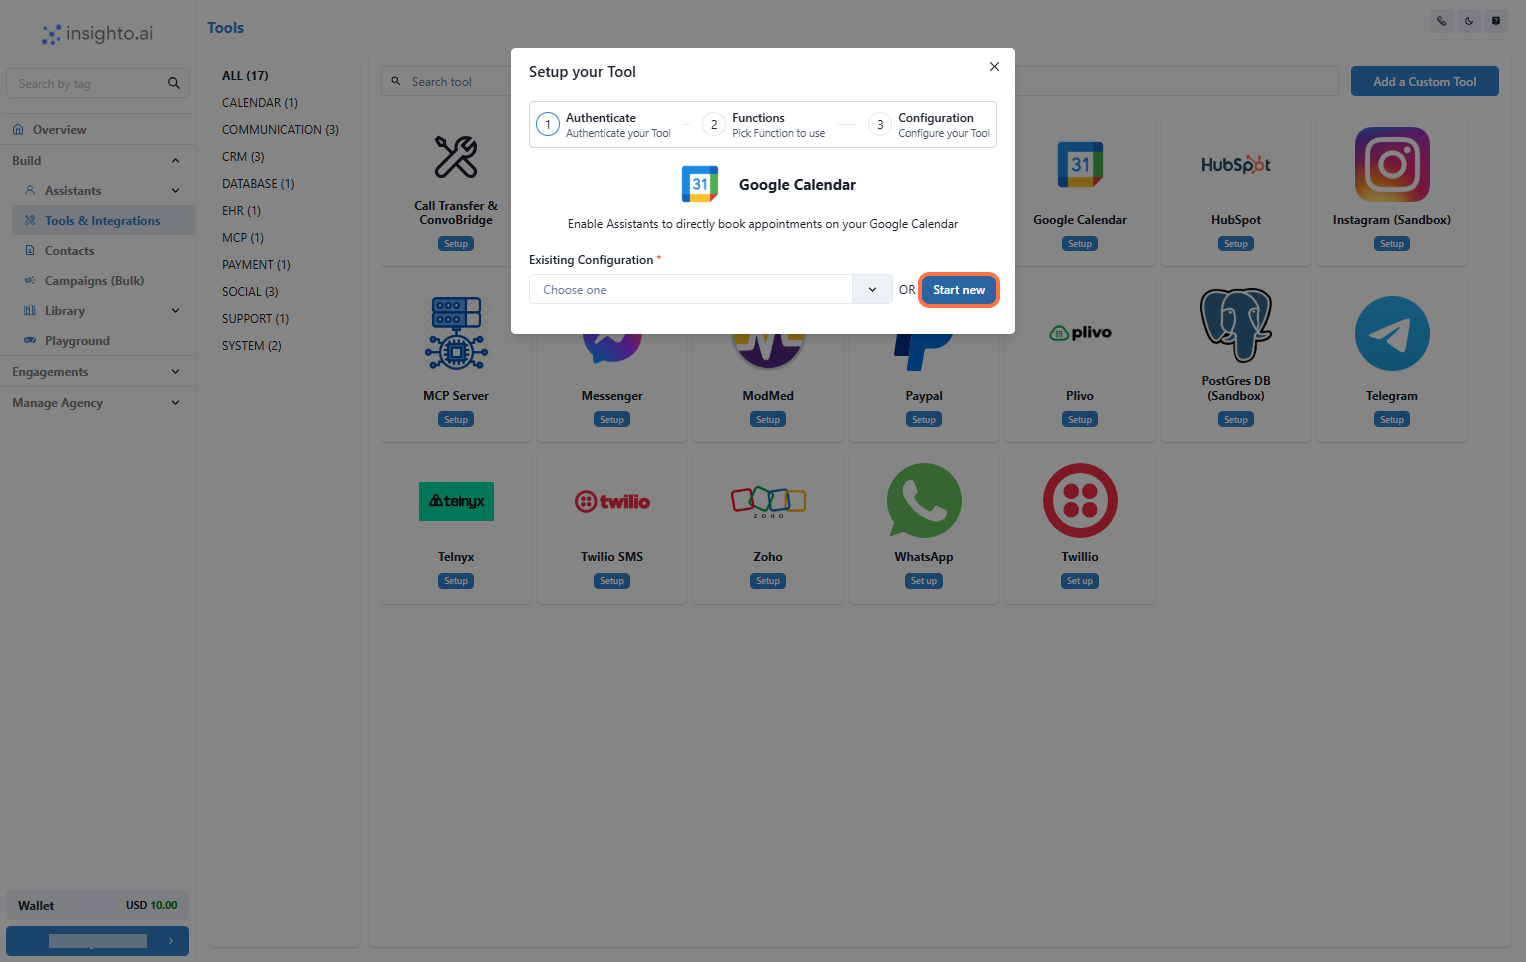
3. Click on Start New
After clicking Set Up, a popup window will appear. Click the **Start New** button to begin creating a new configuration.
***
3. Click on Start New
After clicking Set Up, a popup window will appear. Click the **Start New** button to begin creating a new configuration.
 ***
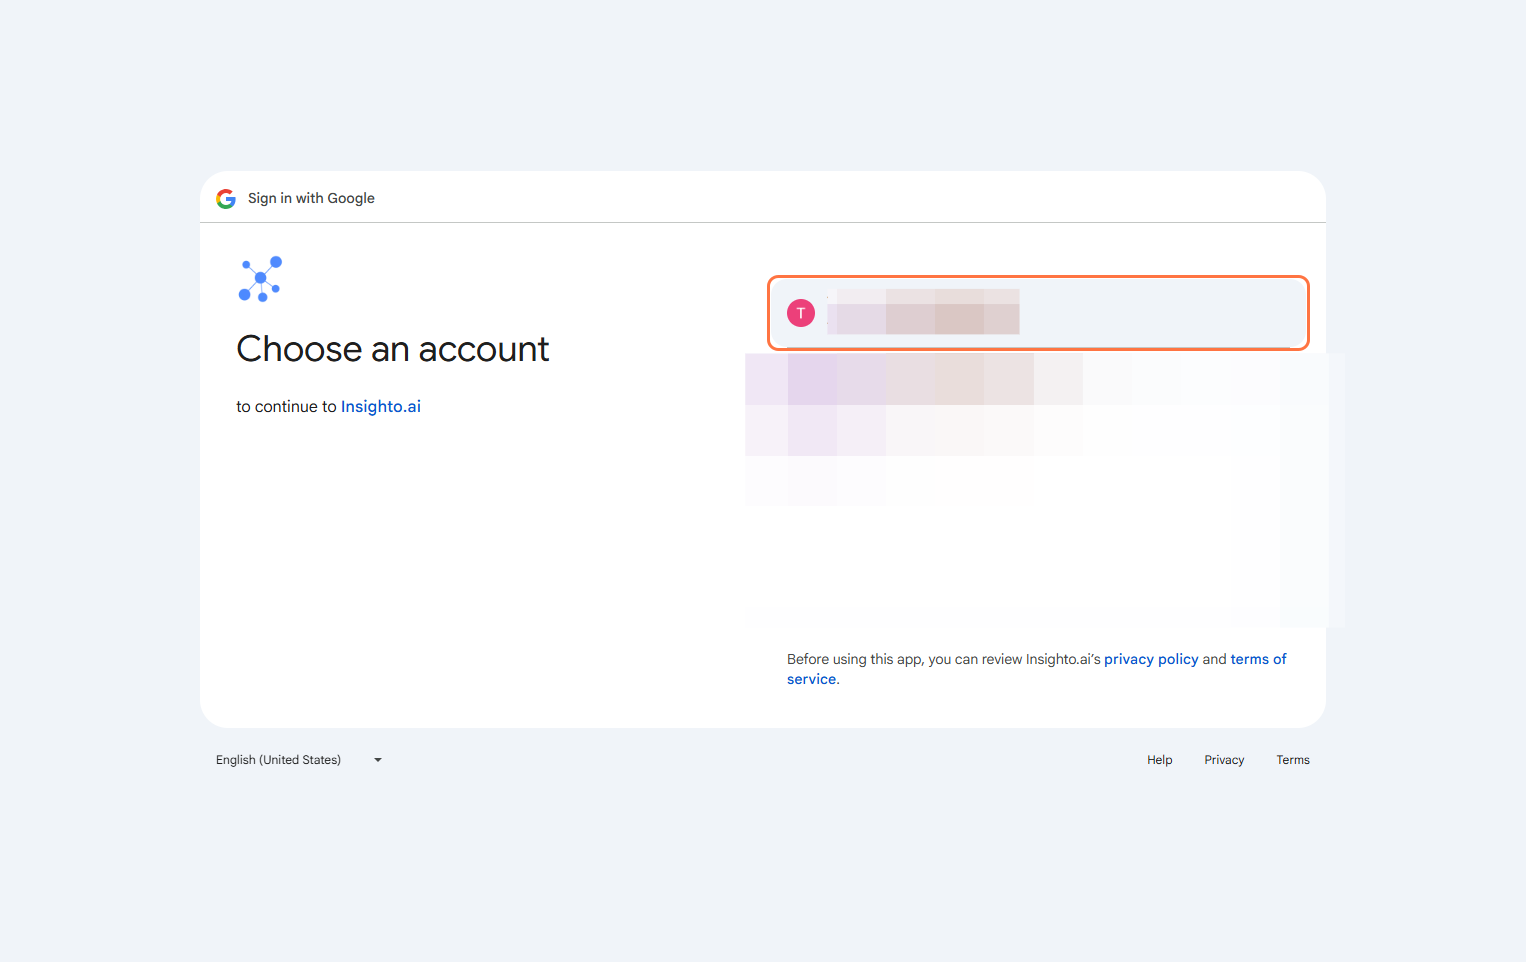
4. Sign into your Google Account
Use your professional Google account to sign in and grant the necessary access.
***
4. Sign into your Google Account
Use your professional Google account to sign in and grant the necessary access.
 ***
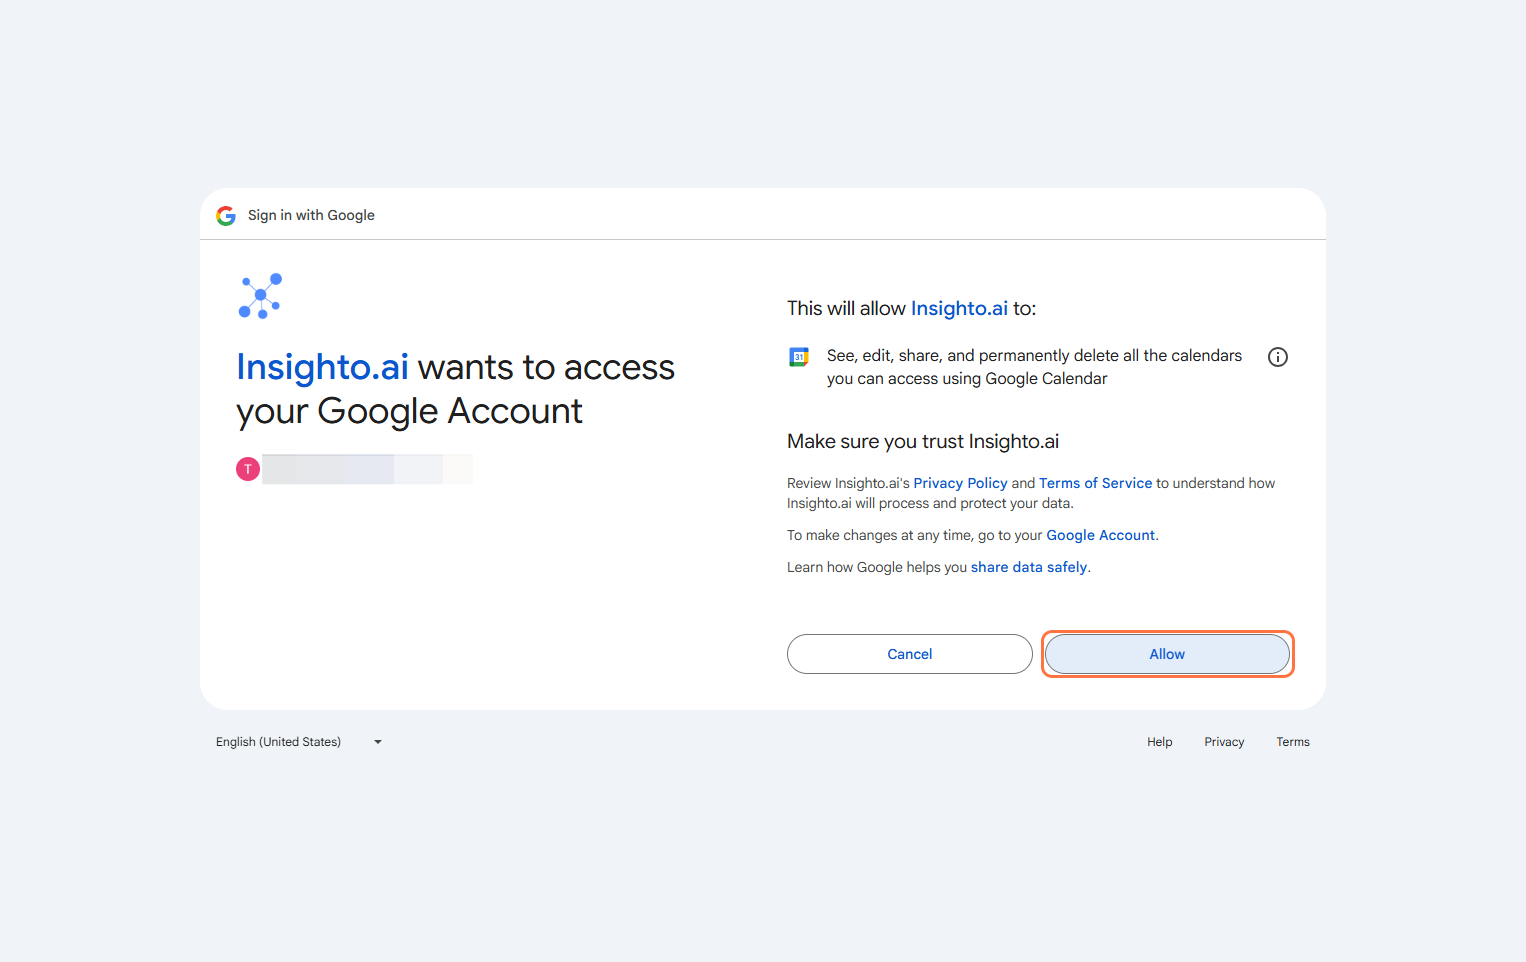
5. Allow all permissions
After granting all required permissions, you’ll be redirected back to Insighto.
***
5. Allow all permissions
After granting all required permissions, you’ll be redirected back to Insighto.
 ***
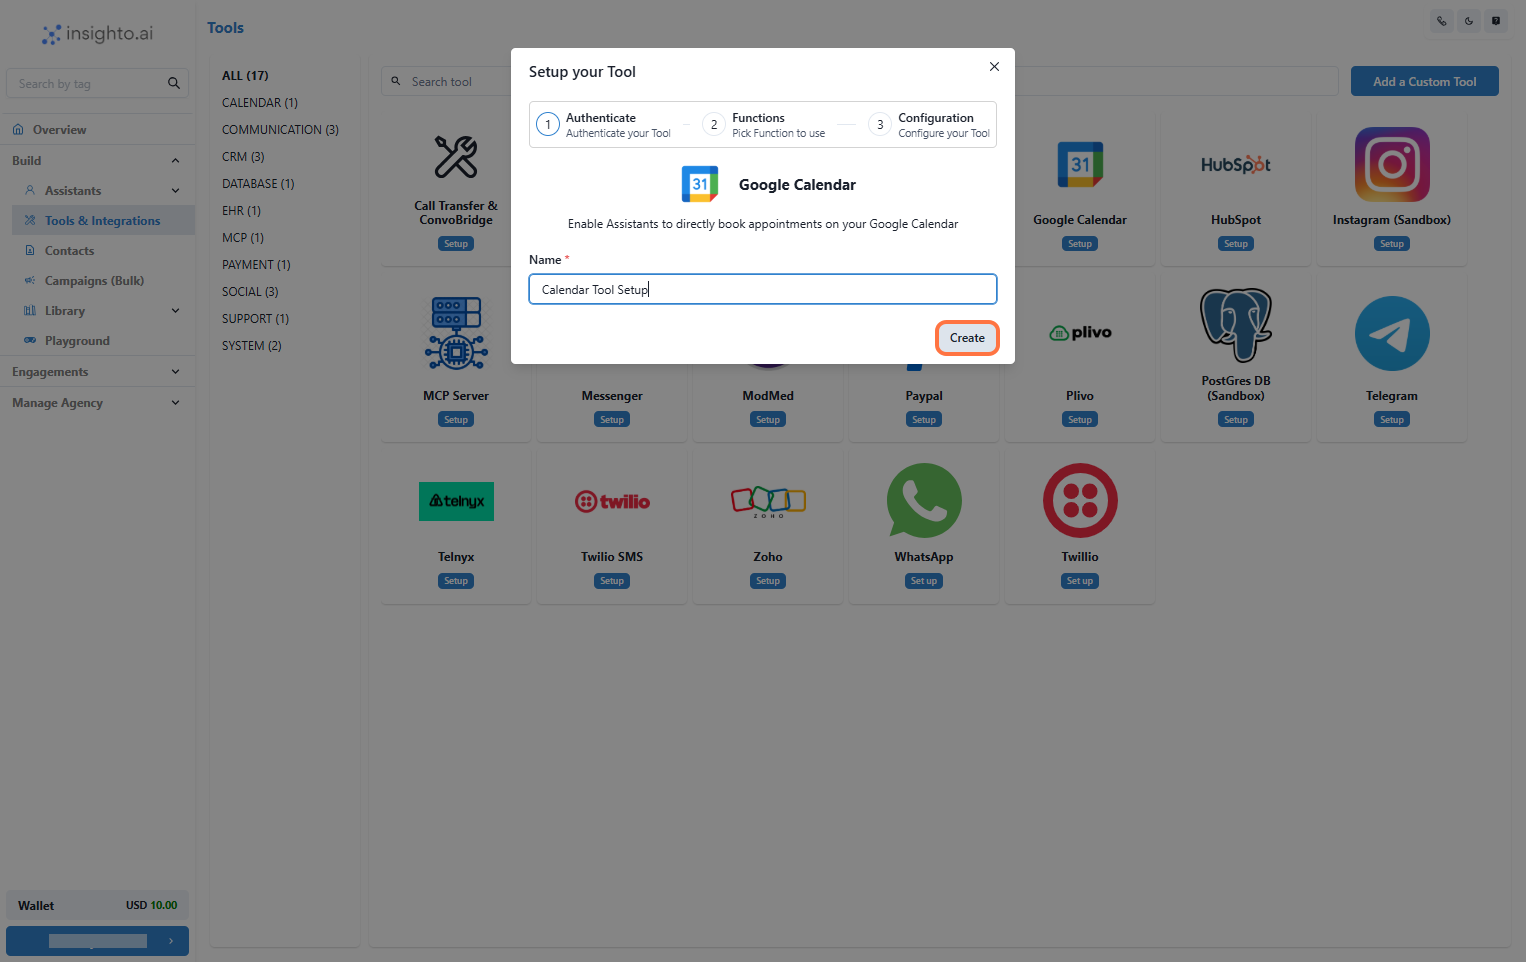
6. Name Your Configuration and Click Create
Enter a name for your configuration, like **"Sales Team Scheduler"**, and click **Create**.
***
6. Name Your Configuration and Click Create
Enter a name for your configuration, like **"Sales Team Scheduler"**, and click **Create**.
 ***
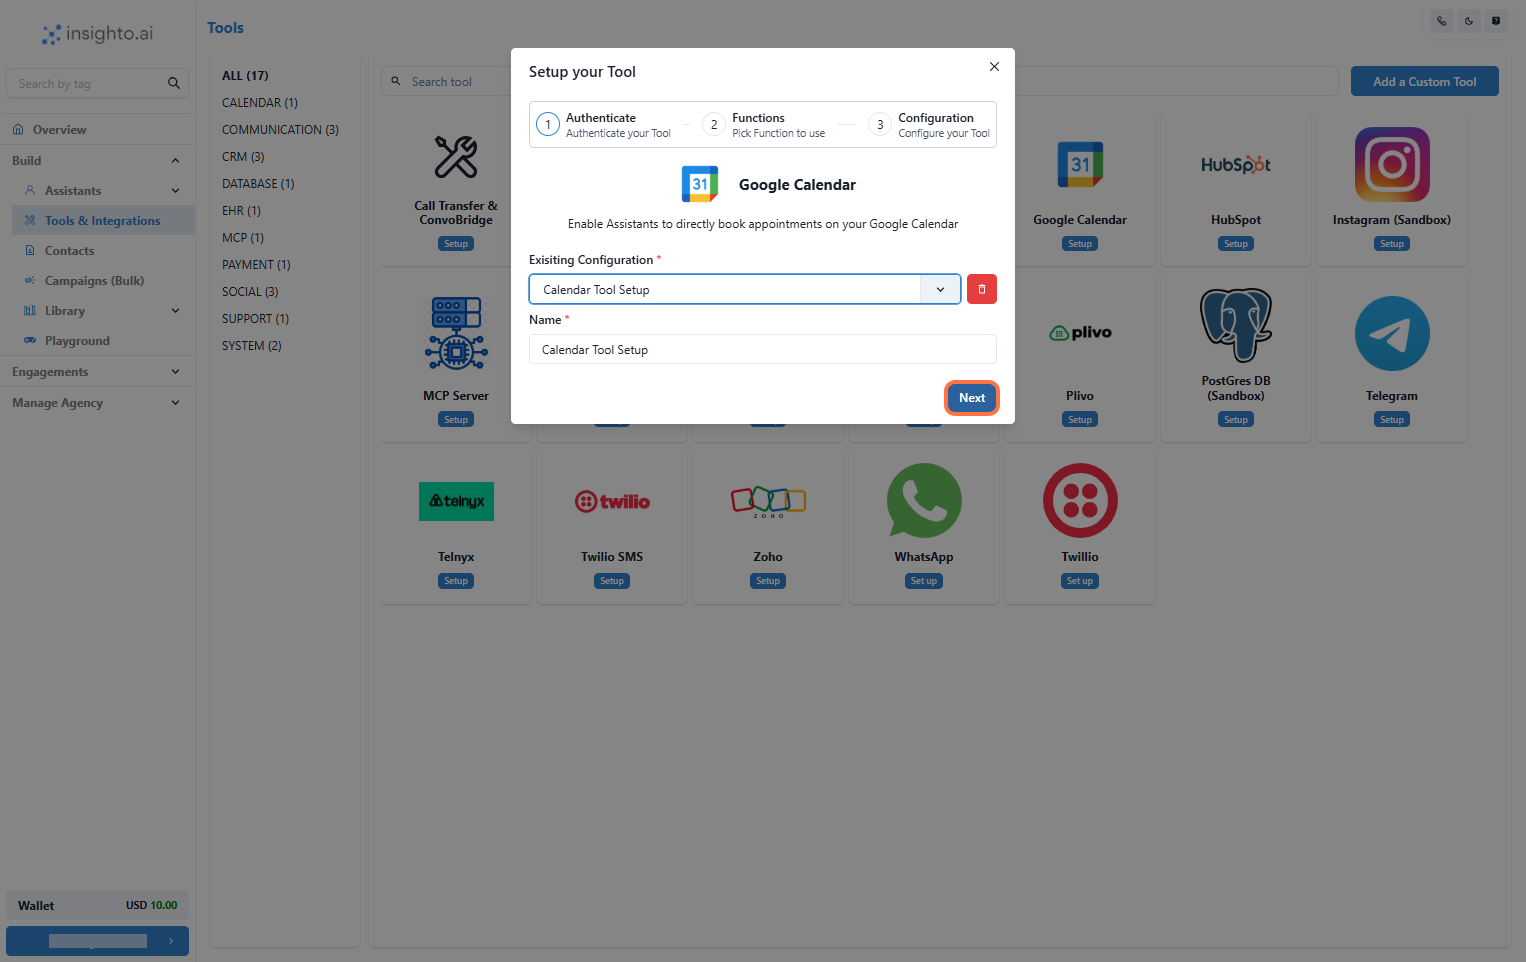
7. Select the Configuration and Click Next
From the dropdown under **Existing Configurations**, select the one you just created and click **Next**.
***
7. Select the Configuration and Click Next
From the dropdown under **Existing Configurations**, select the one you just created and click **Next**.
 ***
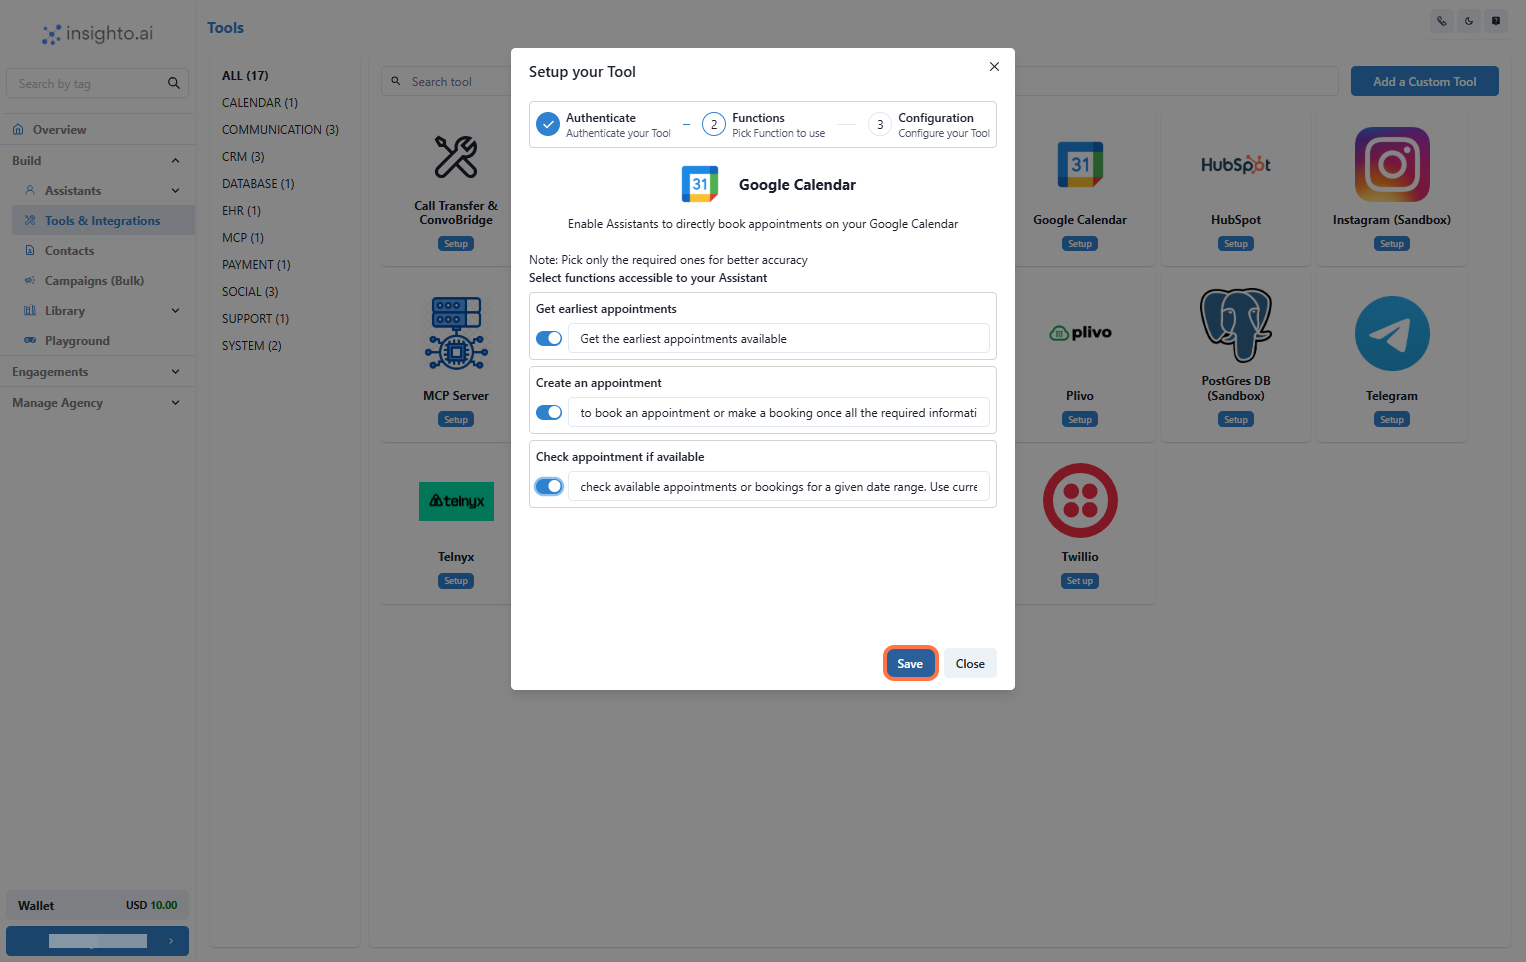
8. Enable Required Functions and Save
Toggle ON the functions your assistant should use—like checking availability or creating events—then click **Save**.
***
8. Enable Required Functions and Save
Toggle ON the functions your assistant should use—like checking availability or creating events—then click **Save**.
 ***
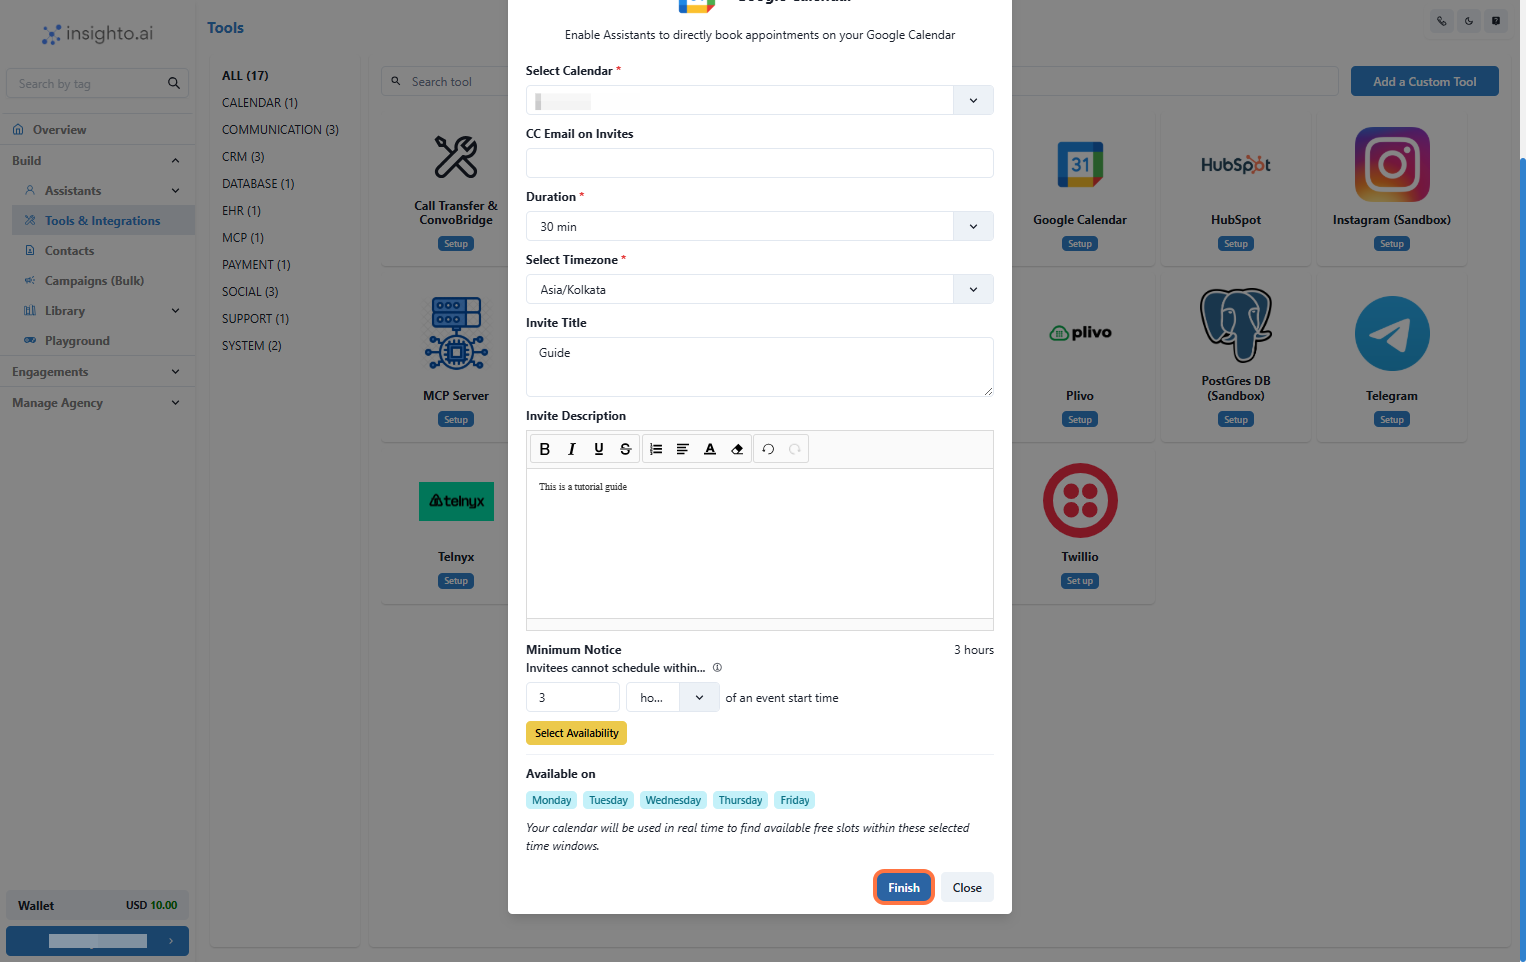
9. Configure Calendar Preferences and Click Finish
* Choose the calendar to be used
* Set the time zone
* Define bookable slot durations
* Set minimum notice time
* Define availability across days
Once configured, click **Finish**.
***
9. Configure Calendar Preferences and Click Finish
* Choose the calendar to be used
* Set the time zone
* Define bookable slot durations
* Set minimum notice time
* Define availability across days
Once configured, click **Finish**.
 ***
## Connect Calendar Tool with Assistant
Now that your Google Calendar is integrated, it’s time to link it to your assistant.
***
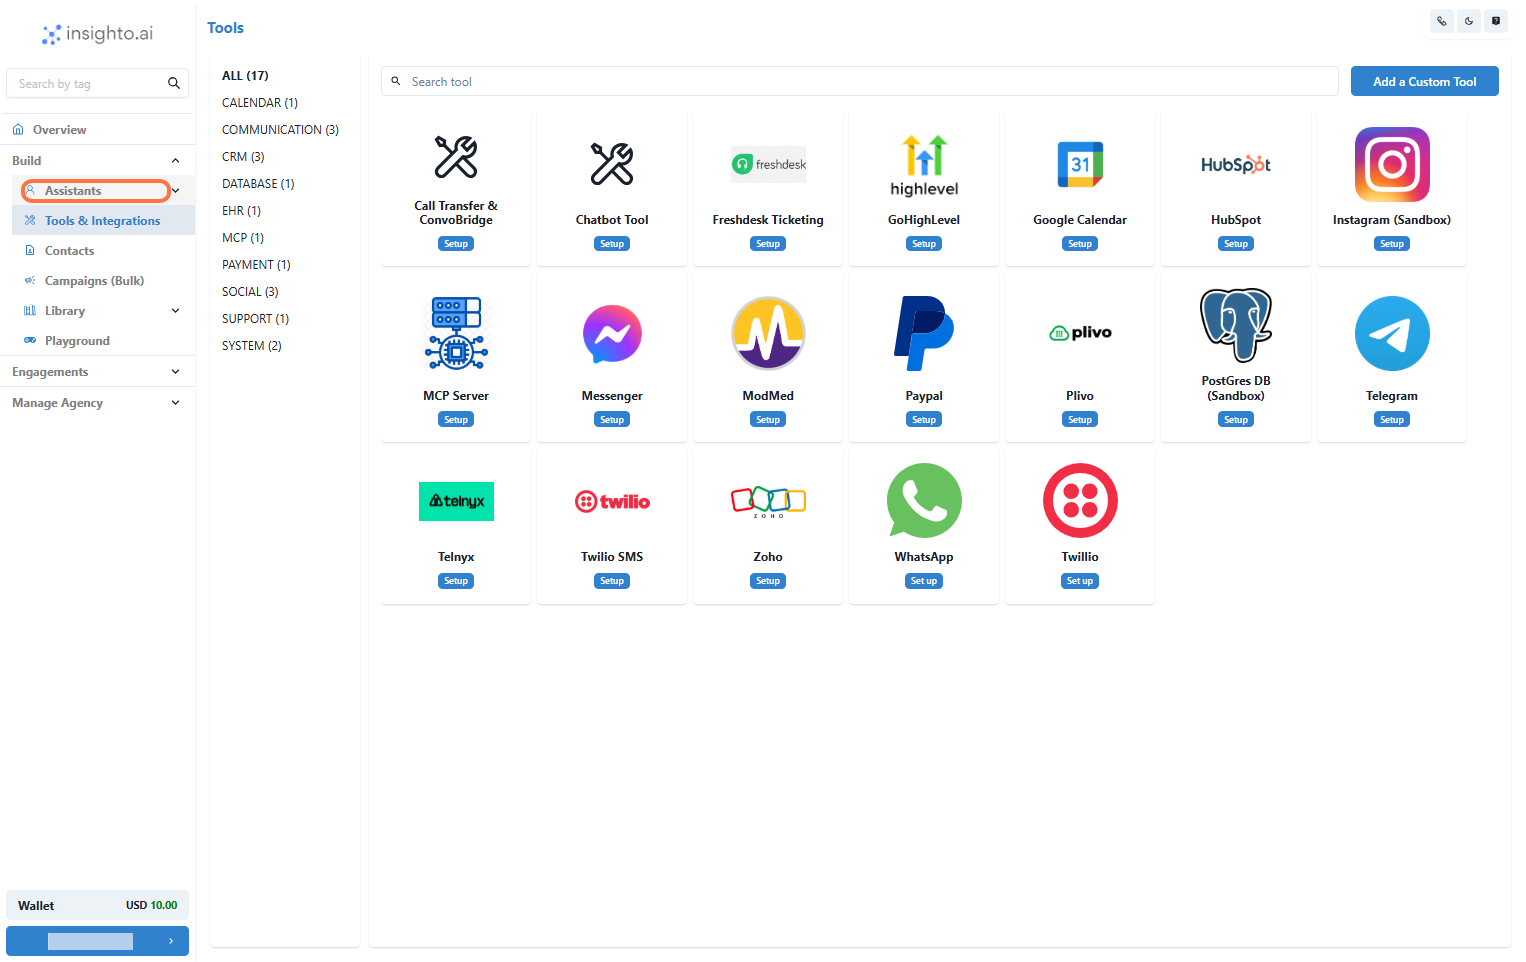
10. Go to Assistants from Left Panel
Click **Assistants** in the left panel of your dashboard to view your assistant list.
***
## Connect Calendar Tool with Assistant
Now that your Google Calendar is integrated, it’s time to link it to your assistant.
***
10. Go to Assistants from Left Panel
Click **Assistants** in the left panel of your dashboard to view your assistant list.
 ***
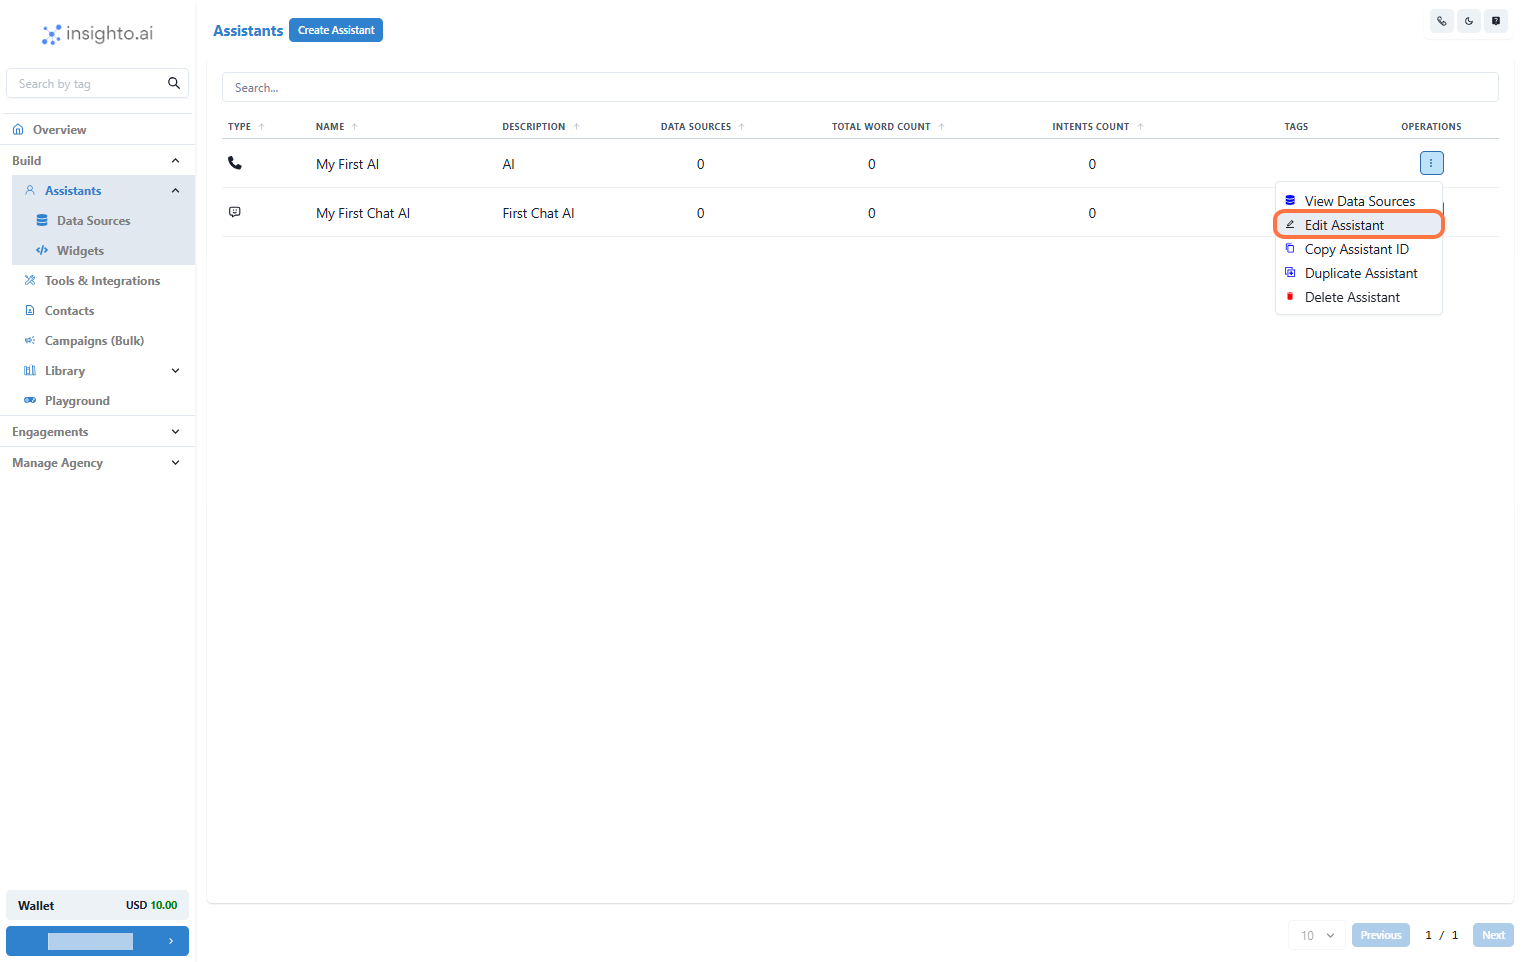
11. Edit any Existing Assistant
Choose the assistant you want to connect with. Click the **three dots** on the assistant card, then select **Edit Assistant**.
***
11. Edit any Existing Assistant
Choose the assistant you want to connect with. Click the **three dots** on the assistant card, then select **Edit Assistant**.
 ***
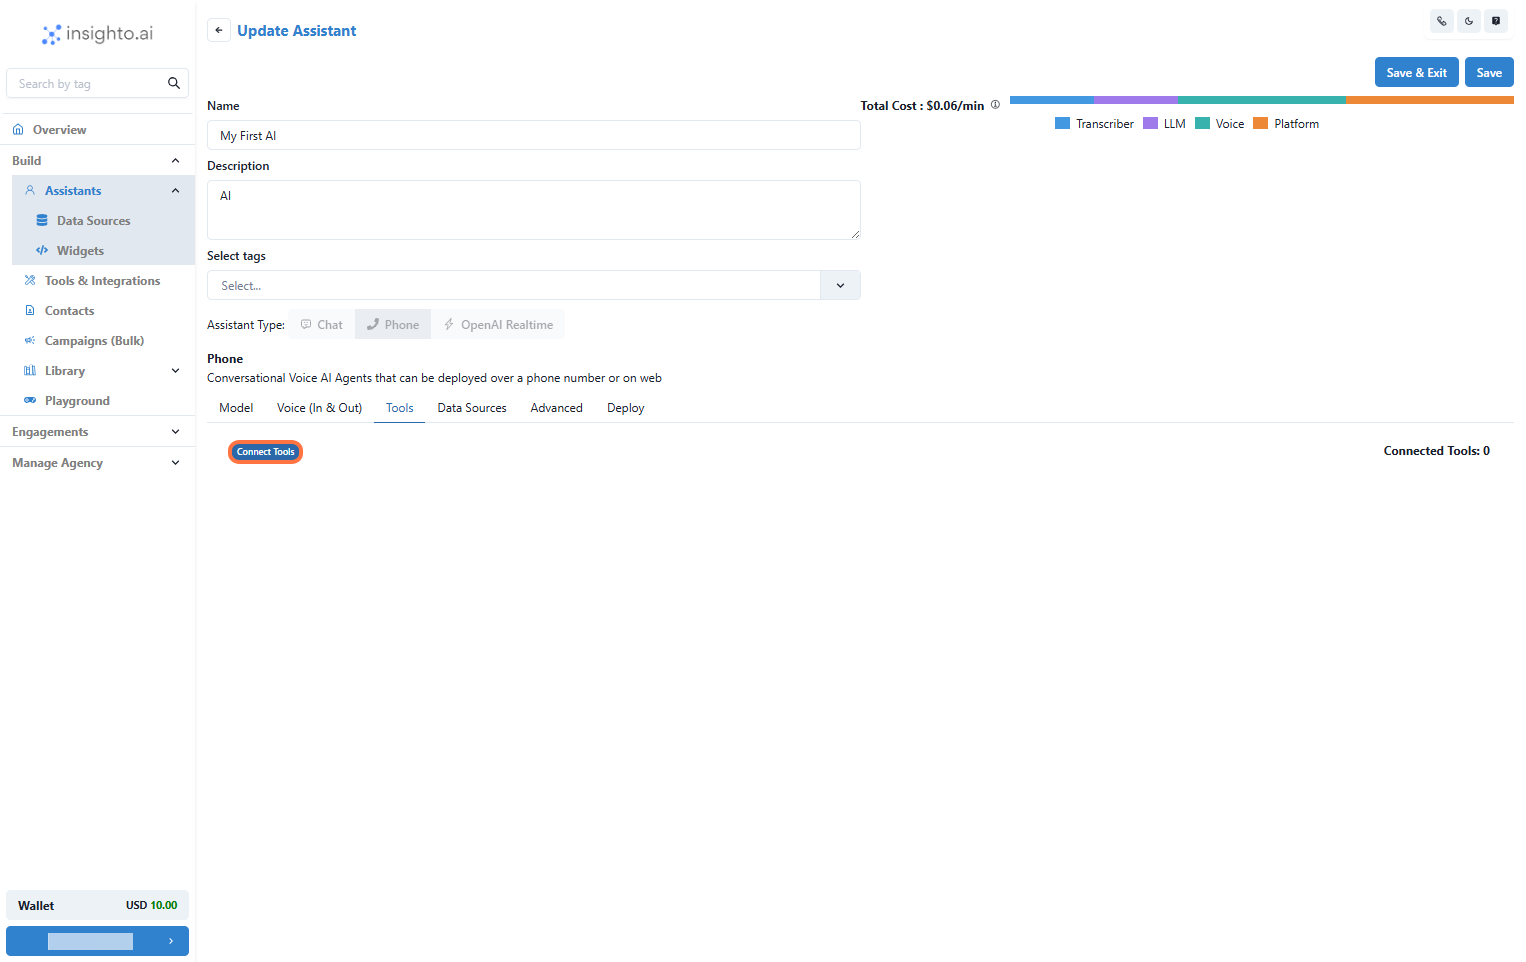
12. Click on Connect Tools
In the assistant editor, go to the **Tools** tab and click **Connect Tools**.
***
12. Click on Connect Tools
In the assistant editor, go to the **Tools** tab and click **Connect Tools**.
 ***
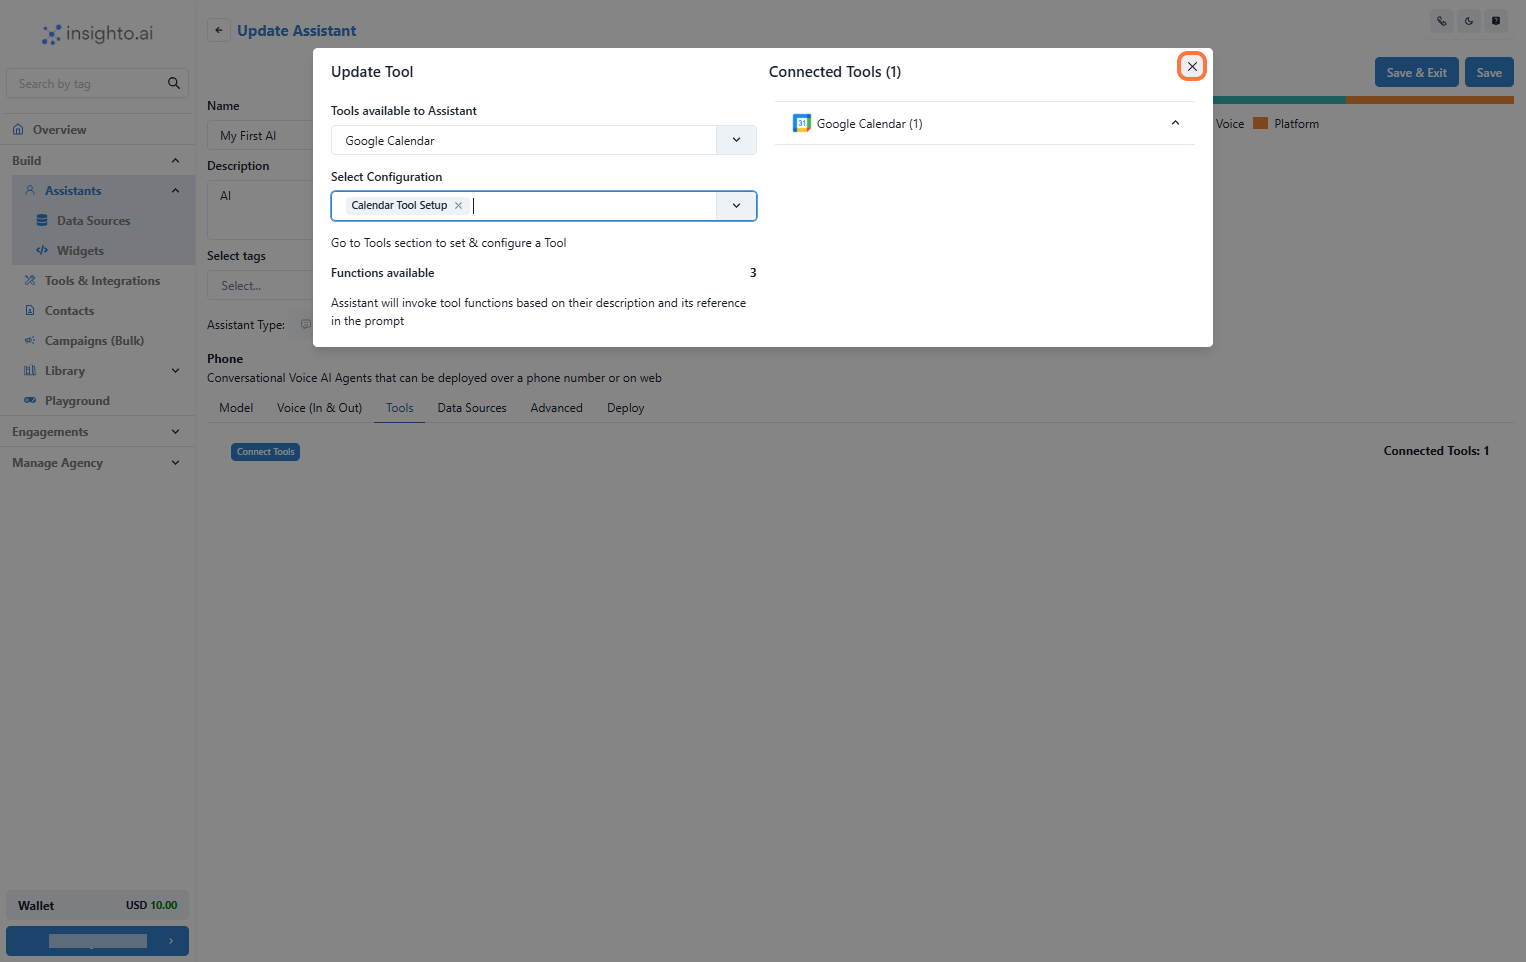
13. Select Tool Type and Configuration from the Dropdown
In the popup:
* Select **Google Calendar Tool** as the tool type
* Then select your created configuration
The tool will be linked automatically.
***
13. Select Tool Type and Configuration from the Dropdown
In the popup:
* Select **Google Calendar Tool** as the tool type
* Then select your created configuration
The tool will be linked automatically.
 ***
## Trigger Tool via Prompts
14. Trigger Instructions for Calendar Tool
To enable scheduling through conversation, use the following prompt instructions:
* **Get earliest appointments:**\
`"Use the booking tool to share earliest slots available between 5:00 AM and 11:30 PM EST."`
* **Create appointment after confirmation:**\
`"Once the user confirms a slot, ask for their name and then their email address to complete the booking. Use the booking tool to secure the appointment. If there is a technical issue, apologize and inform the user politely of a connectivity issue, requesting them to try again later."`
* **Check if a slot is available:**\
`"Use the booking tool to check if the preferred slot is available."`
After adding the instructions, click **Save & Exit** to complete the process.
***
## Trigger Tool via Prompts
14. Trigger Instructions for Calendar Tool
To enable scheduling through conversation, use the following prompt instructions:
* **Get earliest appointments:**\
`"Use the booking tool to share earliest slots available between 5:00 AM and 11:30 PM EST."`
* **Create appointment after confirmation:**\
`"Once the user confirms a slot, ask for their name and then their email address to complete the booking. Use the booking tool to secure the appointment. If there is a technical issue, apologize and inform the user politely of a connectivity issue, requesting them to try again later."`
* **Check if a slot is available:**\
`"Use the booking tool to check if the preferred slot is available."`
After adding the instructions, click **Save & Exit** to complete the process.