> ## Documentation Index
> Fetch the complete documentation index at: https://docs.insighto.ai/llms.txt
> Use this file to discover all available pages before exploring further.
# Insighto.ai Forms
In this guide, you’ll learn how to build custom forms, connect them with your assistant, and trigger them dynamically during conversations to capture structured information from users.
## Creating Forms and Connect them with Assistants
***
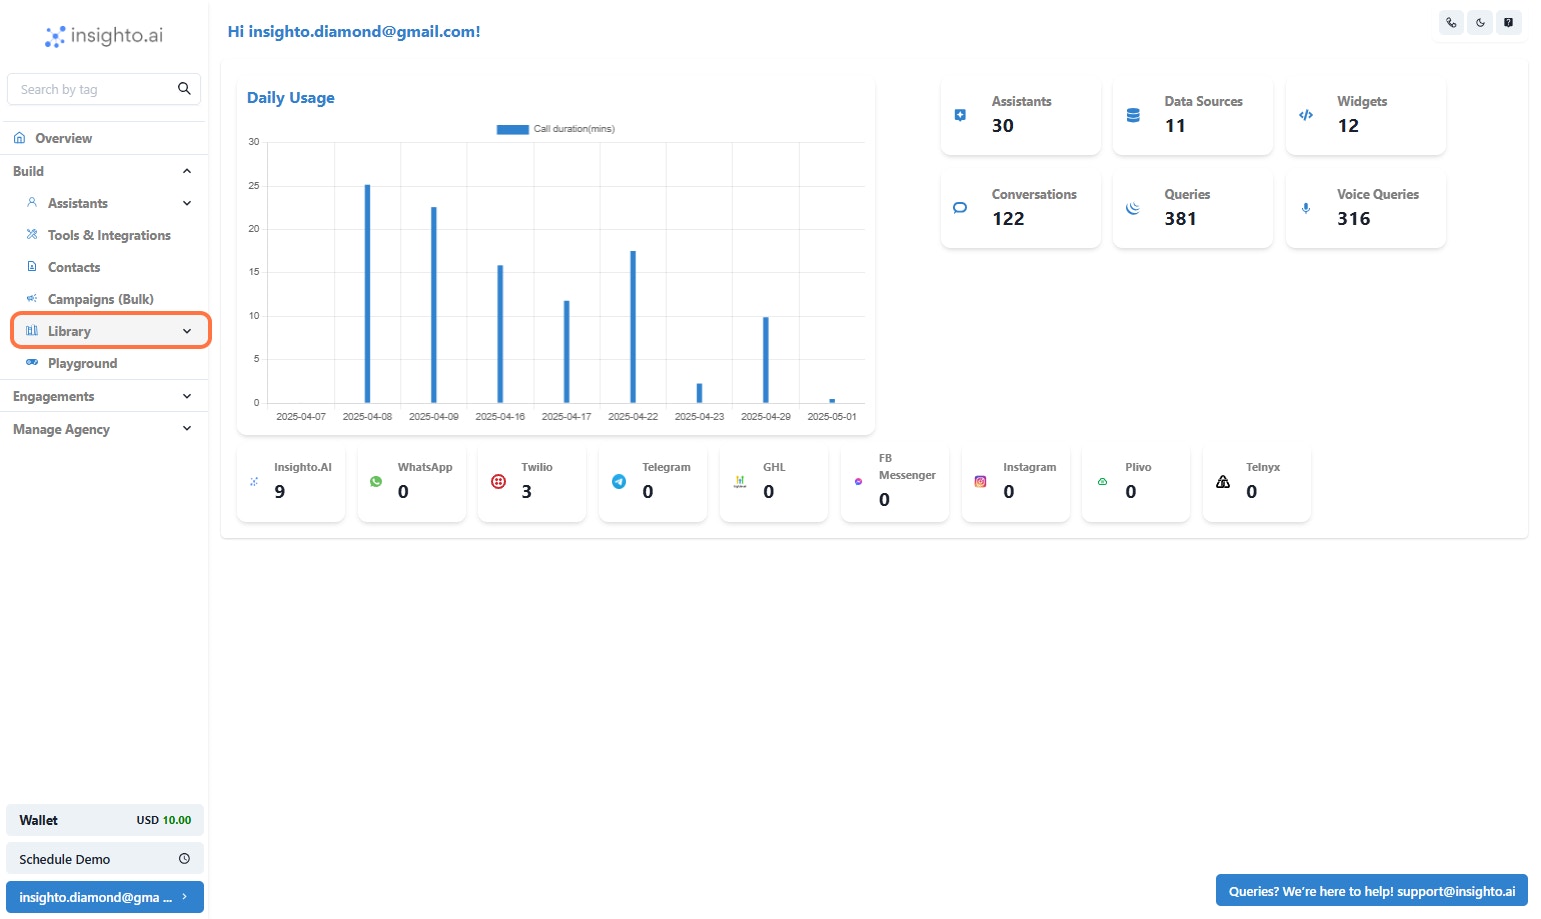
1. Navigate to the Library
Click on **Library** from the left panel in your dashboard. This will expand a dropdown with options like **Forms**, **Tools**, and more.
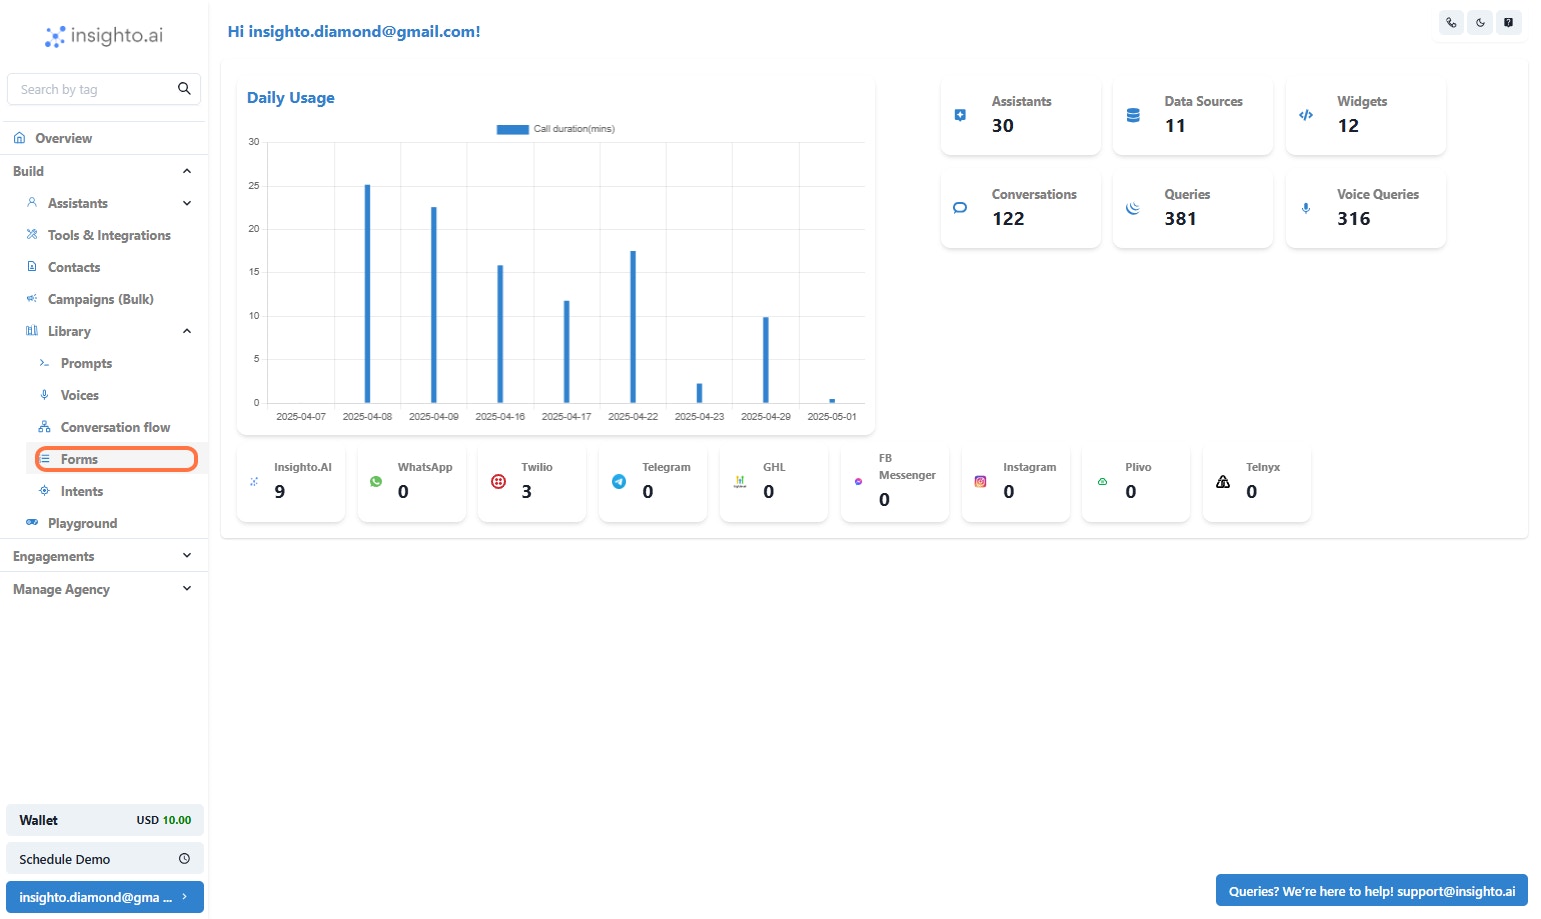
 2. Click on Forms
From the dropdown under **Library**, click on **Forms** to view existing forms or create a new one.
2. Click on Forms
From the dropdown under **Library**, click on **Forms** to view existing forms or create a new one.
 ***
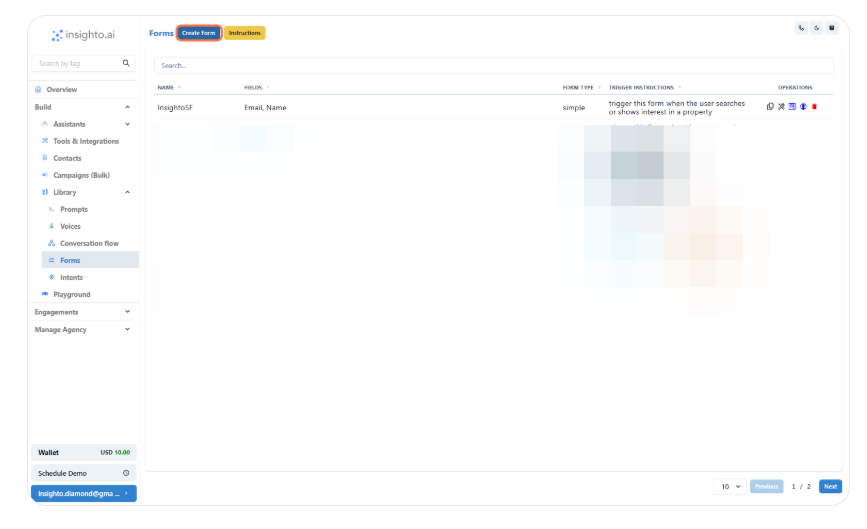
3. Click on Create Form
Hit the **Create Form** button at the top to start building a new form.
***
3. Click on Create Form
Hit the **Create Form** button at the top to start building a new form.
 ***
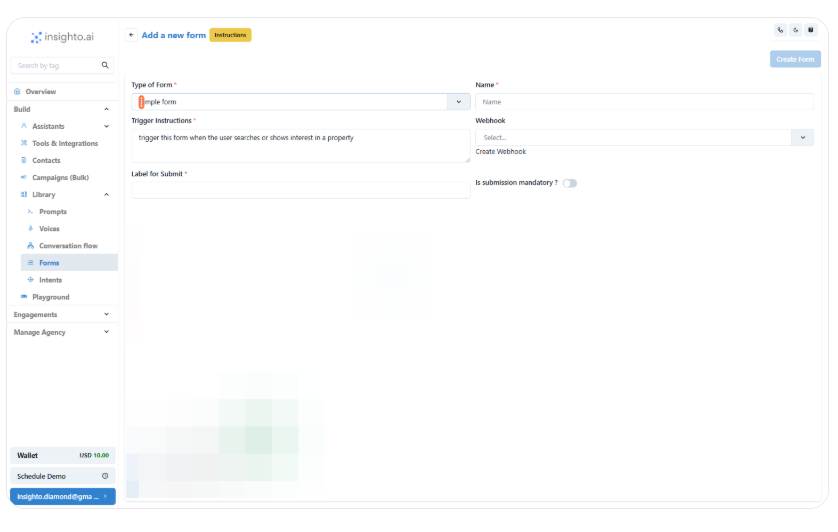
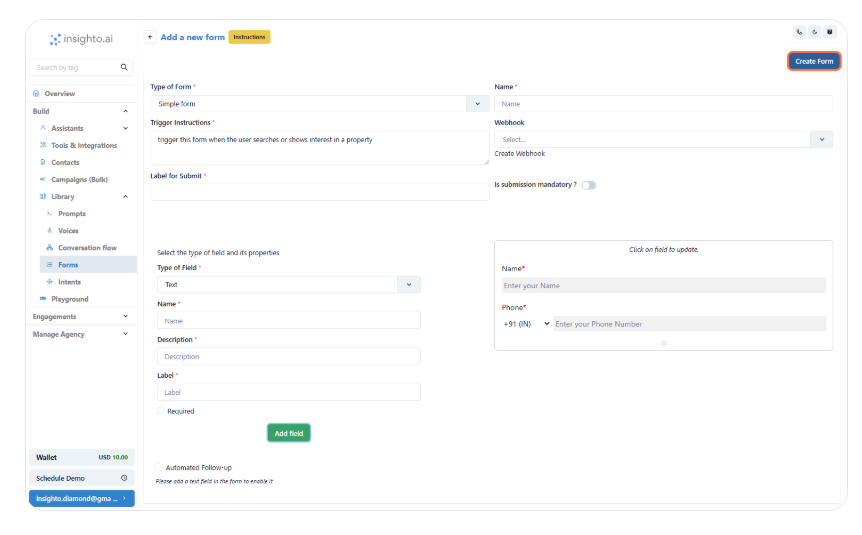
4. Define Basic Form Details
Start by selecting the **Form Type** and giving your form a meaningful **Name**.
Use the **Trigger Instruction** field to define a phrase or keyword that, when mentioned by the user during a conversation, will automatically trigger this form.
Choose a label for the **Submit Button** (e.g., “Send”, “Submit”, “Done”).
***
4. Define Basic Form Details
Start by selecting the **Form Type** and giving your form a meaningful **Name**.
Use the **Trigger Instruction** field to define a phrase or keyword that, when mentioned by the user during a conversation, will automatically trigger this form.
Choose a label for the **Submit Button** (e.g., “Send”, “Submit”, “Done”).
 ***
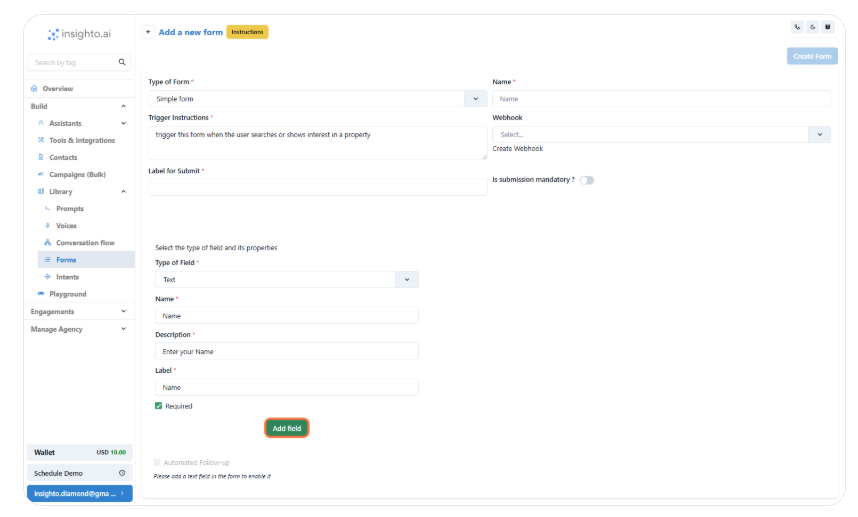
5. Add a Text Field to Capture User Name
To create a field that captures the user's name, select **Text** as the field type and fill in the following:
* **Name**: Used internally to identify the field. Avoid spaces. Use formats like `FullName` or `full_name`.
* **Description**: A short helper text to guide the user on what to enter in this field.
* **Label**: This is the visible field name on the form. You can use spaces here, like **Full Name**, for better readability.
* **Required**: Enable this checkbox if you want to make this field mandatory for form submission.
After filling in these details, click **Add Field** to include it in the form.
***
5. Add a Text Field to Capture User Name
To create a field that captures the user's name, select **Text** as the field type and fill in the following:
* **Name**: Used internally to identify the field. Avoid spaces. Use formats like `FullName` or `full_name`.
* **Description**: A short helper text to guide the user on what to enter in this field.
* **Label**: This is the visible field name on the form. You can use spaces here, like **Full Name**, for better readability.
* **Required**: Enable this checkbox if you want to make this field mandatory for form submission.
After filling in these details, click **Add Field** to include it in the form.
 ***
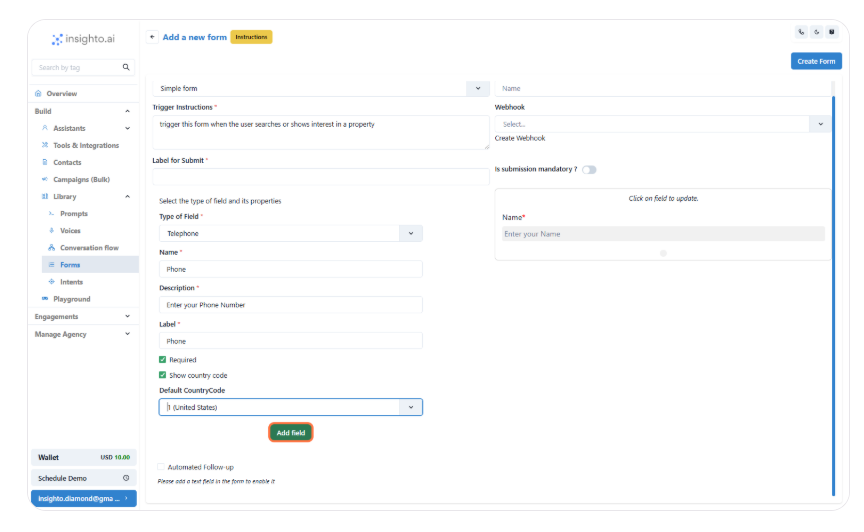
6. Add a Phone Number Field
To capture a user's phone number, select **Telephone** as the field type. Fill in the following details:
* **Name**: Internal reference for the field (e.g., `PhoneNumber`). Avoid using spaces.
* **Description**: Text to guide the user (e.g., “Enter your phone number including area code”).
* **Label**: The visible field name shown to users (e.g., **Phone Number**).
* **Required**: Check this box if the phone number must be provided before form submission.
* **Show Country Code**: Enable this checkbox to allow users to select their country code.
* **Default Country Code**: Set a default country code to prefill the field (e.g., `+1` for the US).
Once all fields are filled, click **Add Field** to save it.
***
6. Add a Phone Number Field
To capture a user's phone number, select **Telephone** as the field type. Fill in the following details:
* **Name**: Internal reference for the field (e.g., `PhoneNumber`). Avoid using spaces.
* **Description**: Text to guide the user (e.g., “Enter your phone number including area code”).
* **Label**: The visible field name shown to users (e.g., **Phone Number**).
* **Required**: Check this box if the phone number must be provided before form submission.
* **Show Country Code**: Enable this checkbox to allow users to select their country code.
* **Default Country Code**: Set a default country code to prefill the field (e.g., `+1` for the US).
Once all fields are filled, click **Add Field** to save it.
 ***
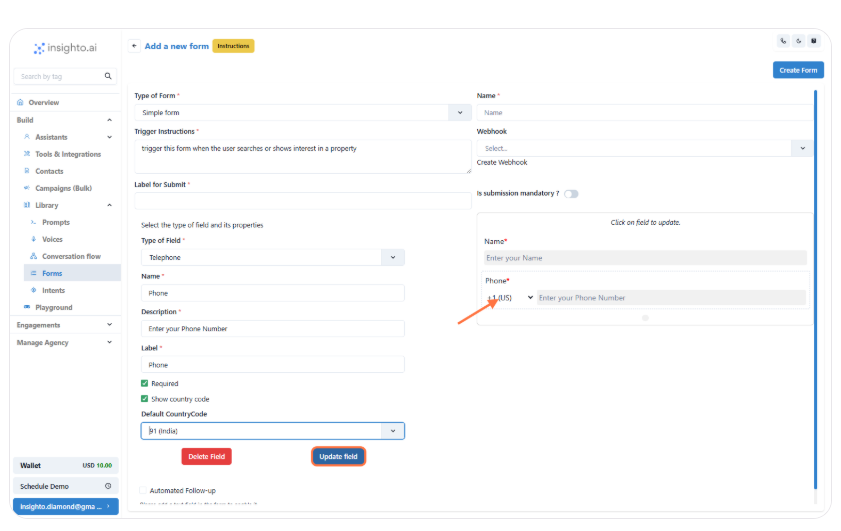
7. Edit or Delete a Form Field
To edit or delete a field:
* Hover over the field and click on it.
* In the left panel, choose **Update** to edit or **Delete** to remove the field.
* Make necessary changes and save, or confirm deletion.
***
7. Edit or Delete a Form Field
To edit or delete a field:
* Hover over the field and click on it.
* In the left panel, choose **Update** to edit or **Delete** to remove the field.
* Make necessary changes and save, or confirm deletion.
 ***
8. Click on Create Form
***
8. Click on Create Form
 ***
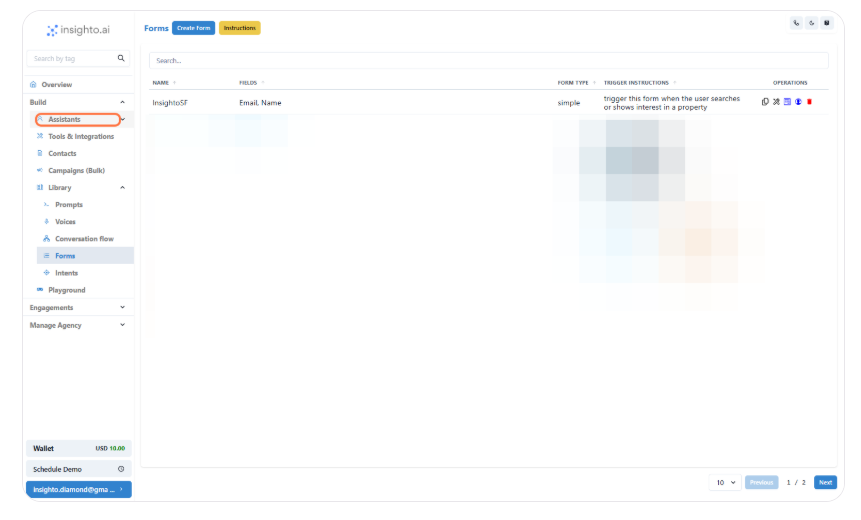
9. Go to Assistants
***
9. Go to Assistants
 ***
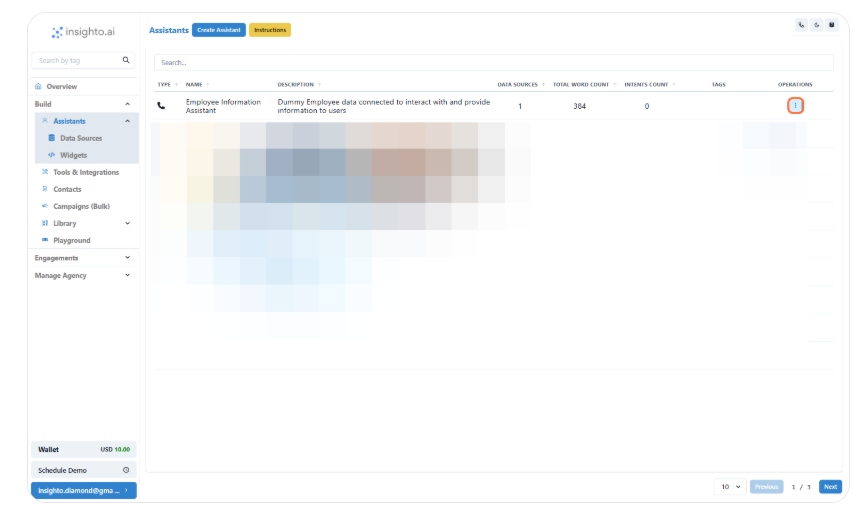
10. Click on Options
***
10. Click on Options
 ***
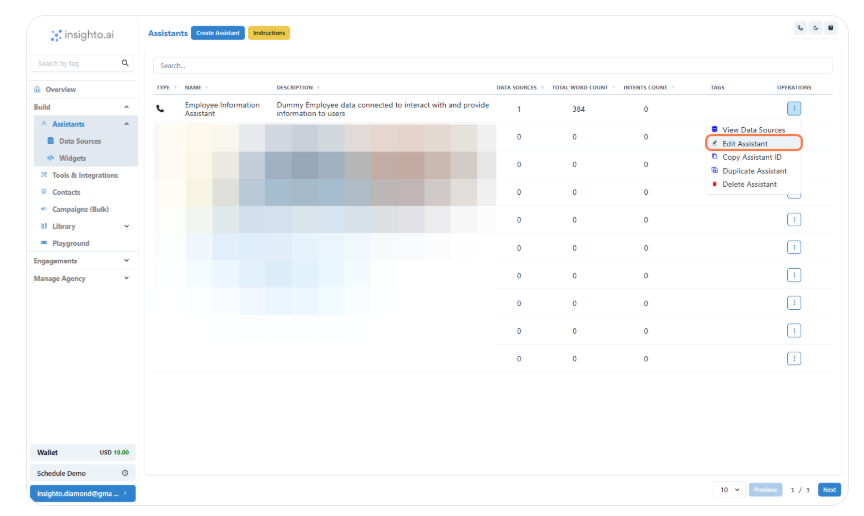
11. Click on Edit Assistant
***
11. Click on Edit Assistant
 ***
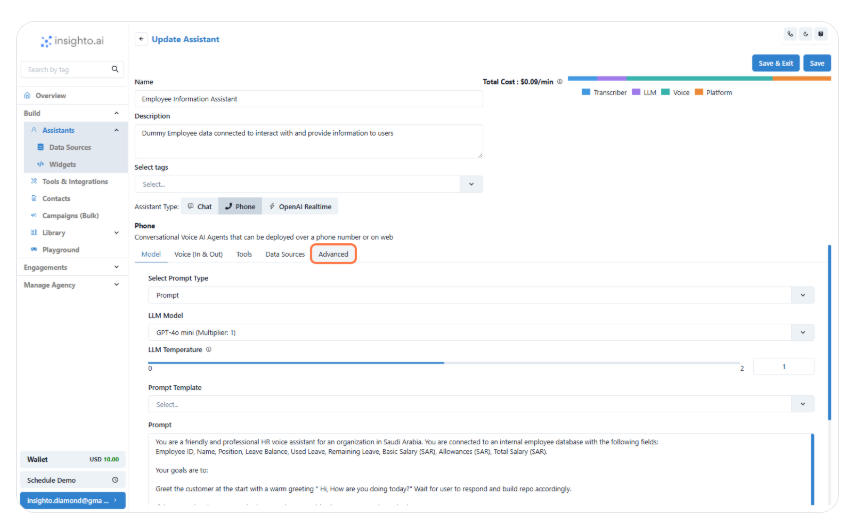
12. Click on Advanced
***
12. Click on Advanced
 ***
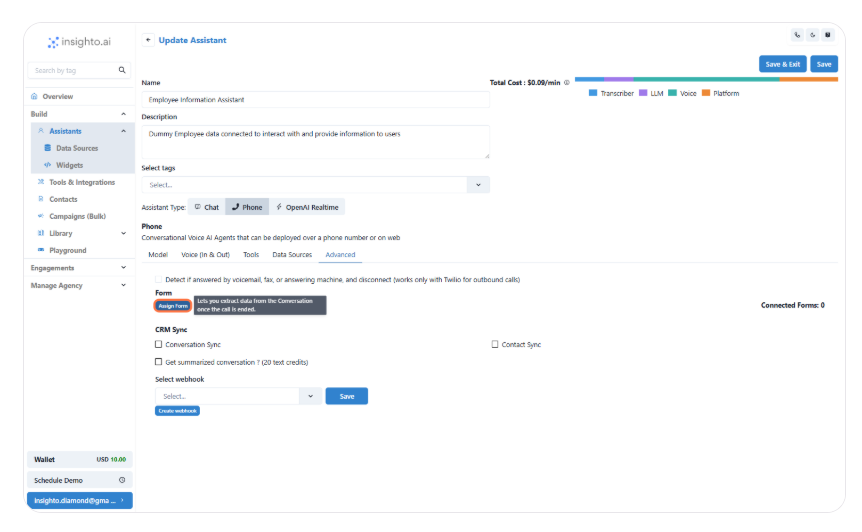
13. Click on Assign Form
***
13. Click on Assign Form
 ***
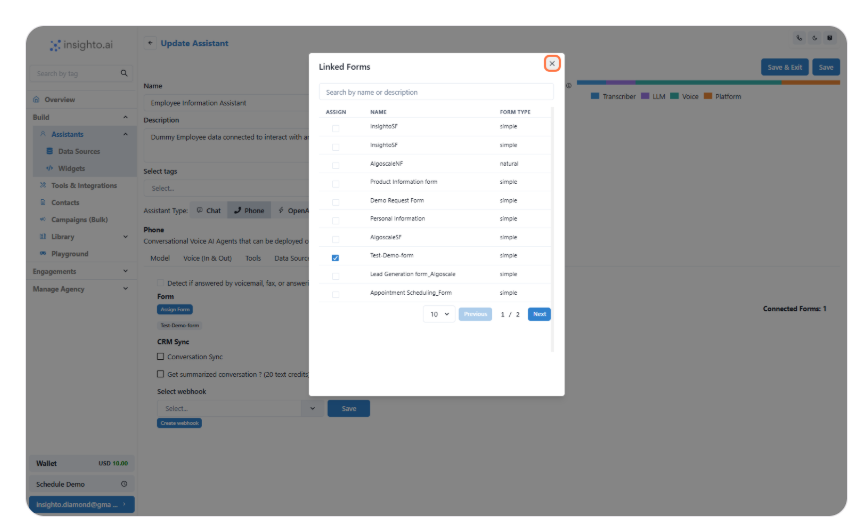
14. Connect the Form
Select the checkbox next to the form you want to connect.
Once selected, click **Close** to confirm and finish the connection.
***
14. Connect the Form
Select the checkbox next to the form you want to connect.
Once selected, click **Close** to confirm and finish the connection.