> ## Documentation Index
> Fetch the complete documentation index at: https://docs.insighto.ai/llms.txt
> Use this file to discover all available pages before exploring further.
> Learn how to deploy your AI assistant to a Twilio SMS number and handle inbound text messages automatically.
# SMS Widget
This guide will walk you through deploying your AI chat assistant on an SMS number, enabling it to respond to inbound text messages automatically. Once set up, the assistant will handle user queries received via SMS in real time.
⚠ Note: SMS deployment supports inbound messages only. Your assistant cannot send an initial message unless triggered by a user.
#
🧩 Prerequisite:
1. Follow the SMS Tool Setup Guide
[Set Up SMS Tool with Twilio →](https://docs.insighto.ai/SMS-Tool)
Once done, return to this guide to continue with deploying your assistant using an SMS widget.
### Create SMS Widget
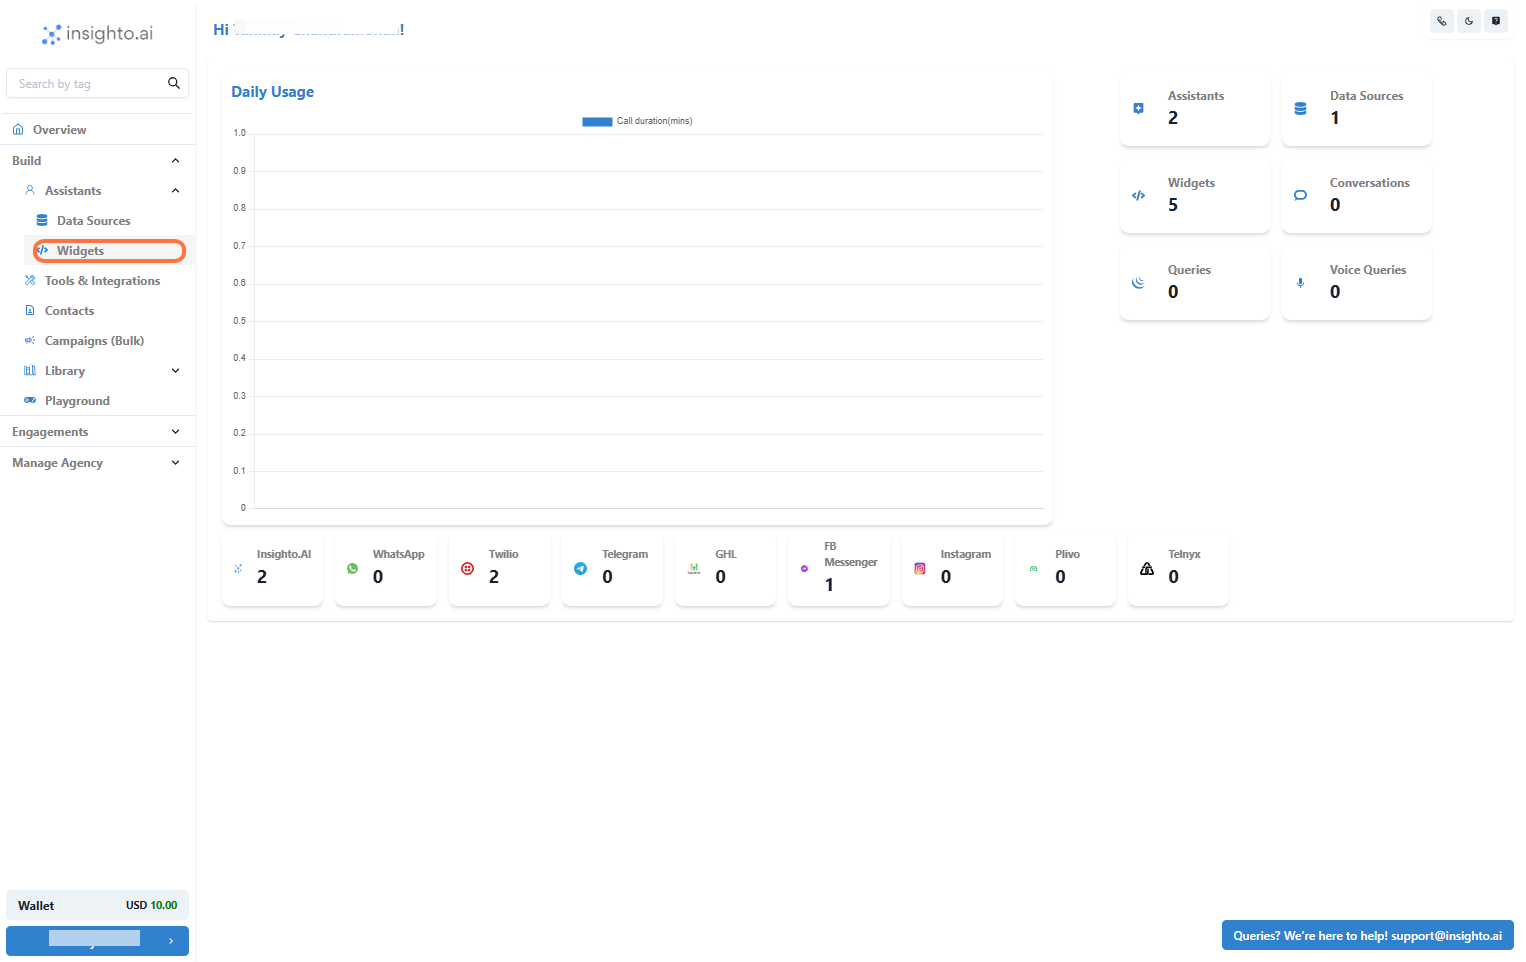
2. Click on Widgets from the Left Panel
In the Assistants section of the left panel, click on Widgets. This will take you to the widget setup page where you can deploy your AI assistant.
🔔 Note:\
Ensure you have already created an AI chat assistant before proceeding. If you haven’t, please follow the previous guides to create and configure your assistant first.
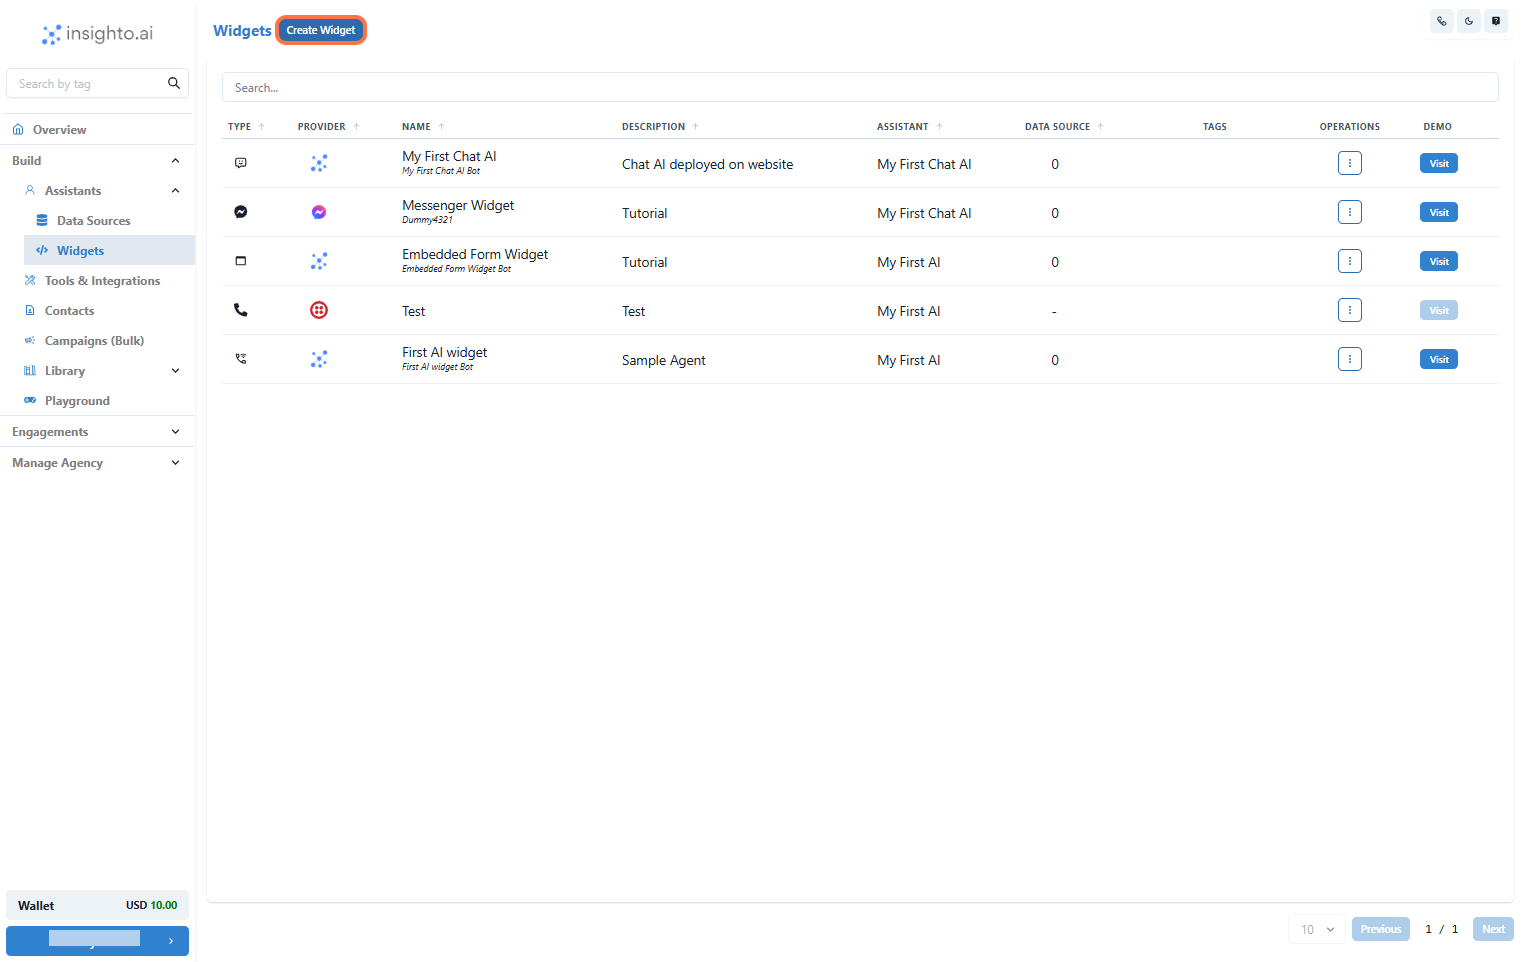
 3. Create New Widget
Click Create New Widget to start the setup process.
3. Create New Widget
Click Create New Widget to start the setup process.
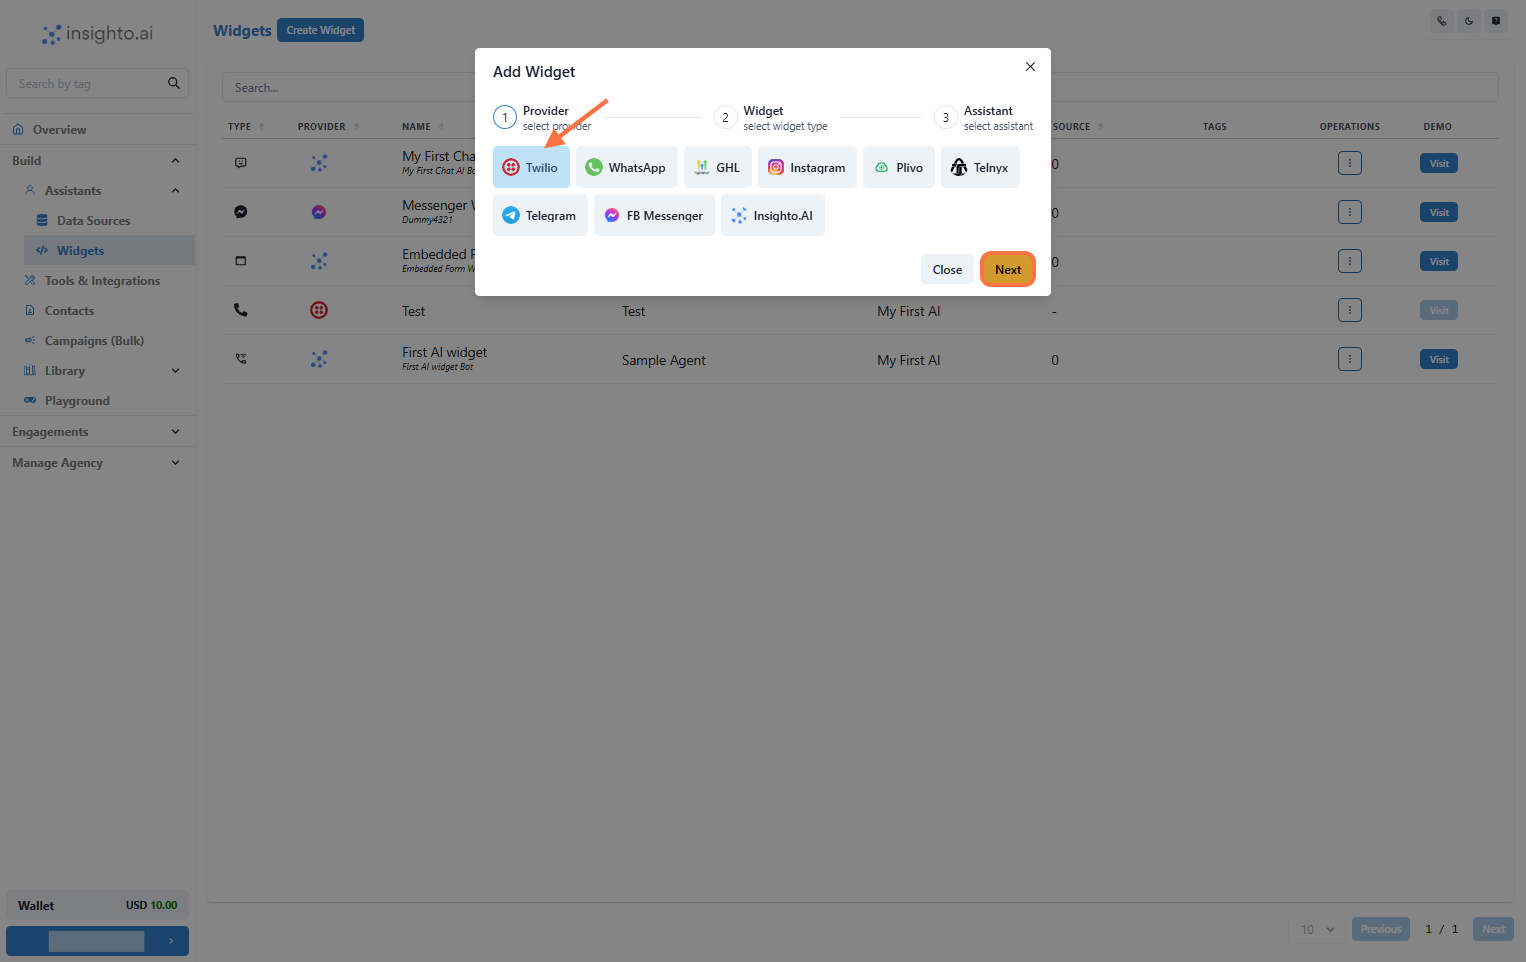
 4. Select Twilio as the Provider Type and Click Next
In the widget setup screen, choose Twilio as the provider type. Once selected, click Next to proceed.
4. Select Twilio as the Provider Type and Click Next
In the widget setup screen, choose Twilio as the provider type. Once selected, click Next to proceed.
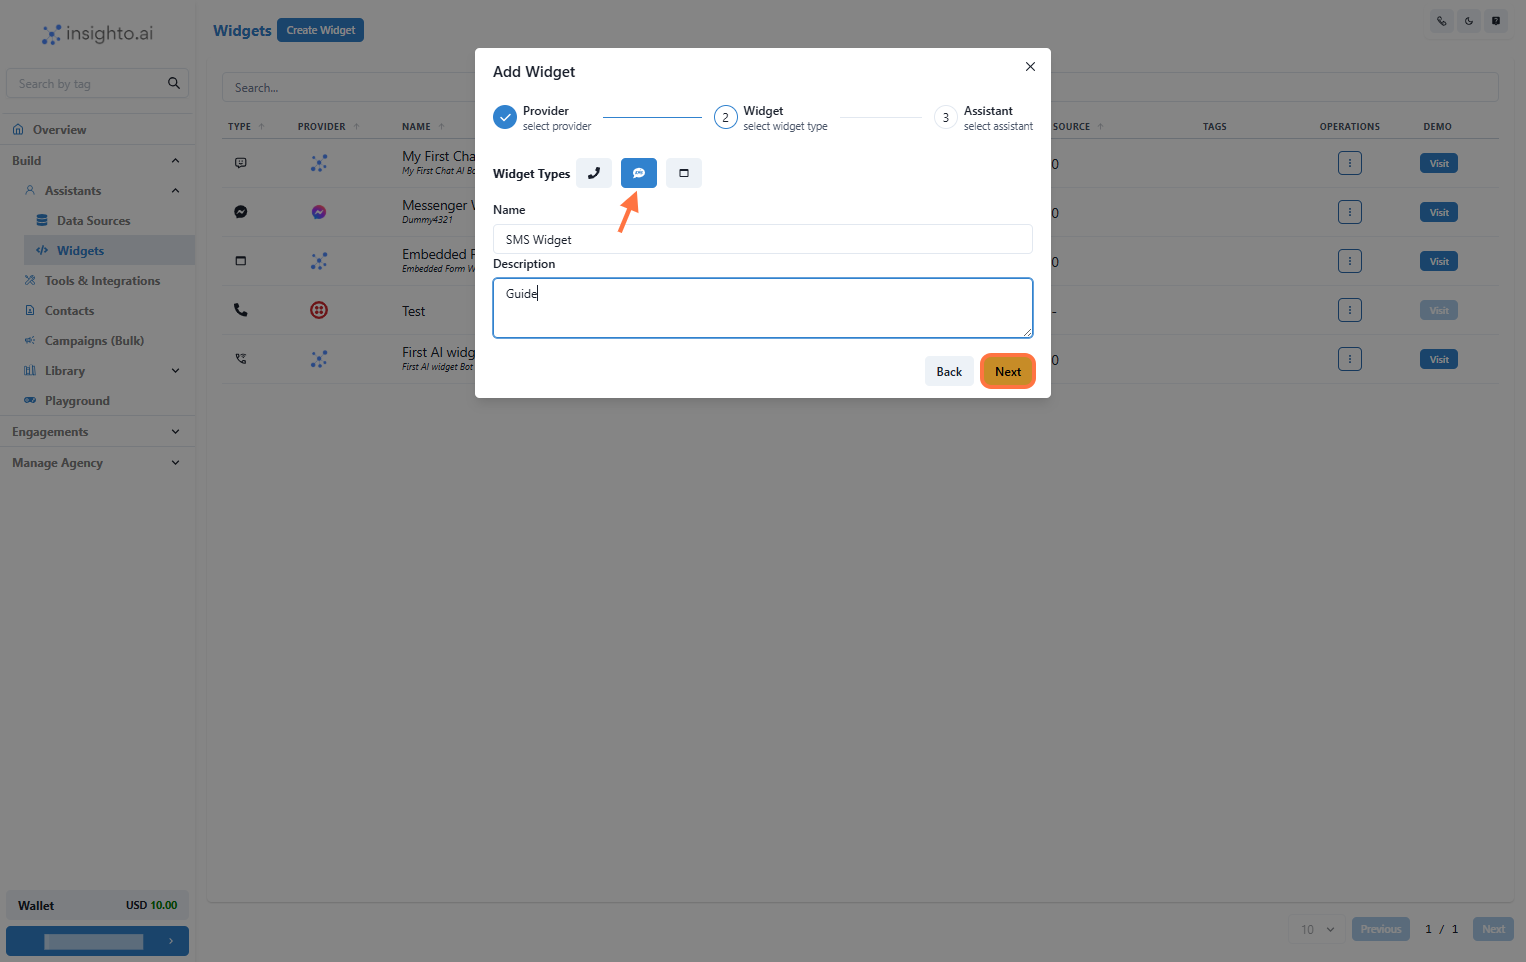
 5. Select Widget Type, Name, and Describe Your Widget
Widget Type: Choose the SMS type.
Name: Choose a descriptive name for easy identification (e.g., Customer Support Chat).
Description: Provide a brief description of the widget’s purpose (e.g., Handles customer support inquiries via WhatsApp).
Once you’ve filled in these details, click Next to move on.
5. Select Widget Type, Name, and Describe Your Widget
Widget Type: Choose the SMS type.
Name: Choose a descriptive name for easy identification (e.g., Customer Support Chat).
Description: Provide a brief description of the widget’s purpose (e.g., Handles customer support inquiries via WhatsApp).
Once you’ve filled in these details, click Next to move on.
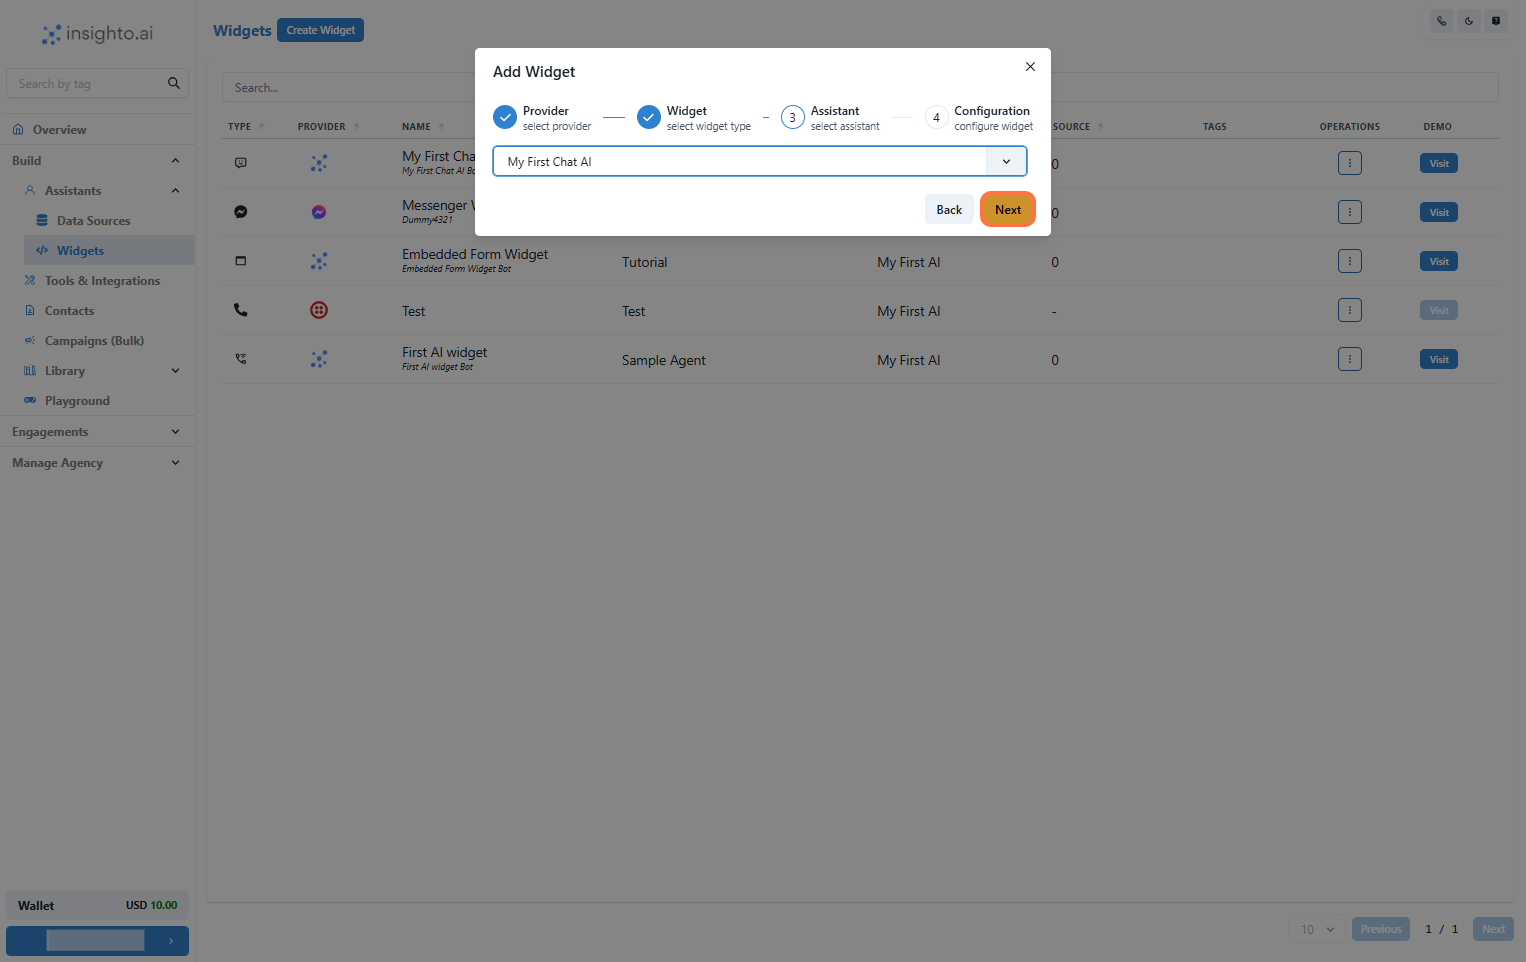
 6. Select Your Chat Assistant from the Dropdown
In this step, select the AI chat assistant you created earlier from the dropdown list.
6. Select Your Chat Assistant from the Dropdown
In this step, select the AI chat assistant you created earlier from the dropdown list.
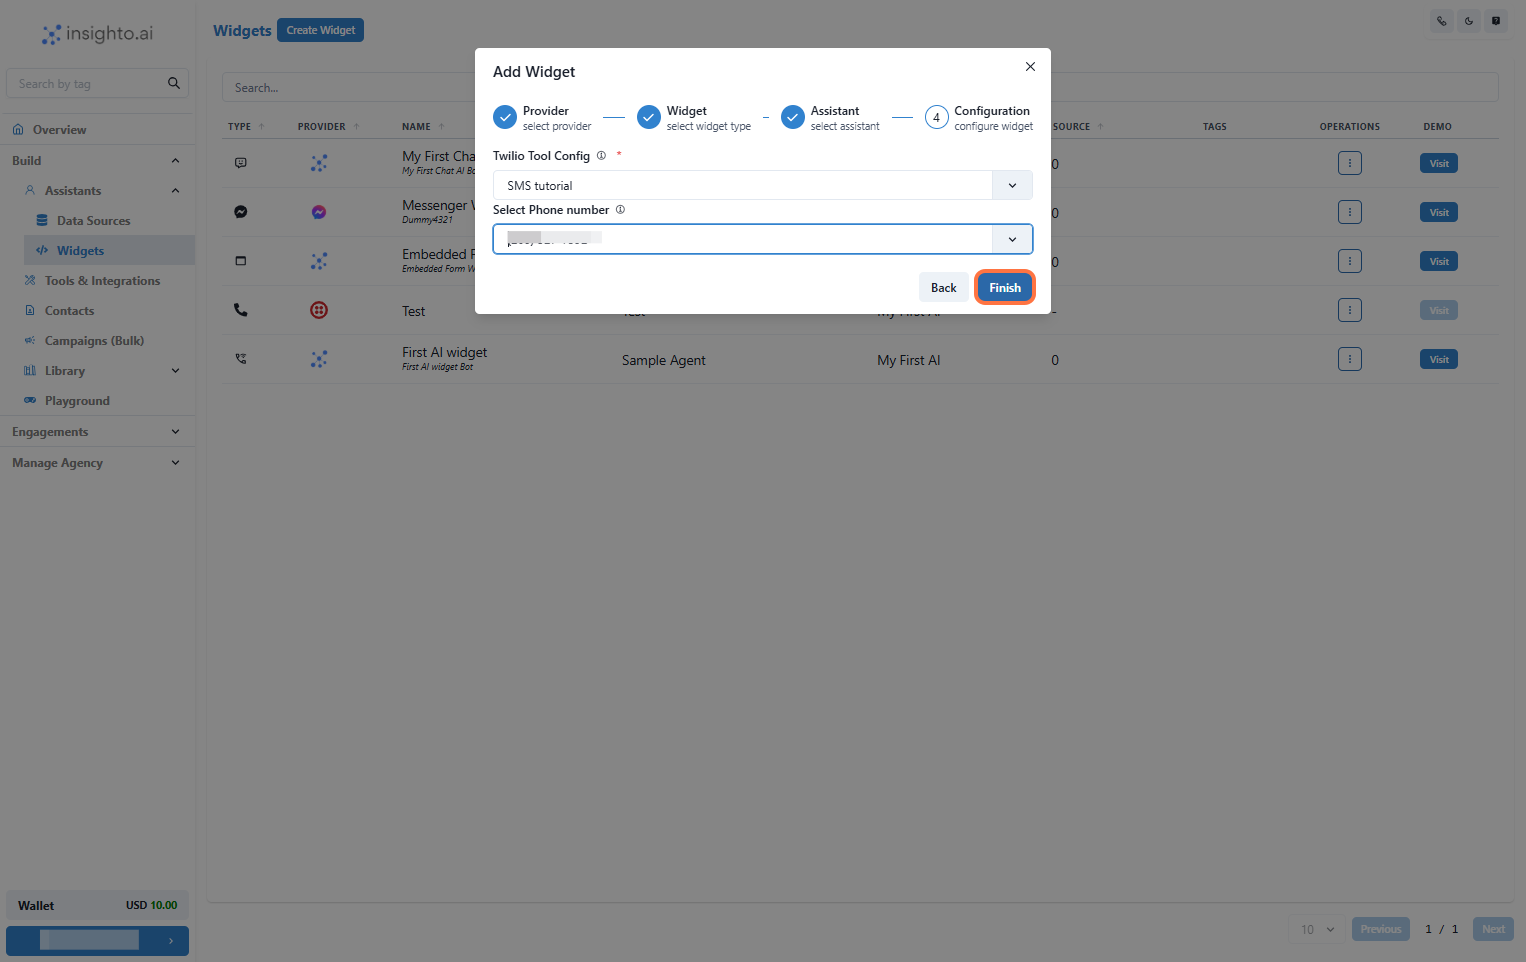
 7. Configure Twilio SMS Widget
In this step, set the behavior for your Twilio-powered SMS assistant:
Select Your Twilio Account from the dropdown\
Choose a Phone Number associated with that account\
Once done, click Finish to complete deployment.
7. Configure Twilio SMS Widget
In this step, set the behavior for your Twilio-powered SMS assistant:
Select Your Twilio Account from the dropdown\
Choose a Phone Number associated with that account\
Once done, click Finish to complete deployment.
 8. Test Your SMS Assistant
Send a message to Twilio number you just configured to test your AI chat assistant in action.
8. Test Your SMS Assistant
Send a message to Twilio number you just configured to test your AI chat assistant in action.
