> ## Documentation Index
> Fetch the complete documentation index at: https://docs.insighto.ai/llms.txt
> Use this file to discover all available pages before exploring further.
# Telynx Set Up For Voice AI
Connect your Insighto voice assistant to a Telynx phone number and let users interact via real phone calls.\
This guide will walk you through setting up Telynx and integrating it with Insighto.
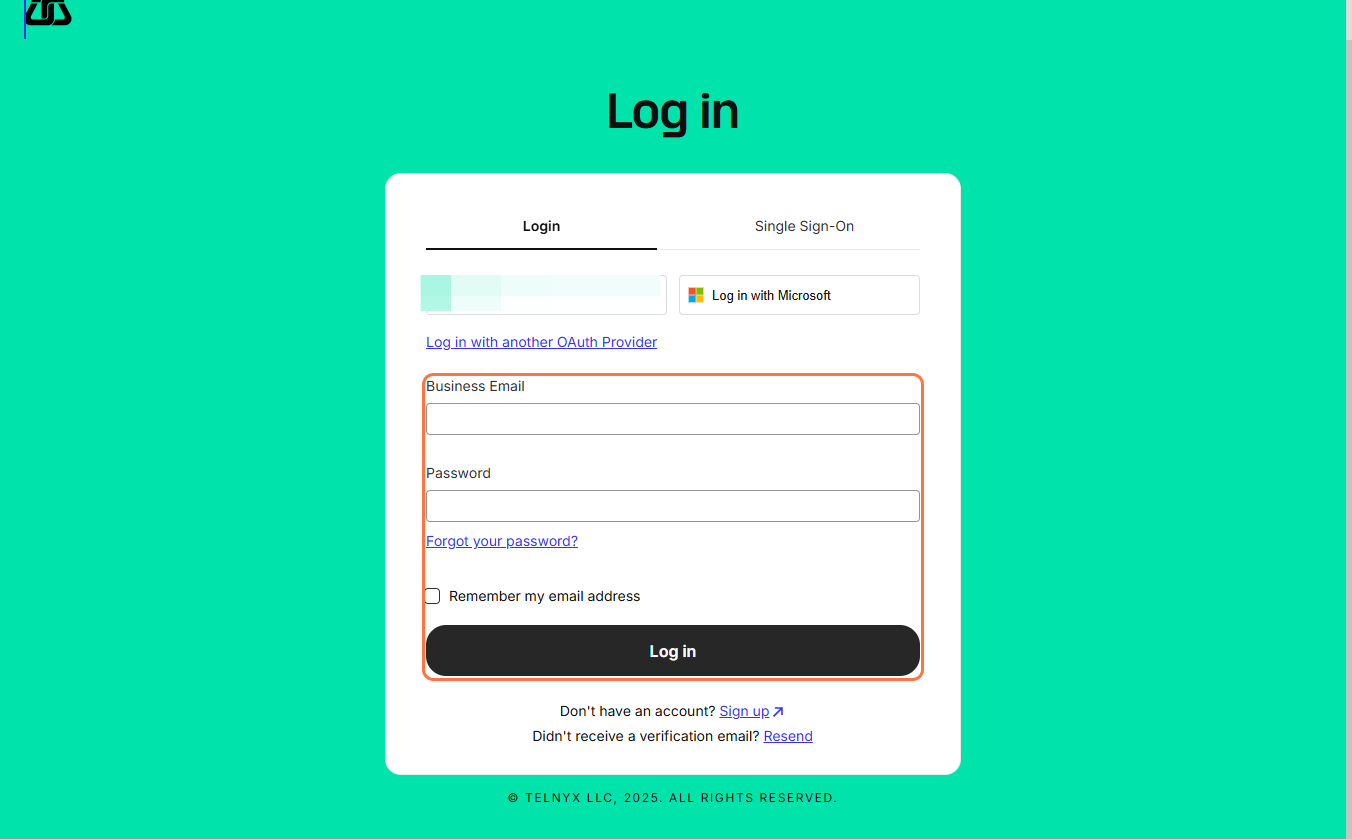
1. Click on Login
* Go to [Telnyx Login](https://portal.telnyx.com/#/login/sign-in)
* Enter your credentials, and access your dashboard.
* Once logged in, you’ll land on the Telnyx Console homepage.
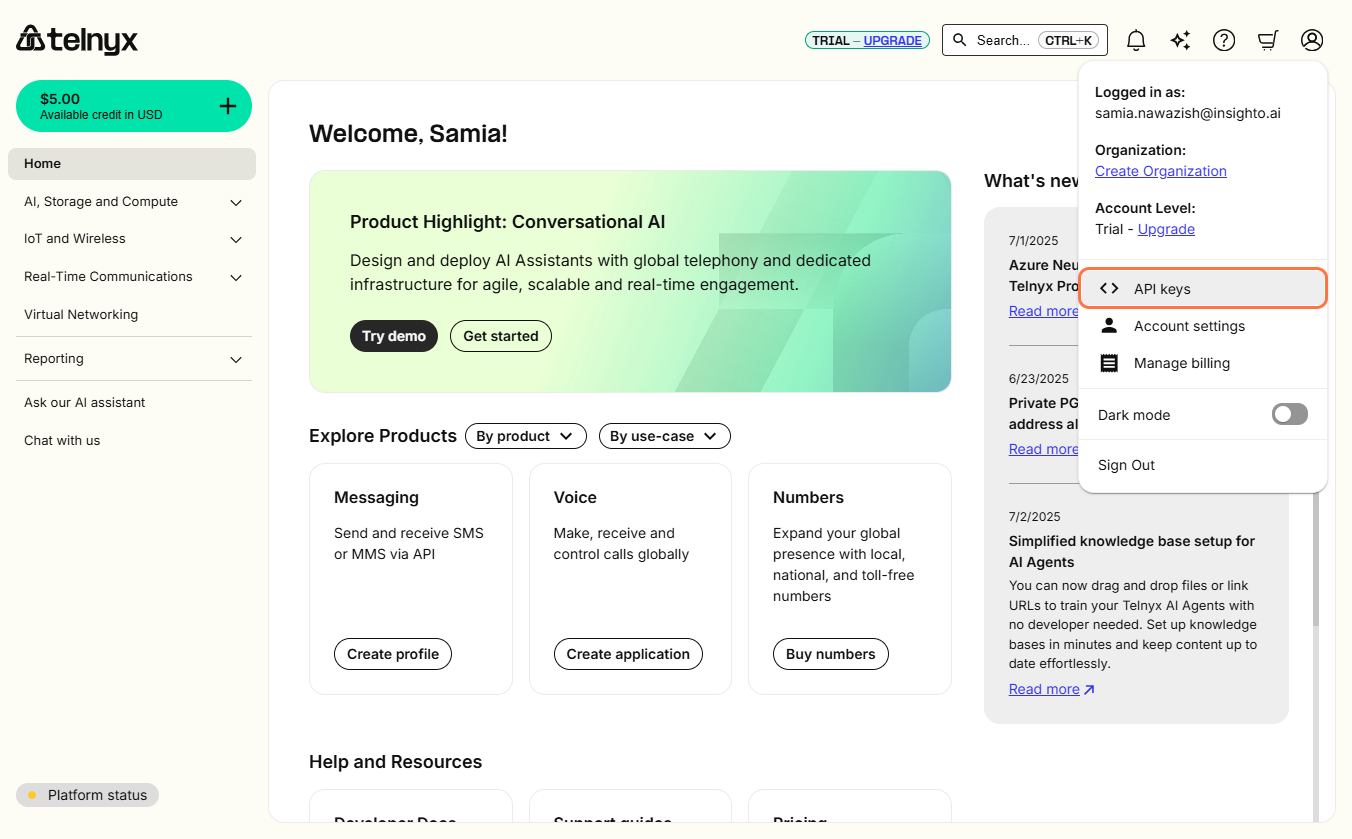
##  2. Click on API Keys
* In the top right corner, click on your **profile icon**.
* From the dropdown menu, click on **API keys**.
[Go to Telnyx Console](https://portal.telnyx.com/#/home)
##
2. Click on API Keys
* In the top right corner, click on your **profile icon**.
* From the dropdown menu, click on **API keys**.
[Go to Telnyx Console](https://portal.telnyx.com/#/home)
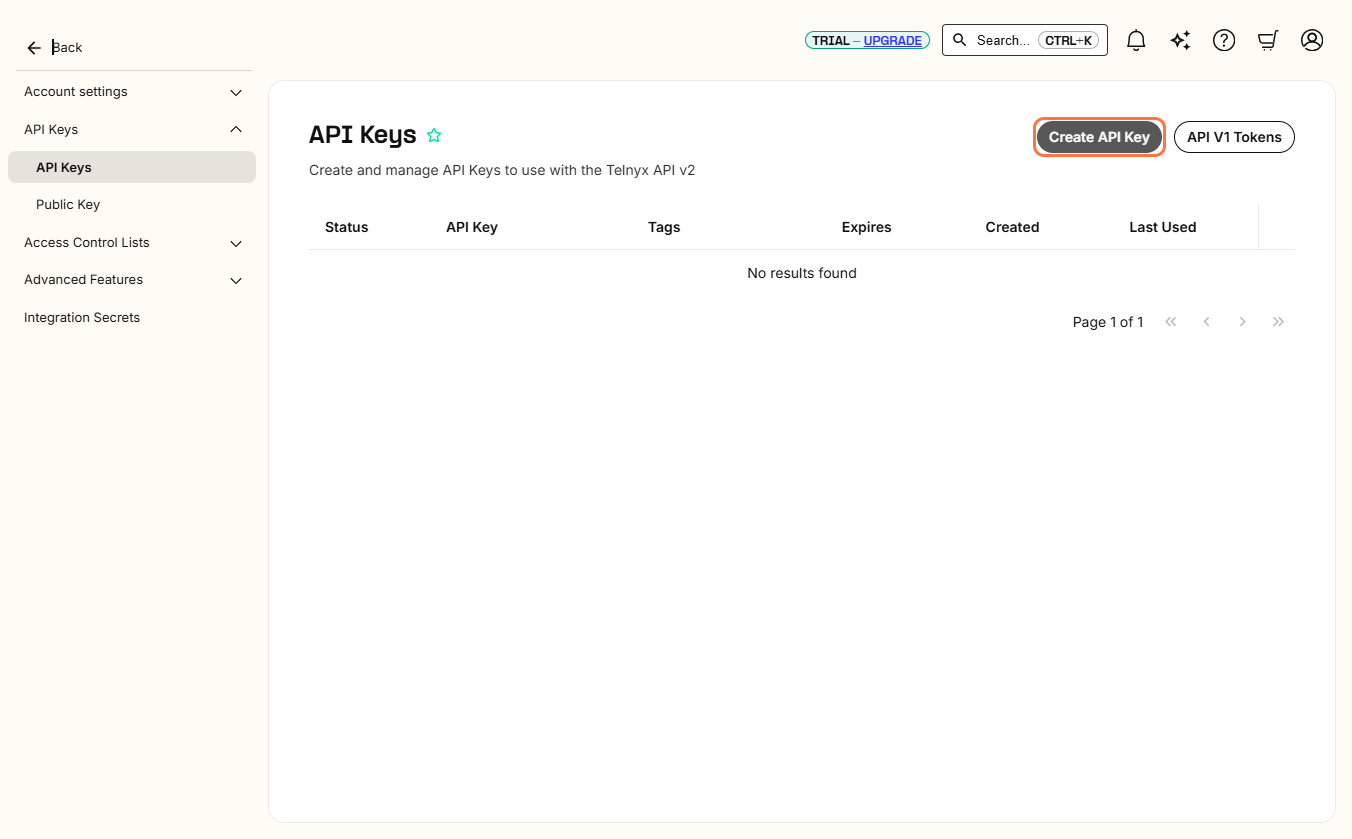
##  3. Create API Key
* Click the **Create API Key** button on the right side.
* This will generate a new Telnyx API key.
* **Copy the key** and keep it handy for Insighto setup.
[Go to API Keys](https://portal.telnyx.com/#/api-keys)
##
3. Create API Key
* Click the **Create API Key** button on the right side.
* This will generate a new Telnyx API key.
* **Copy the key** and keep it handy for Insighto setup.
[Go to API Keys](https://portal.telnyx.com/#/api-keys)
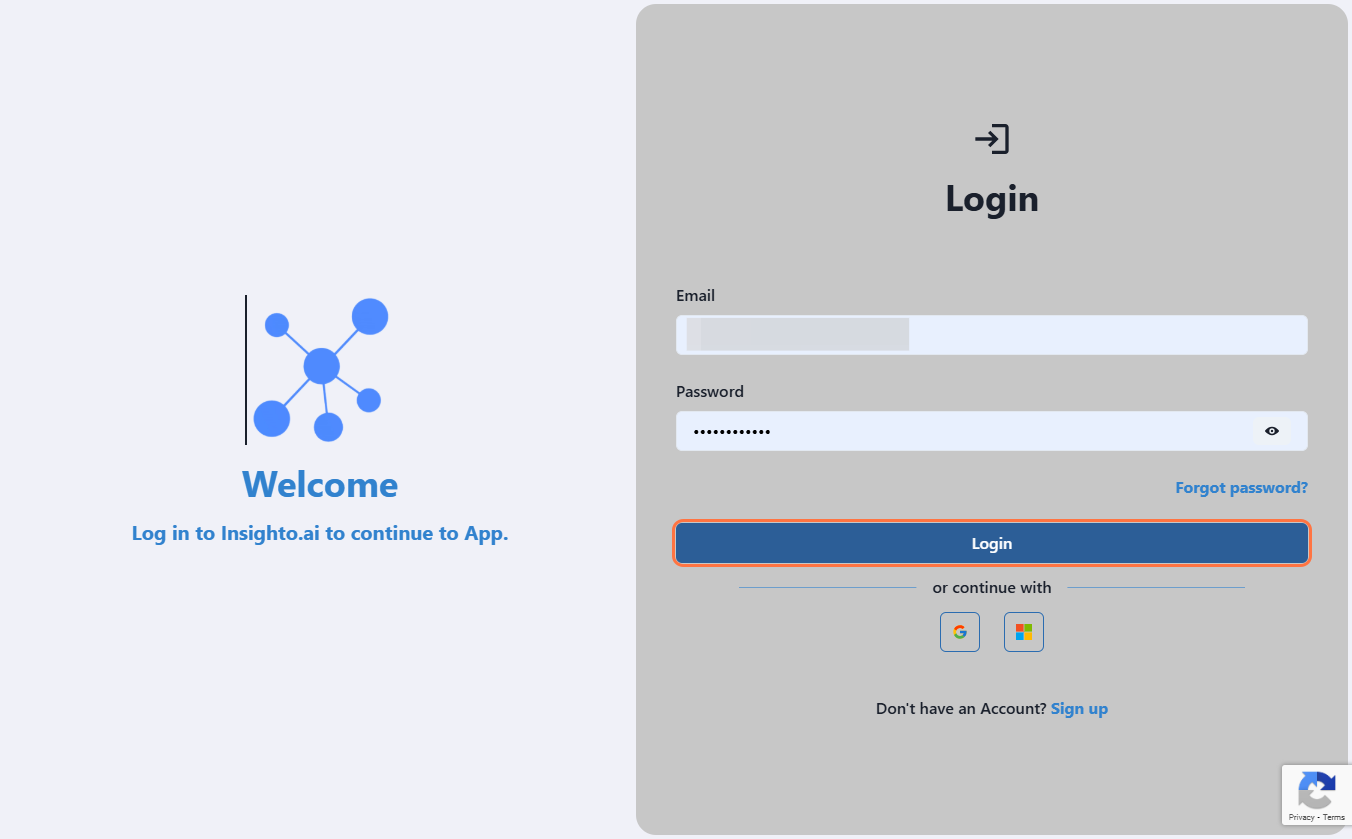
##  4. Login to Insighto
* Go to [Insighto Login](https://app.insighto.ai/login)
##
4. Login to Insighto
* Go to [Insighto Login](https://app.insighto.ai/login)
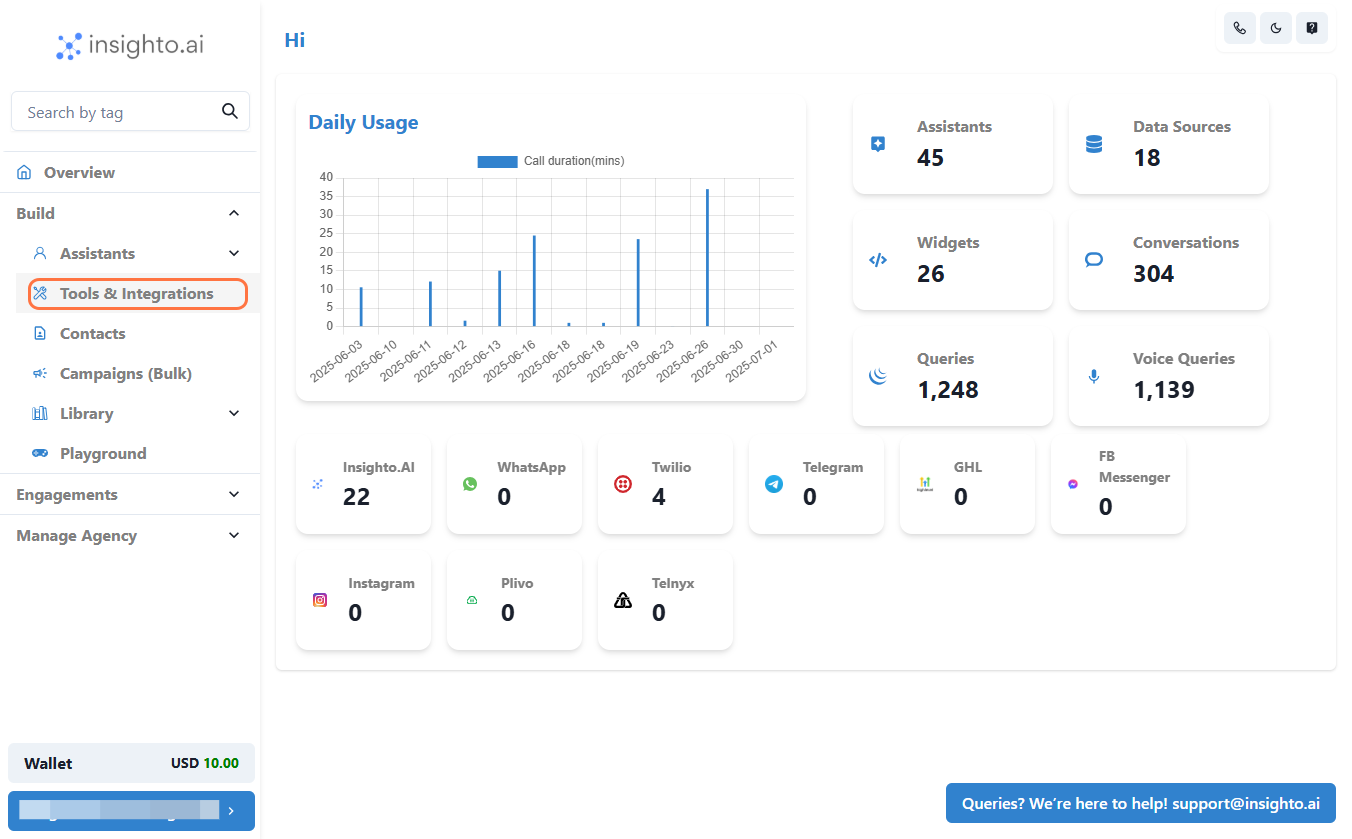
##  5. Navigate to Tools & Integrations
* Click on **Tools & Integrations** from the dashboard.
##
5. Navigate to Tools & Integrations
* Click on **Tools & Integrations** from the dashboard.
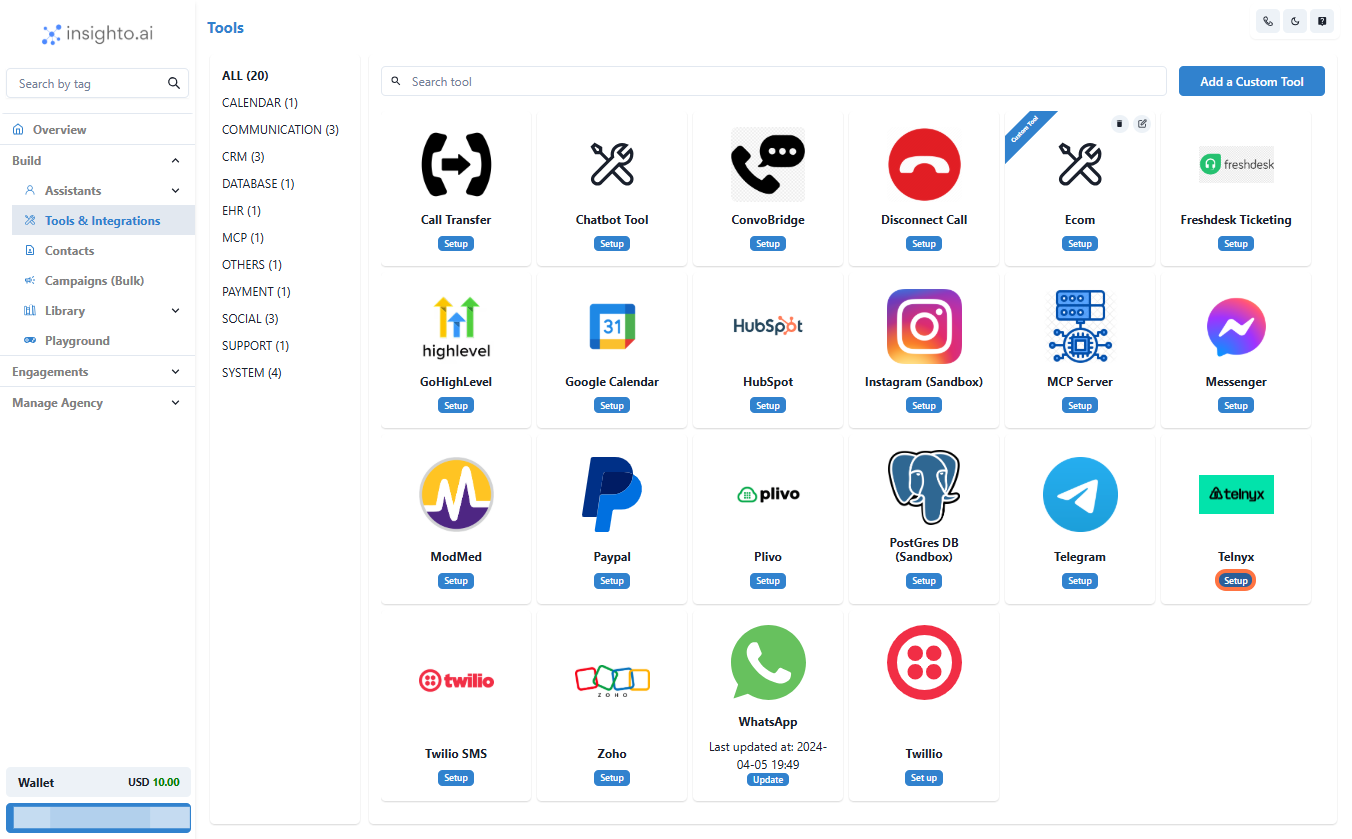
##  6. Click on Telnyx Setup
* Select **Telnyx Setup** from the list.
##
6. Click on Telnyx Setup
* Select **Telnyx Setup** from the list.
##  7. Click on Start New
* Click on **Create New**.
##
7. Click on Start New
* Click on **Create New**.
##  8. Enter Details and Create
* Enter a **Name** and **API Key**.
* Click on **Create**.
##
8. Enter Details and Create
* Enter a **Name** and **API Key**.
* Click on **Create**.
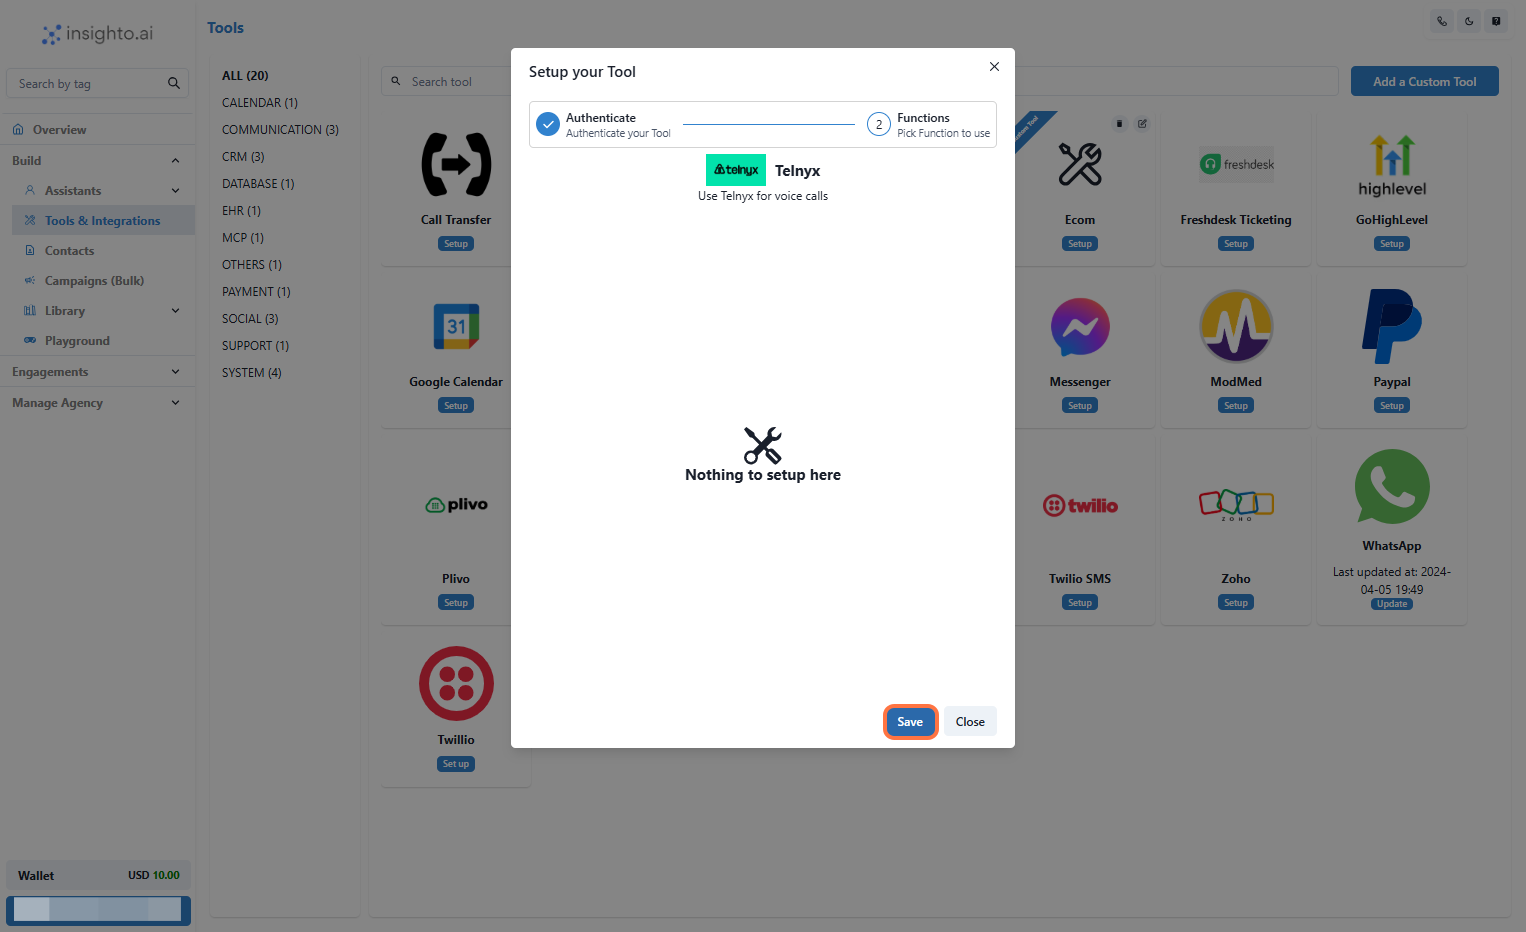
##  9. Save
* Click on **Save** to confirm integration.
##
9. Save
* Click on **Save** to confirm integration.
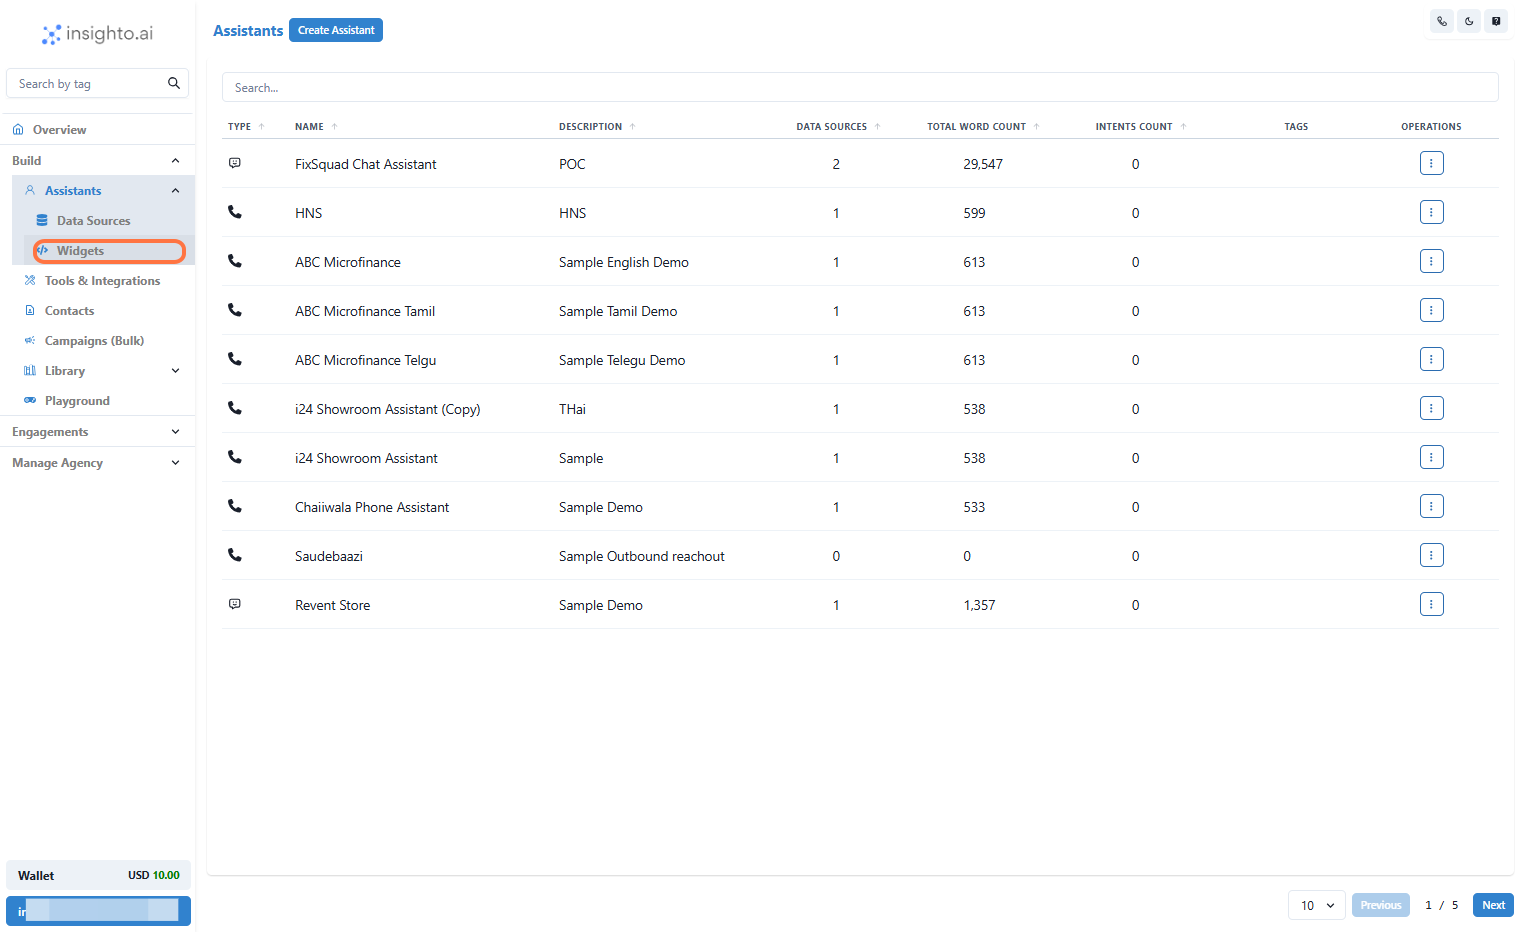
##  10. Go to Widgets
* Click on **Widgets**.
##
10. Go to Widgets
* Click on **Widgets**.
##  11. Create Widget
* Click on **Create Widget**.
##
11. Create Widget
* Click on **Create Widget**.
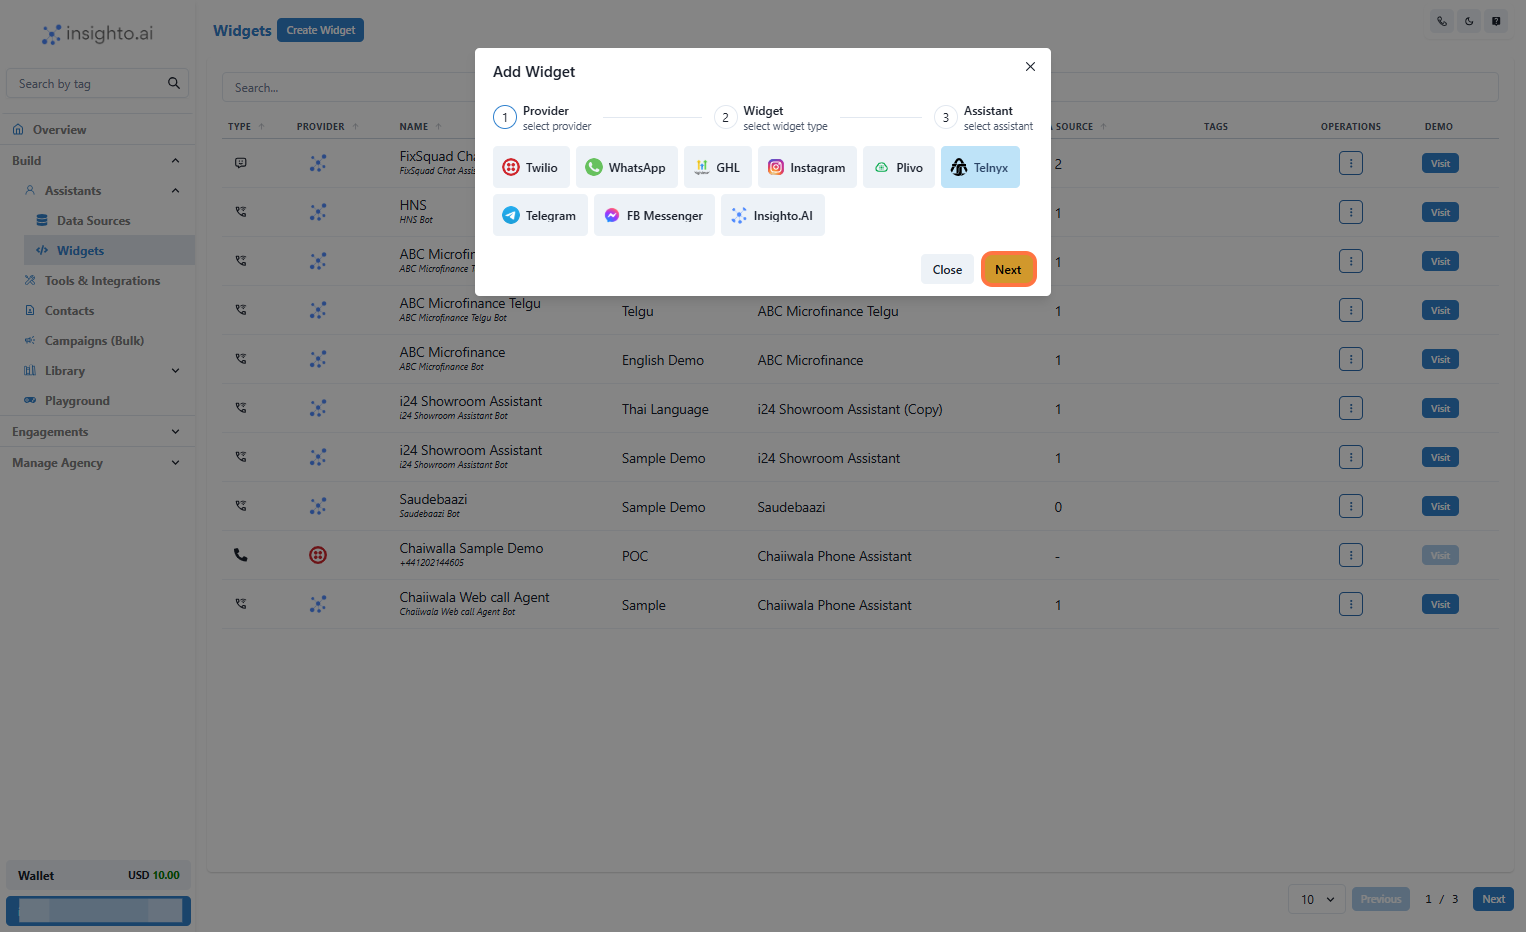
## 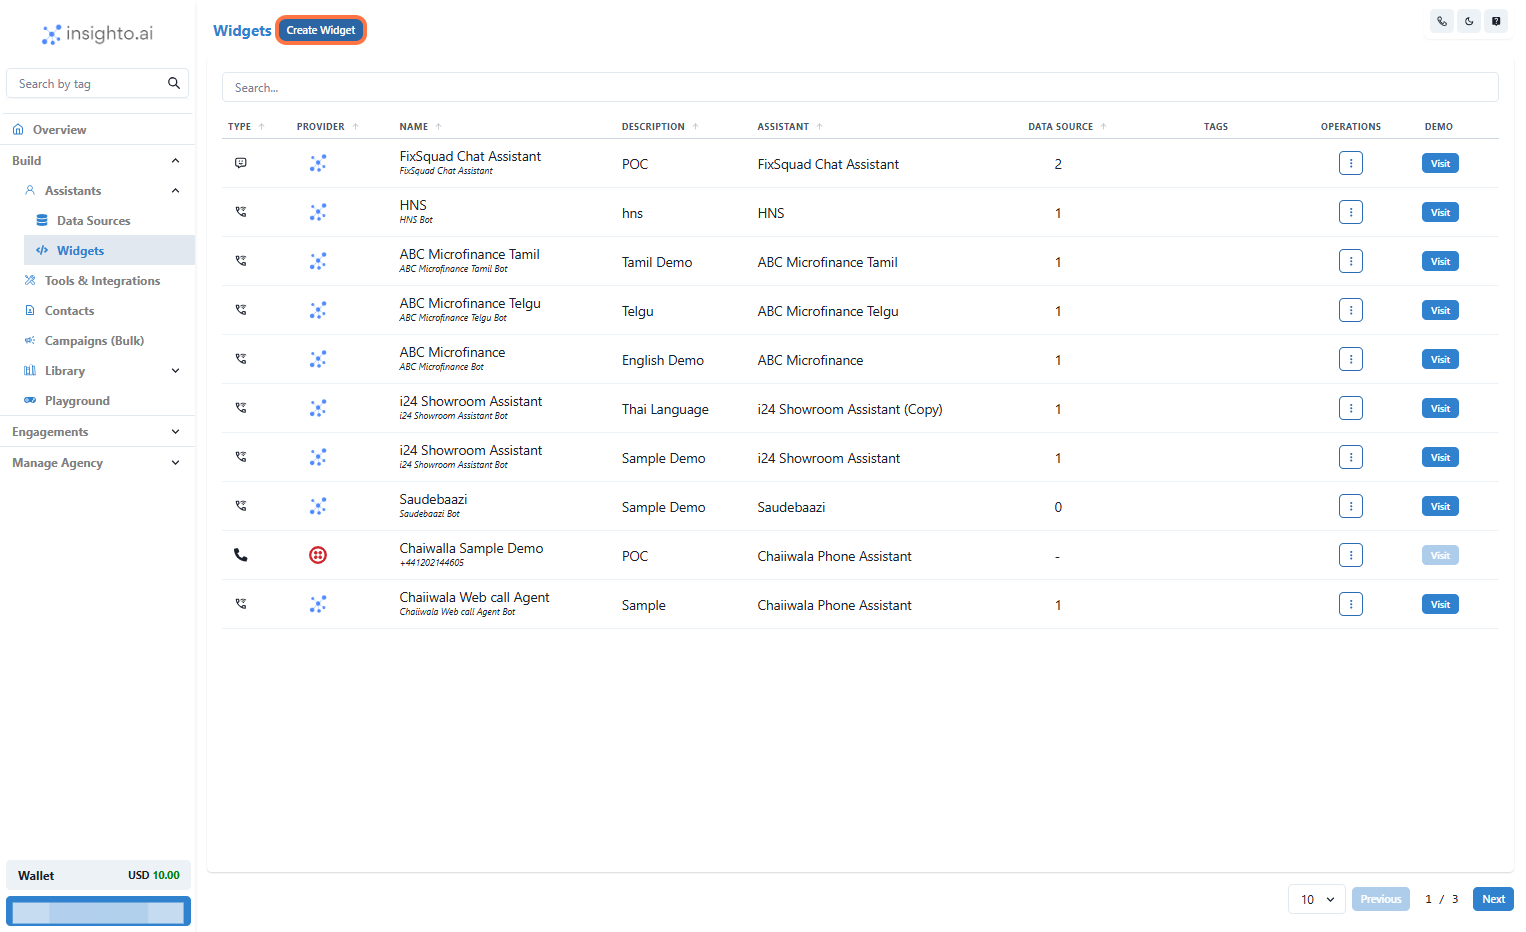 12. Select Provider Type
* Choose your **Provider Type**.
##
12. Select Provider Type
* Choose your **Provider Type**.
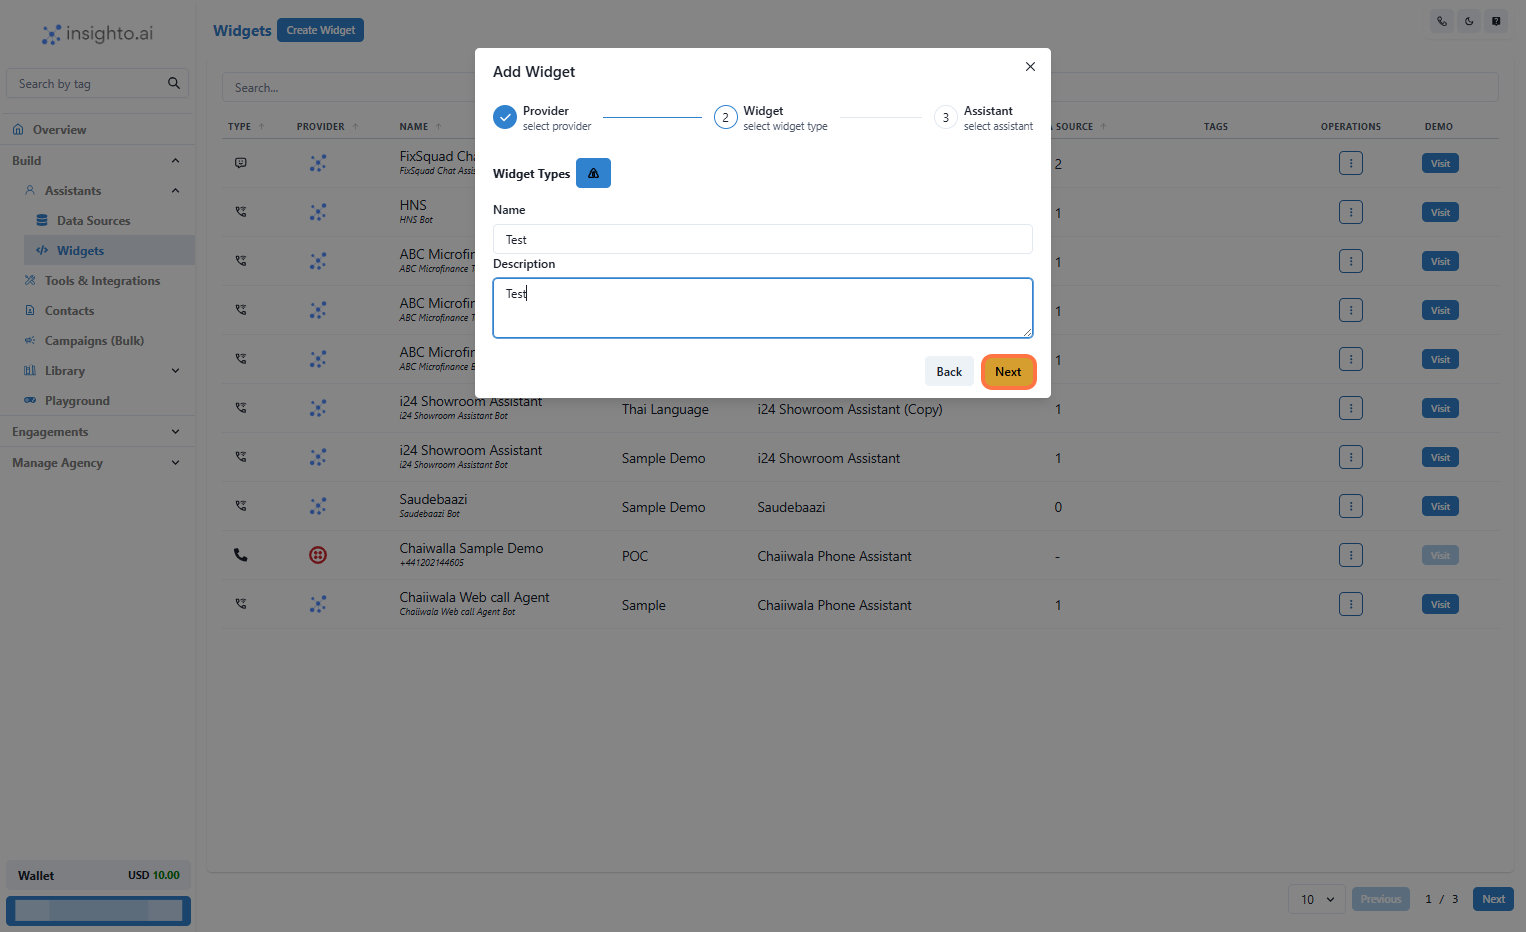
##  13. Select Widget Type
* Choose the **Widget Type**.
* Provide **Name** and **Description**.
* Click on **Next**.
##
13. Select Widget Type
* Choose the **Widget Type**.
* Provide **Name** and **Description**.
* Click on **Next**.
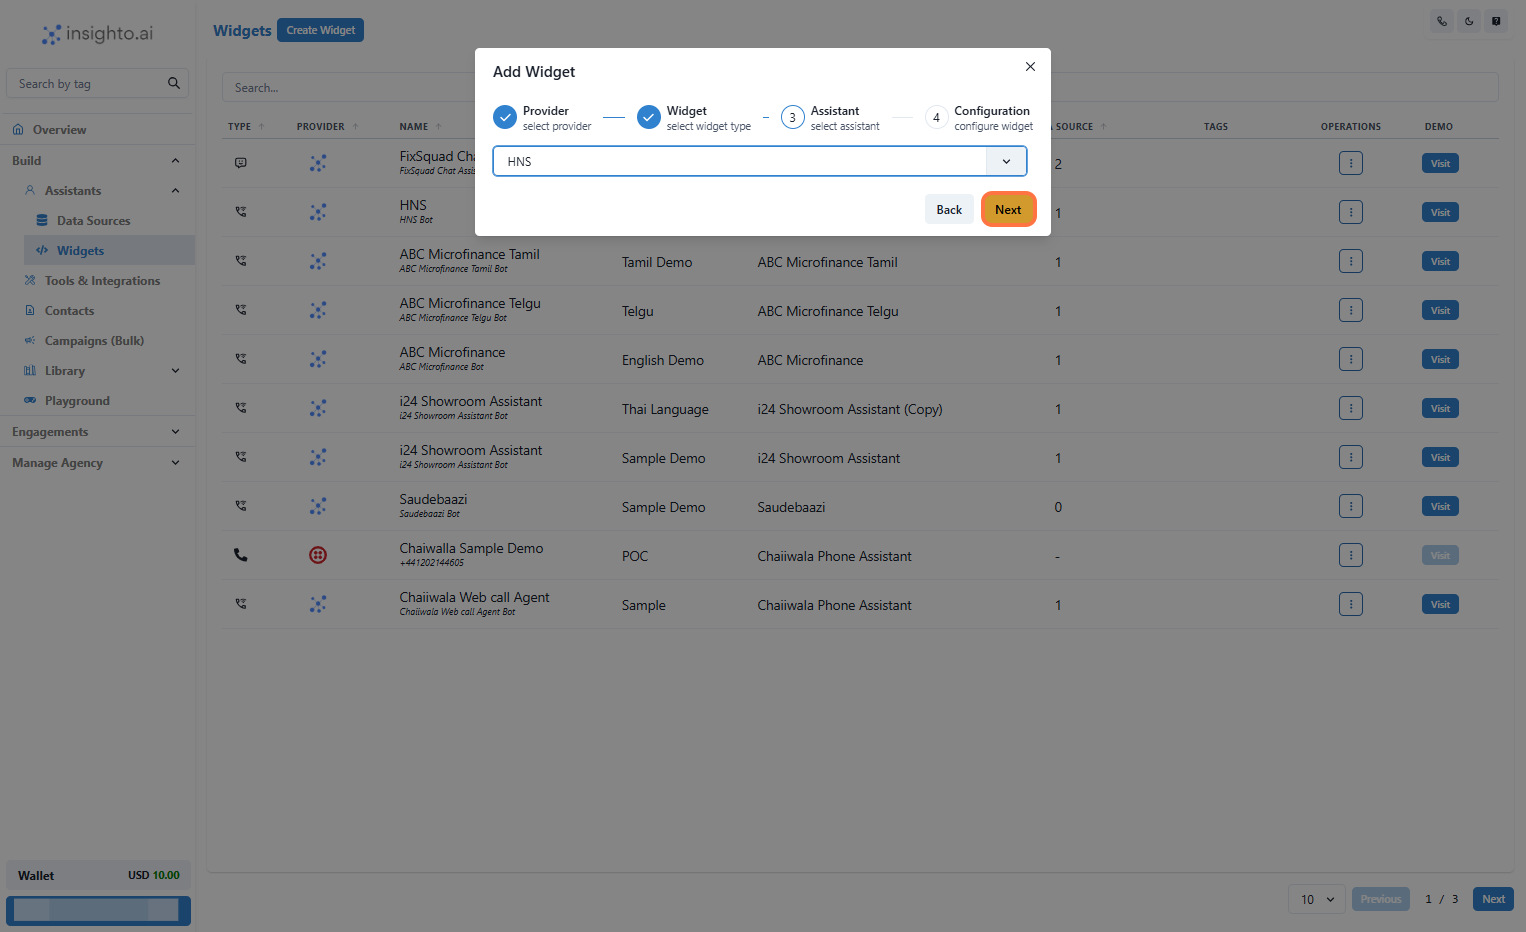
##  14. Select the Assistant
* Choose your AI **Assistant** from the dropdown and proceed.
##
14. Select the Assistant
* Choose your AI **Assistant** from the dropdown and proceed.
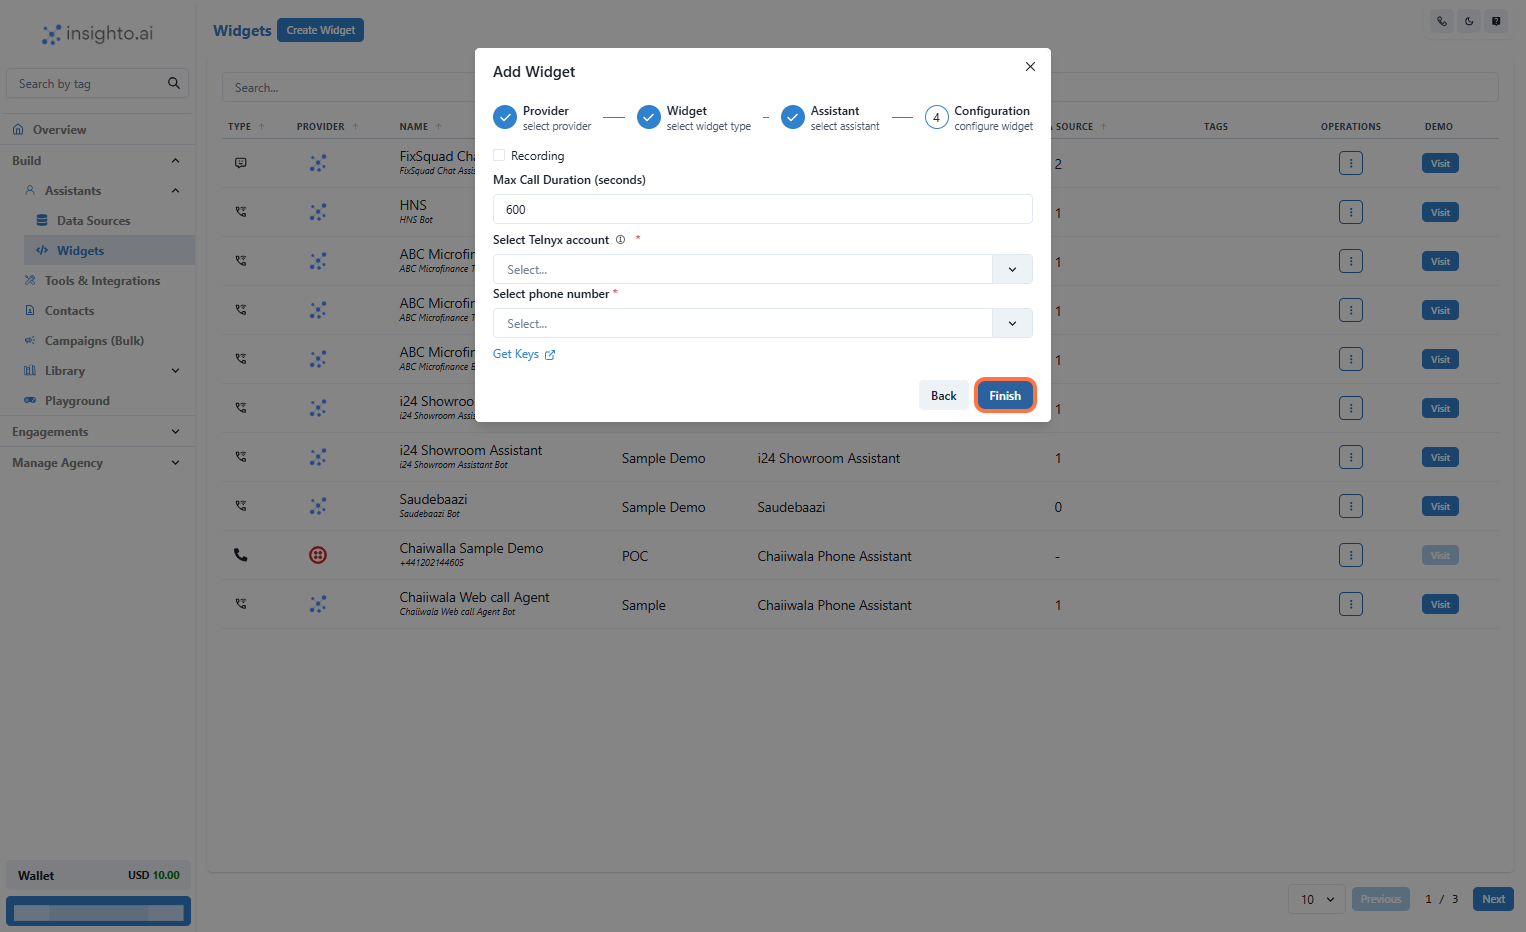
##  15. Configure Telnyx Widget
Configure the behavior of your Telnyx-powered voice assistant:
* Enable **Call Recording** (optional) – recordings available in Telnyx dashboard.
* Set **Maximum Call Duration** (e.g., 300 seconds for 5 minutes).
* Select your **Telnyx Account** from the dropdown.
* Choose a **Phone Number** associated with the account.
Once done, click **Finish** to complete deployment.
##
15. Configure Telnyx Widget
Configure the behavior of your Telnyx-powered voice assistant:
* Enable **Call Recording** (optional) – recordings available in Telnyx dashboard.
* Set **Maximum Call Duration** (e.g., 300 seconds for 5 minutes).
* Select your **Telnyx Account** from the dropdown.
* Choose a **Phone Number** associated with the account.
Once done, click **Finish** to complete deployment.
##  16. Test Your Voice Assistant
* Call the Telnyx number you just configured.
* Ensure the conversation flows correctly based on your prompt and voice settings.
16. Test Your Voice Assistant
* Call the Telnyx number you just configured.
* Ensure the conversation flows correctly based on your prompt and voice settings.