Learn how to create and manage billing plans using Stripe integration in Insighto. With Stripe integrated, you can now set up billing plans for your clients. Insighto.ai allows you to create three types of plans: Regular, Add-ons, and Hidden.Documentation Index
Fetch the complete documentation index at: https://docs.insighto.ai/llms.txt
Use this file to discover all available pages before exploring further.
Regular Plans
These are standard billing plans your users subscribe to and are charged monthly. The first plan you create will automatically be set as the default and will be free.Add-ons
Add-on plans can be bought on top of regular plans to meet extended needs. You can create special add-ons such as storage add-ons or Voice credit Add-ons Queries Add.Hidden Plans
These are still under development and are yet to be decided.1. Click on Add
Click on Add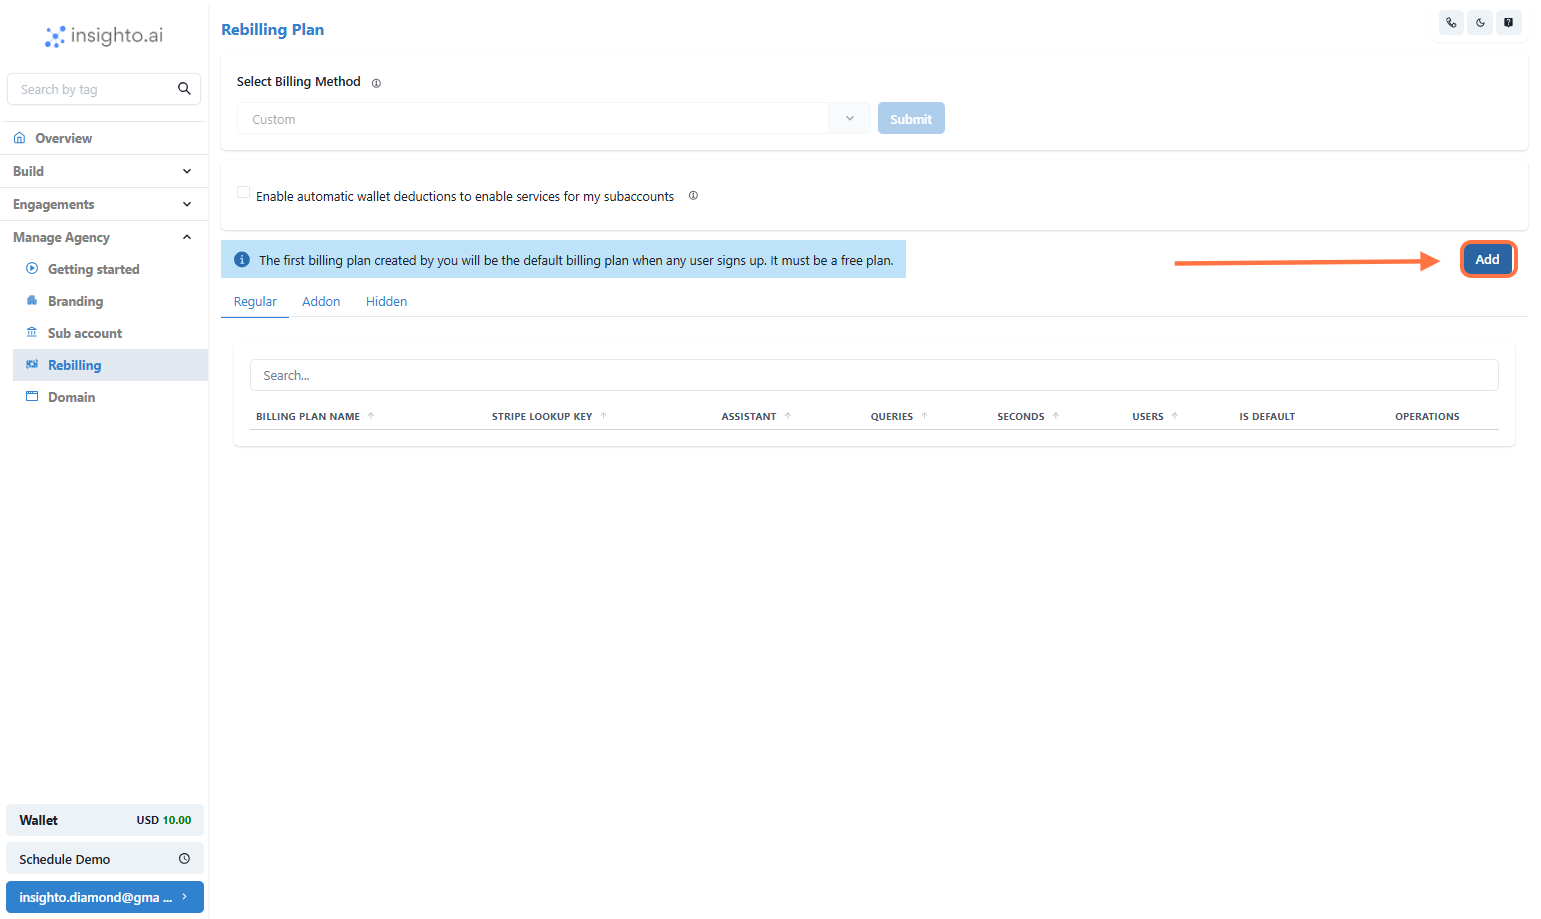
2. Fill in Plan Details
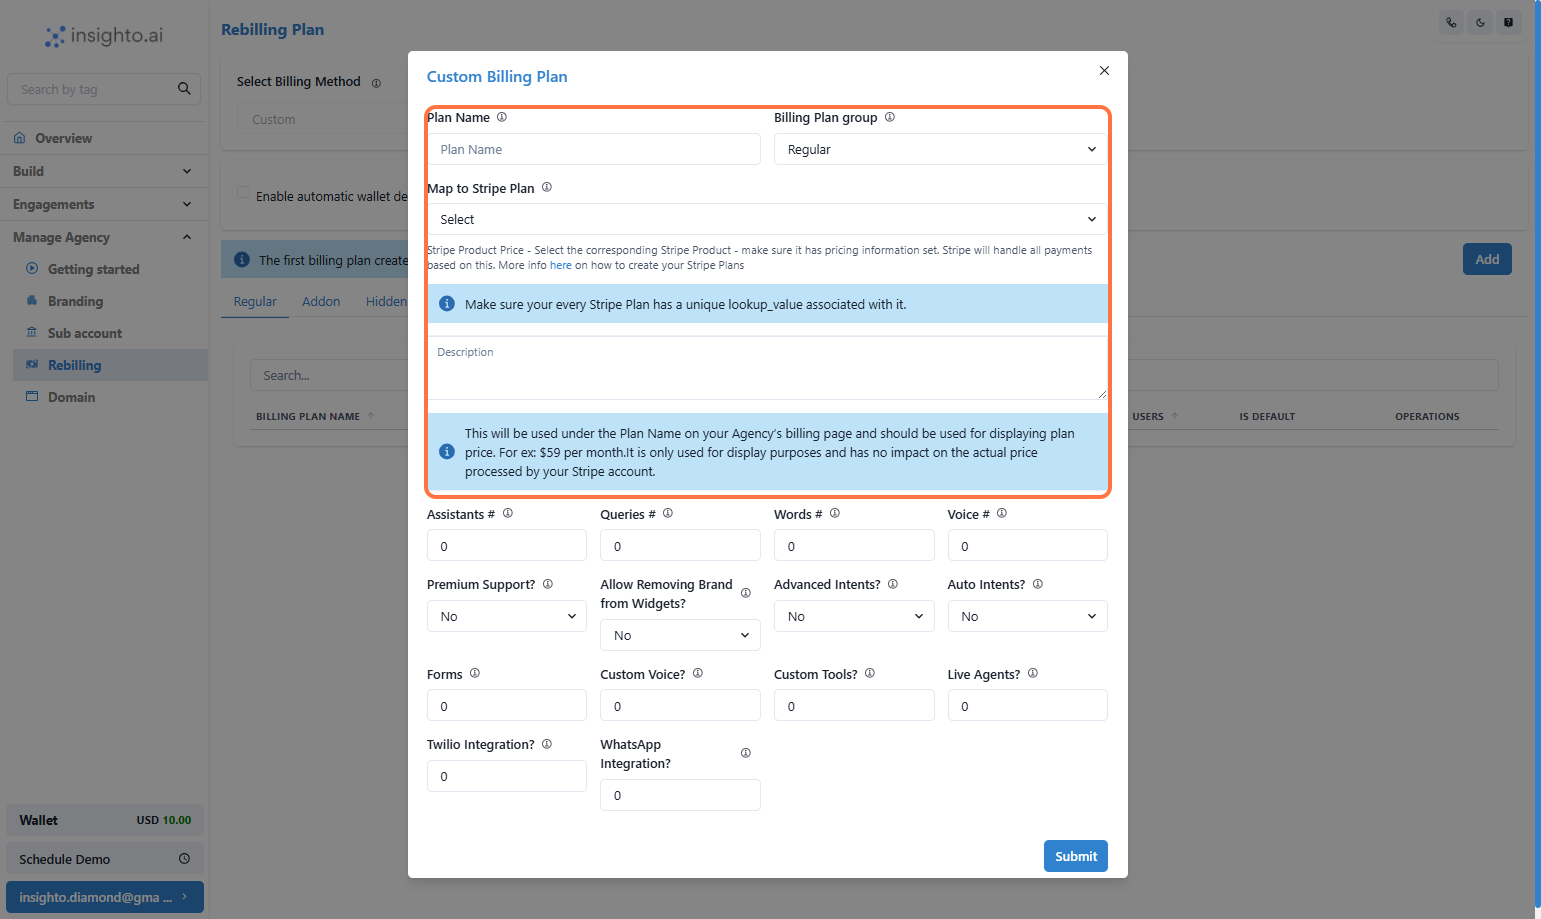
- Plan Name: Enter a clear and customer-facing name for the plan (e.g., Starter Plan, Premium Add-on).
- Plan Type: Choose from the dropdown:
- Regular – A standard subscription plan.
- Add-on – An optional upgrade or additional feature.
- Hidden – A plan not visible to users but can be assigned manually.
- Stripe Mapping: Select the corresponding product and price you’ve set up in Stripe using the dropdown.
- Description: Provide a brief overview of what the plan includes and who it’s for.
💡 Make sure the plan name and Stripe mapping match what you configured earlier for consistency and accurate billing.
3. Set Usage Limits for the Plan

- Assistants #: Maximum number of assistants a user can create within this plan.
- Queries #: Number of chat assistant credits included.
- Words #: Total word count allowed in the user’s knowledge base (documents, FAQs, etc.).
- Voice #: Number of voice assistant credits included.
Note on Credit Consumption Variability
The default credit mapping assumes use of a regular LLM and standard voice provider:- 1 credit = 1 chat query
- 1 credit = 1 second of voice usage
- 2.5 credits = 1 second of voice usage
📌 It’s important to inform your customers that choosing advanced models or providers will reduce total available usage within their credit limits.
4. Select Feature Access for the Plan
Use the dropdown options to control which premium features are included in this plan. Choose Yes or No for each:-
Premium Support?
Grants users access to priority support channels and faster response times. -
Allow Removing Brand from Widgets?
Allows users to remove or replace Insighto branding from chat and voice widgets—ideal for white-label use. -
Advanced Intents?
Lets users create and manage their own custom intents, giving them full control over conversation design. -
Auto Intents?
Gives users access to predefined, auto-generated intents available within Insighto—helpful for fast setup without custom configuration.
💡 Use these settings to tailor feature access per plan tier. Advanced tools like custom intents may be ideal for higher-tier plans.

5. Enable or Restrict Specific Features
In this step, you can allow or restrict access to advanced features by setting each field to either:- 1 = Enabled (feature will be accessible to users in this plan)
- 0 = Disabled (feature will not be available in this plan)
- Forms: Allows users to create and use forms
- Custom Voice: Enables users to upload and use their own voice.
- Custom Tools: Gives users the ability to integrate their own APIs or functions as tools within assistants.
- Live Agents: Allows handover to human support agents via a live chat interface.
- Twilio Integration: Grants access to integrate with Twilio for phone call capabilities.
- WhatsApp Integration: Enables communication through WhatsApp using supported integration.
🔒 Setting a value of 0 disables the feature completely for users in this billing plan.

6. Click on Submit
Click on Submit🎉 Congratulations!
You’ve successfully created your first billing plan on Insighto!
Now you can continue creating the rest of your plans to fully prepare your agency for launch and start offering tailored packages to your clients.

What’s Next After Creating Billing Plans?
7. Set a Plan as Default
You can mark any plan as the default plan. This plan will be automatically assigned to new users or subaccounts if no specific plan is selected. How to set as default:Click on the “Set as Default” button next to the plan you want to mark. A checkmark will appear indicating it’s now the default.

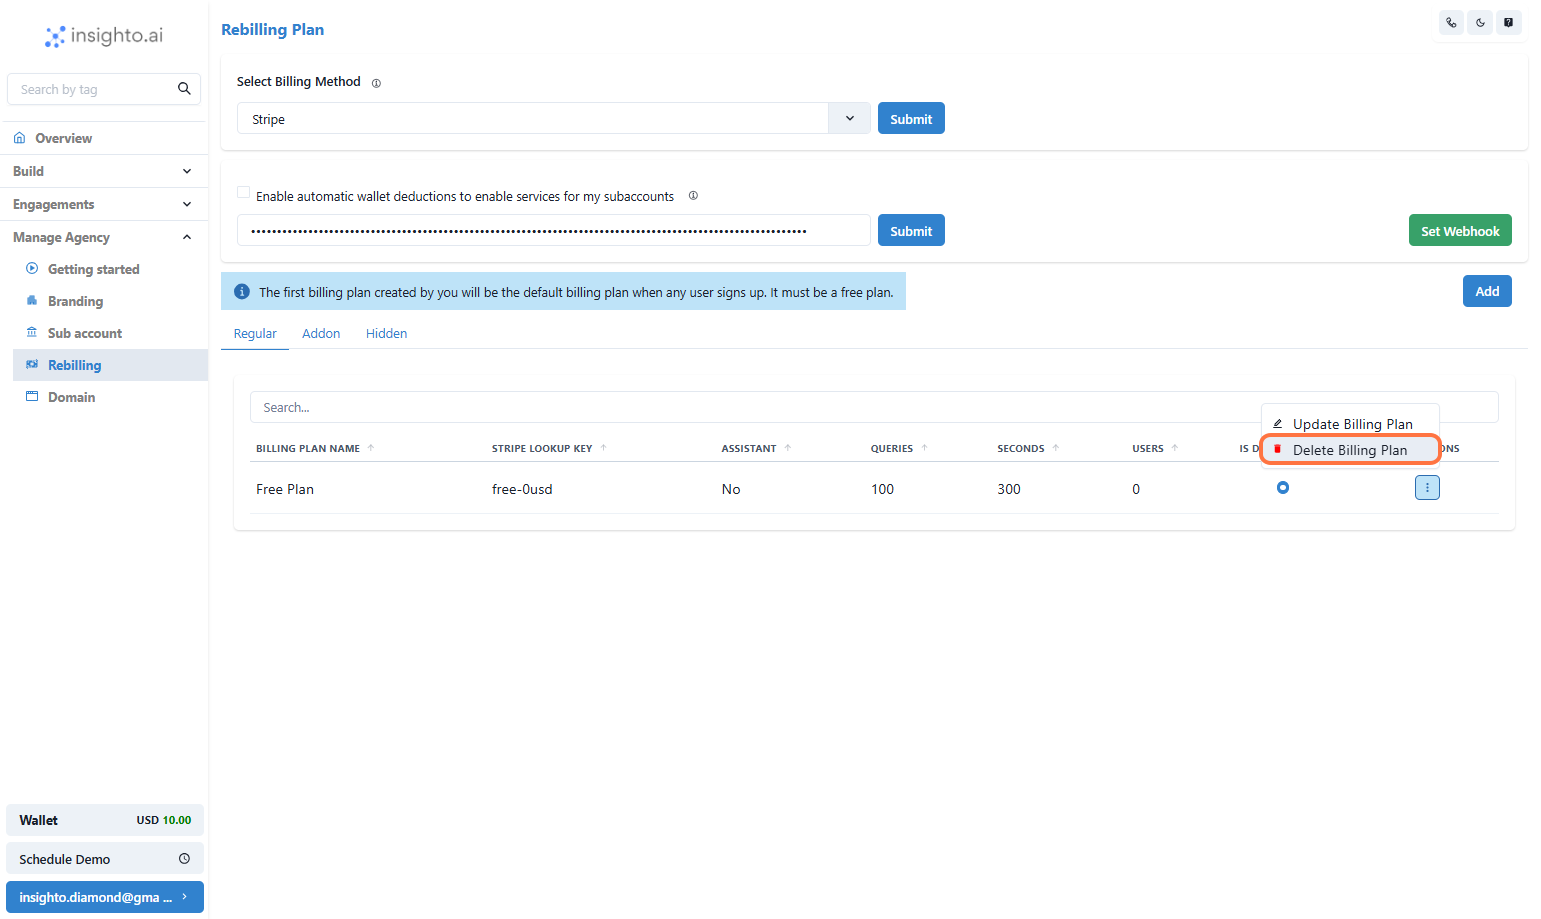
8. Click on Options
Click on Options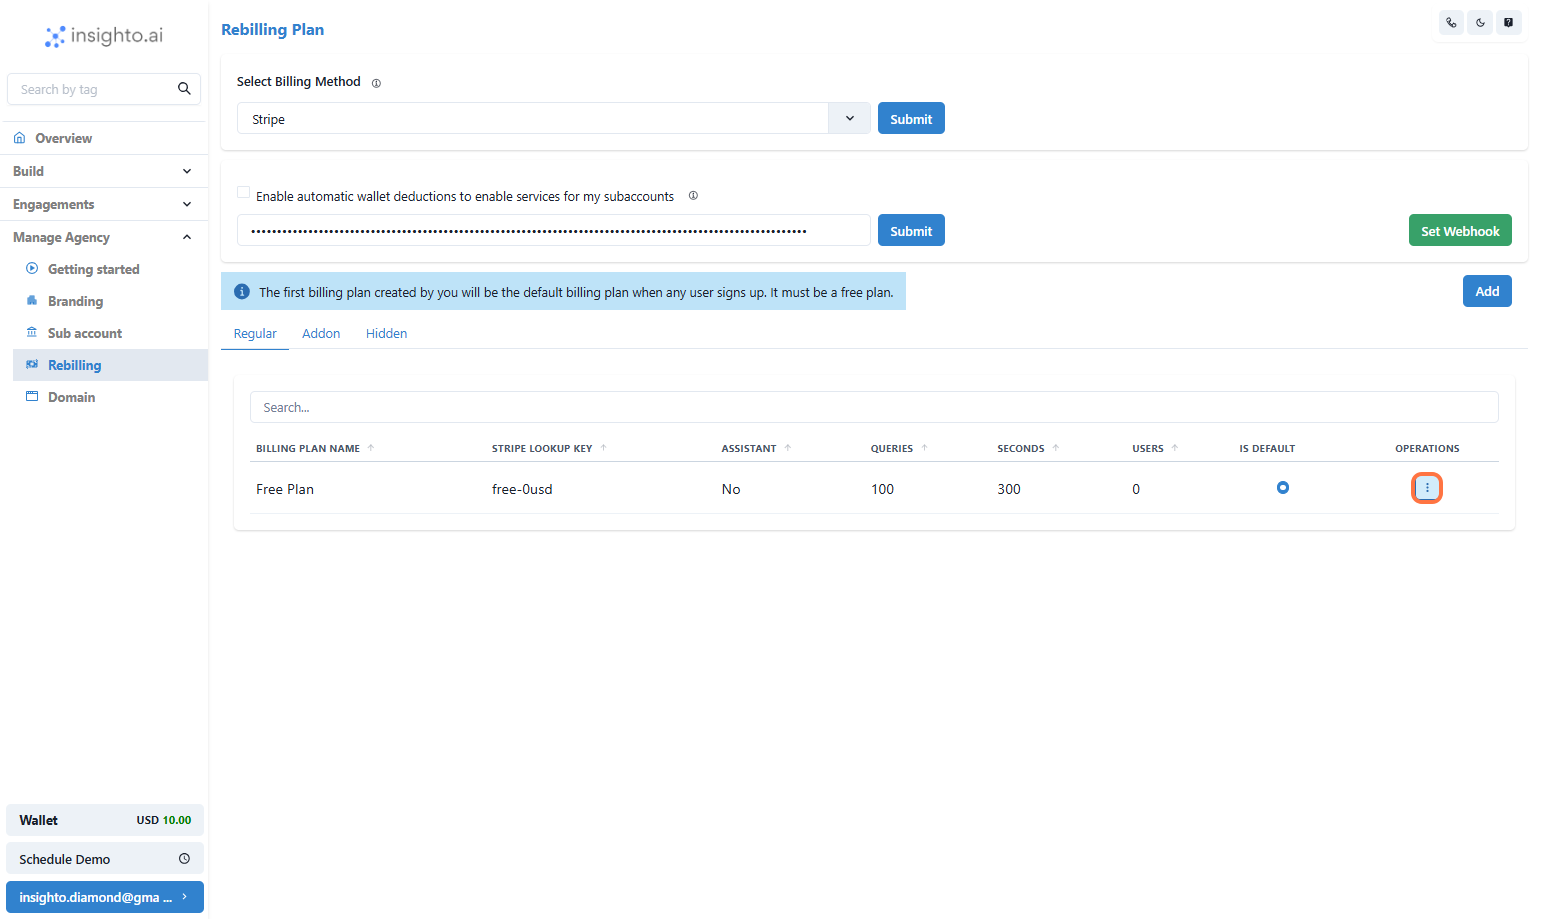
9. Update a Billing Plan
You can edit any existing billing plan to update pricing, features, limits, or Stripe mapping. How to update:Click on the “Edit” icon next to the plan. Make your changes and hit Save to apply.
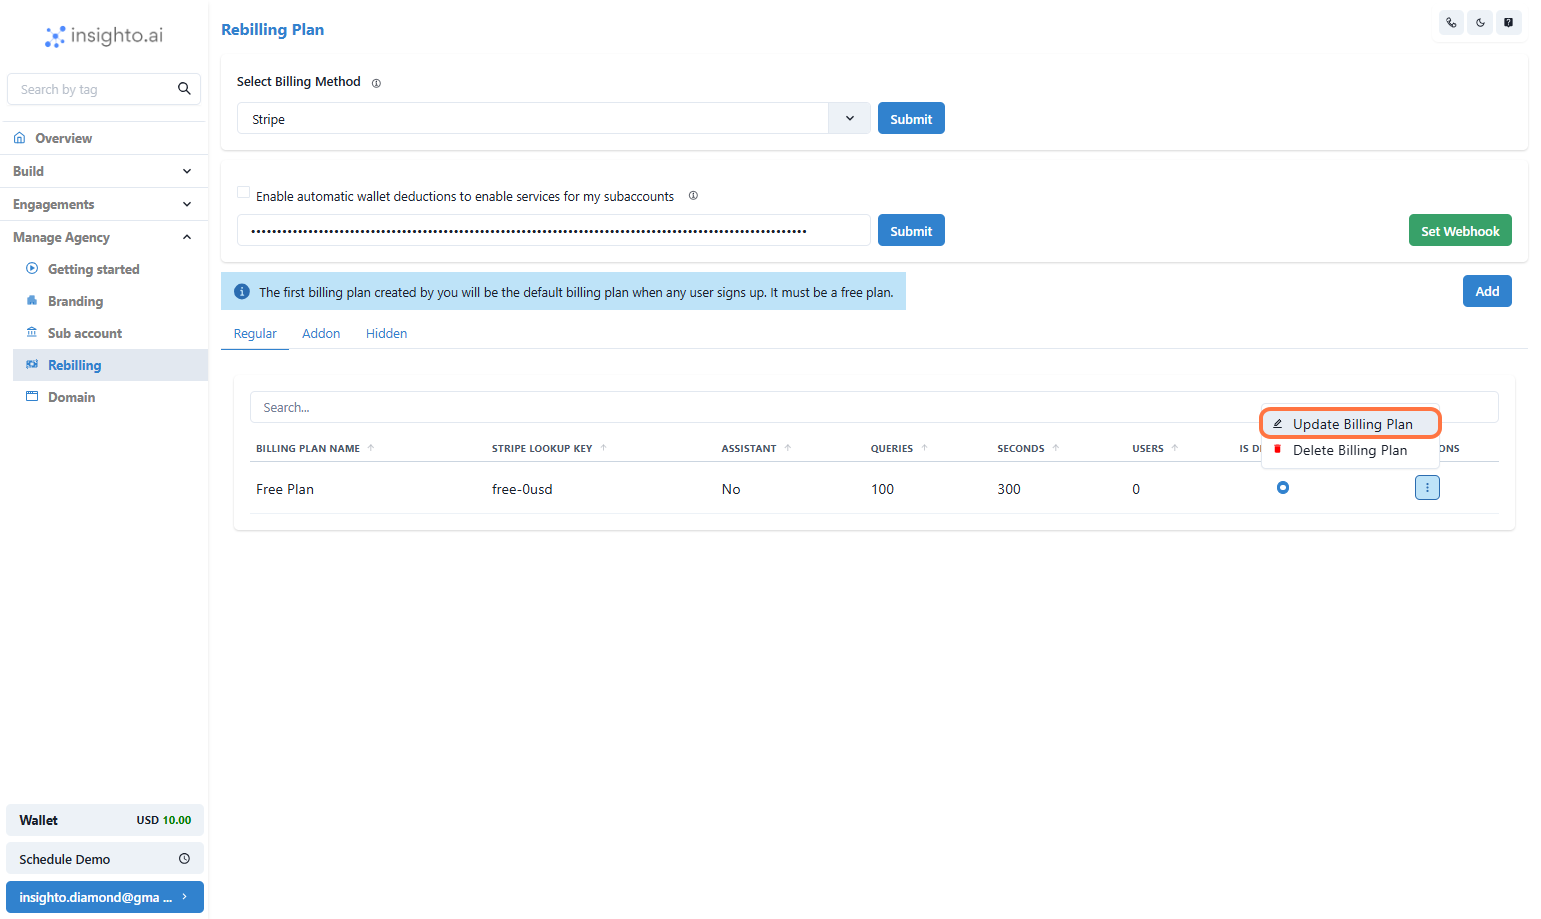
10. Delete a Billing Plan
If a plan is no longer needed, you can delete it.Note:How to delete:
Plans currently assigned to users cannot be deleted unless reassigned.
Click the “Delete” icon next to the plan and confirm your action.